Up and running with Prismic
Looking for a powerful yet flexible headless CMS? In our latest blog, we dive into Prismic, how to set it up with Next.js, and leverage Slice Machine for dynamic, reusable content components. 🌐 From creating pages to managing multilingual content, we cover it all with a step-by-step guide!


Prismic is a cloud-based headless Content Management System (CMS) that allows businesses to efficiently manage their online content. It is designed to be user-friendly, making it accessible to both developers and content creators.
Slice Machine: Prismic uses a unique tool that allows you to create reusable components, called slices, for your website. This makes it faster to build and update pages with minimal coding. Similar to a storybook, a slice can be developed and previewed in isolation with mock data before being used as a building block in pages.
In this tutorial, we will make a simple Flower catalogue in two languages. The basic features of this site:
- Header
- Footer
- Menu
- NextJS
- Tailwind CSS
Pages:
- Homepage with hero
- Flower Details page
- About Page
Slices:
- Homepage Hero
- Flower Card
- Flower Details
- Flower Post
By the end of this tutorial, you'll see how powerful and easy it is to develop and maintain a website built with Prismic.
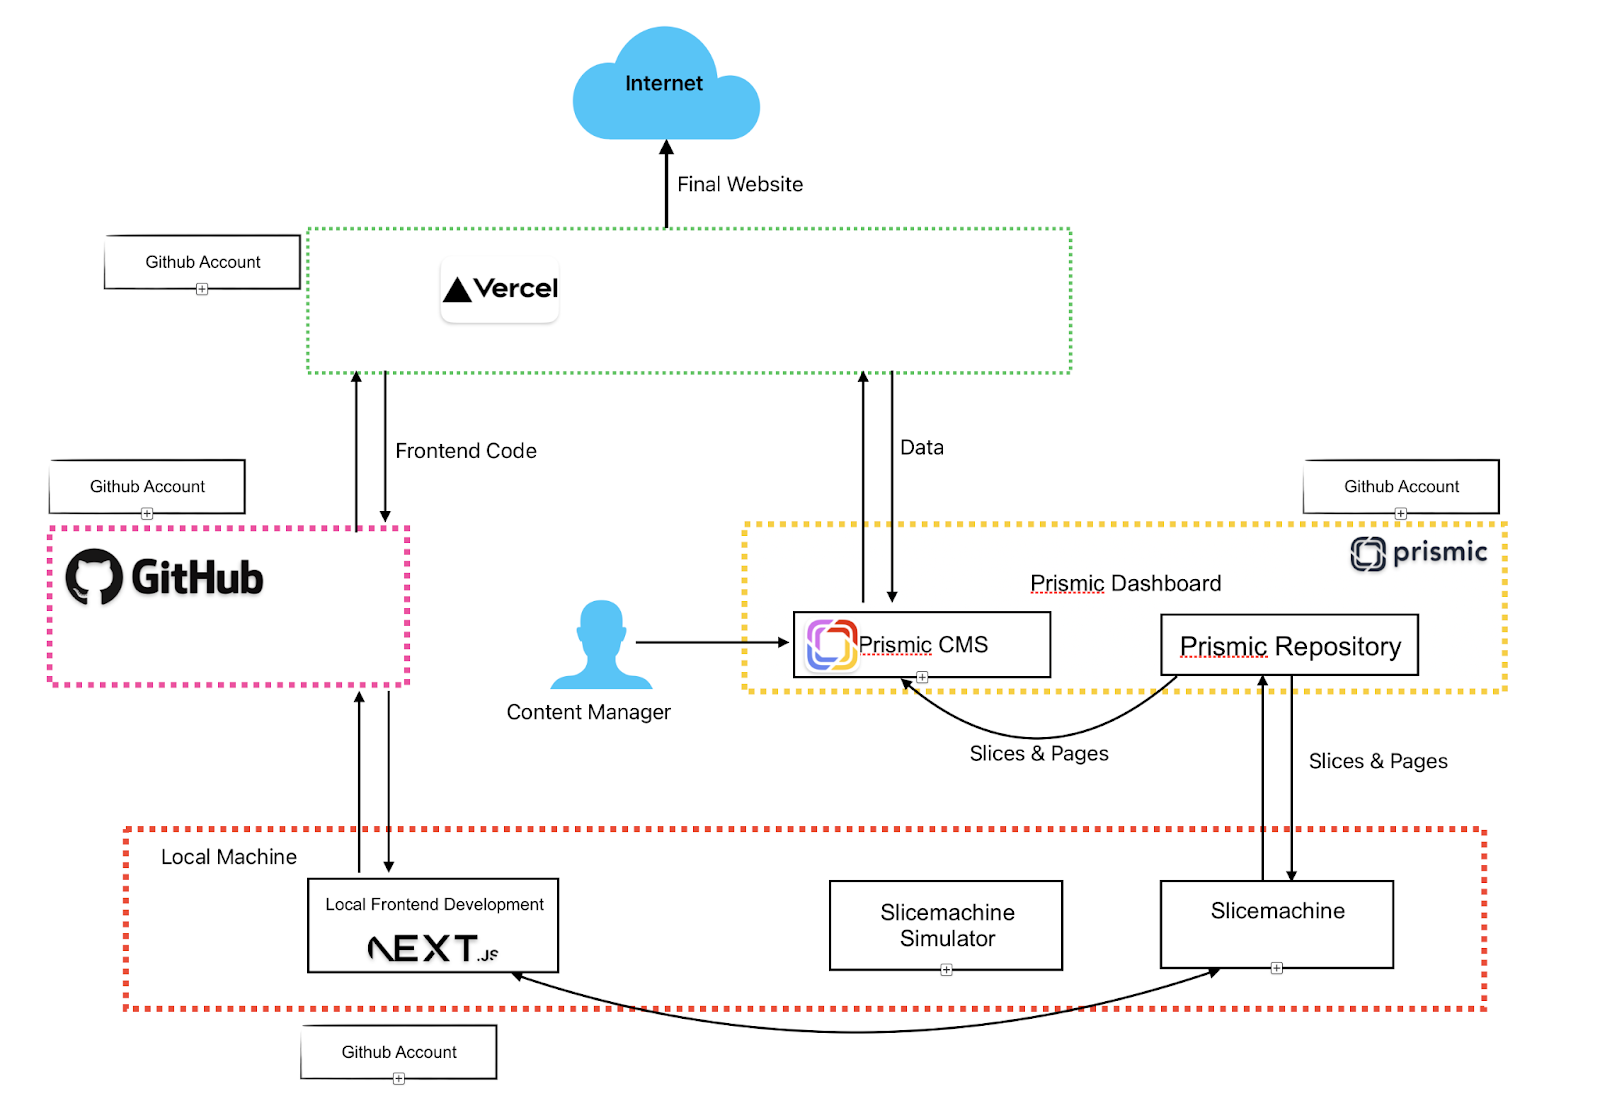
Understanding the different entities involved
The learning curve of Prismic development is pretty steep. It’s important to understand the different components involved in the development process otherwise nothing will make sense.
- Github Account
- Prismic Dashboard
- Prismic Repository
- Prismic CMS Dashboard
- Local Development Environment
- Frontend
- Slice Machine
- Slice Machine Simulator
- Github Account
Why?
- All the following components are connected to each other via github login only.
- The Frontend code (in our case NextJS) will be stored in Github.
- Prismic Dashboard
This is the dashboard provided by Prismic for managing Prismic Repository and Prismic CMS:
- Prismic Repository
Prismic Repository will be created inside the Prismic Dashboard. Prismic repository will contain all the slices and pages which we will develop in our Slice Machine. The only thing we need to do here is create a repository, delete a repository and push changes.
- Prismic CMS Dashboard
By clicking on the name of the Prismic Repository in Prismic Dashboard, the user will land in Prismic CMS. From this CMS dashboard the user can create pages, use the slices created in the slice machine, put up content and publish them.
- Local Development Environment
- Frontend Code : The place where the entire frontend code will reside, in our case NextJS. Here we will style individual slices.
- Slice Machine: Using slice machine, we will create slices, model and page structure (Data Structure). We will create slices here and push to the Prismic repository via GUI itself.
- Slice Machine Simulator: The slices we will create, we can preview them here with mock data. The Simulator will also reflect the UI changes we will do in the local frontend code.
Initialize the Project
This step will set up the basic Next.js project, integrate Slice Machine (a tool provided by Prismic) into the Next.js project, and connect the project to the remote Prismic repository using your Git account.
At the Prismic End
1. Create an account in github.com
2. Create account in prismic.io with GitHub
3. Login into GitHub via cli
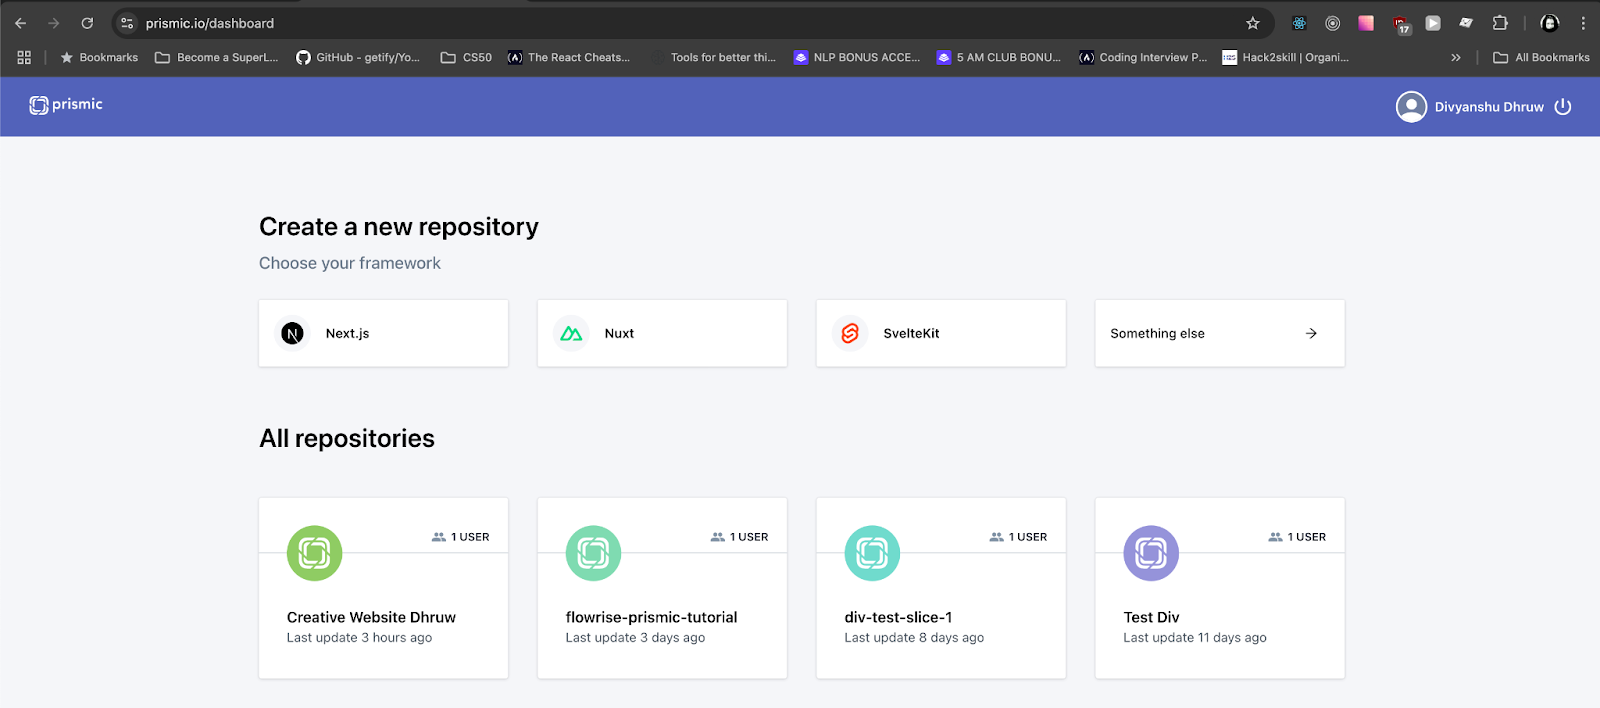
4. In Prismic Dashboard, create a new repository with your preferred Framework - Next / Nuxt or Sveltekit
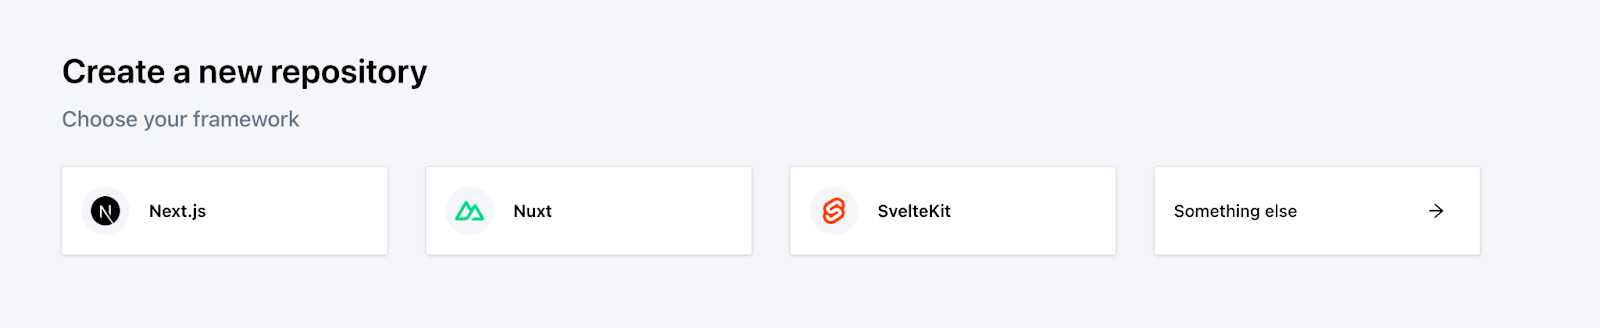
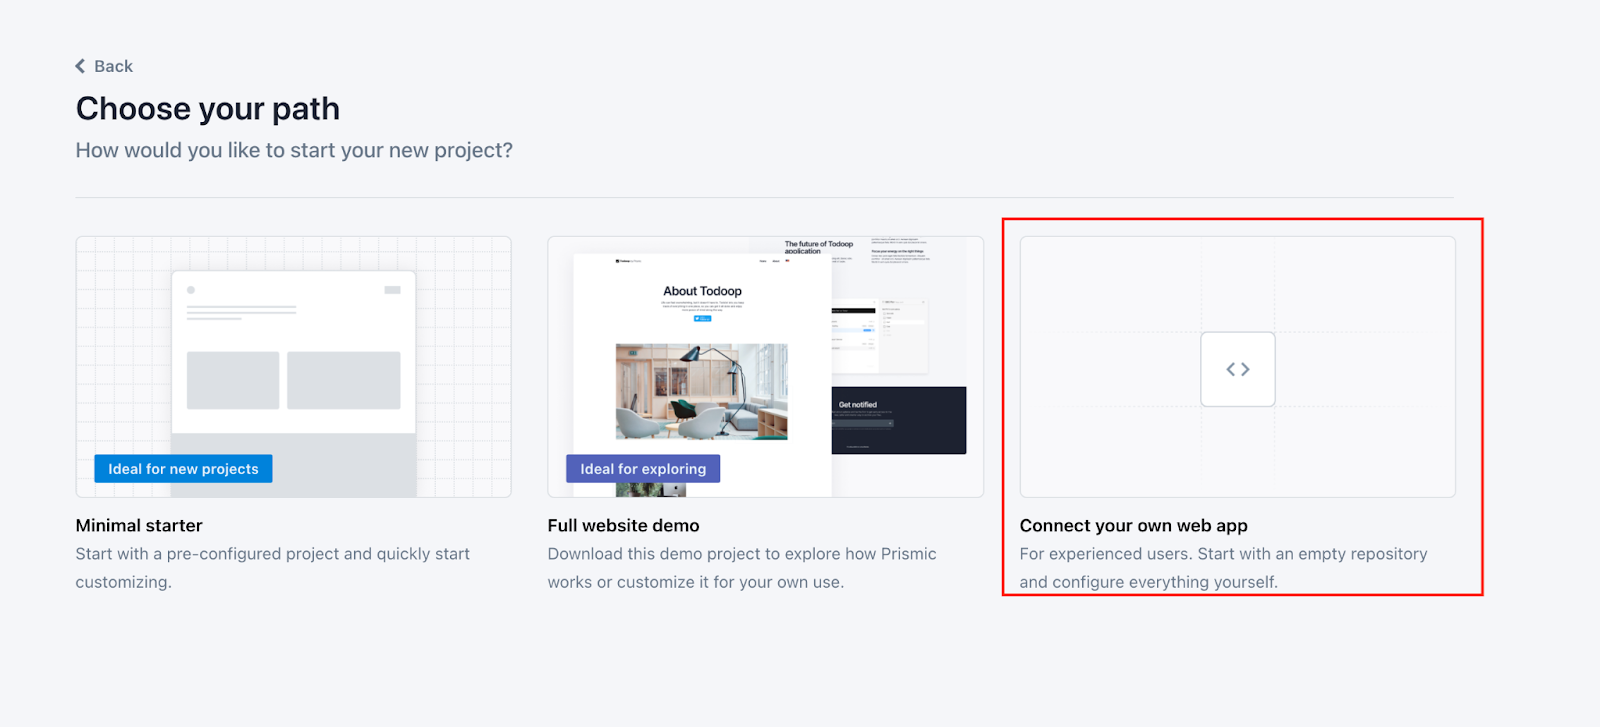
5. Select Next.js , Prismic will give you three options: Minimal Starter, Full Website Demo, Connect your own Web App . Choose Connect your own Web App.
6. Fill up the details of your new Repository and select the pricing plan.
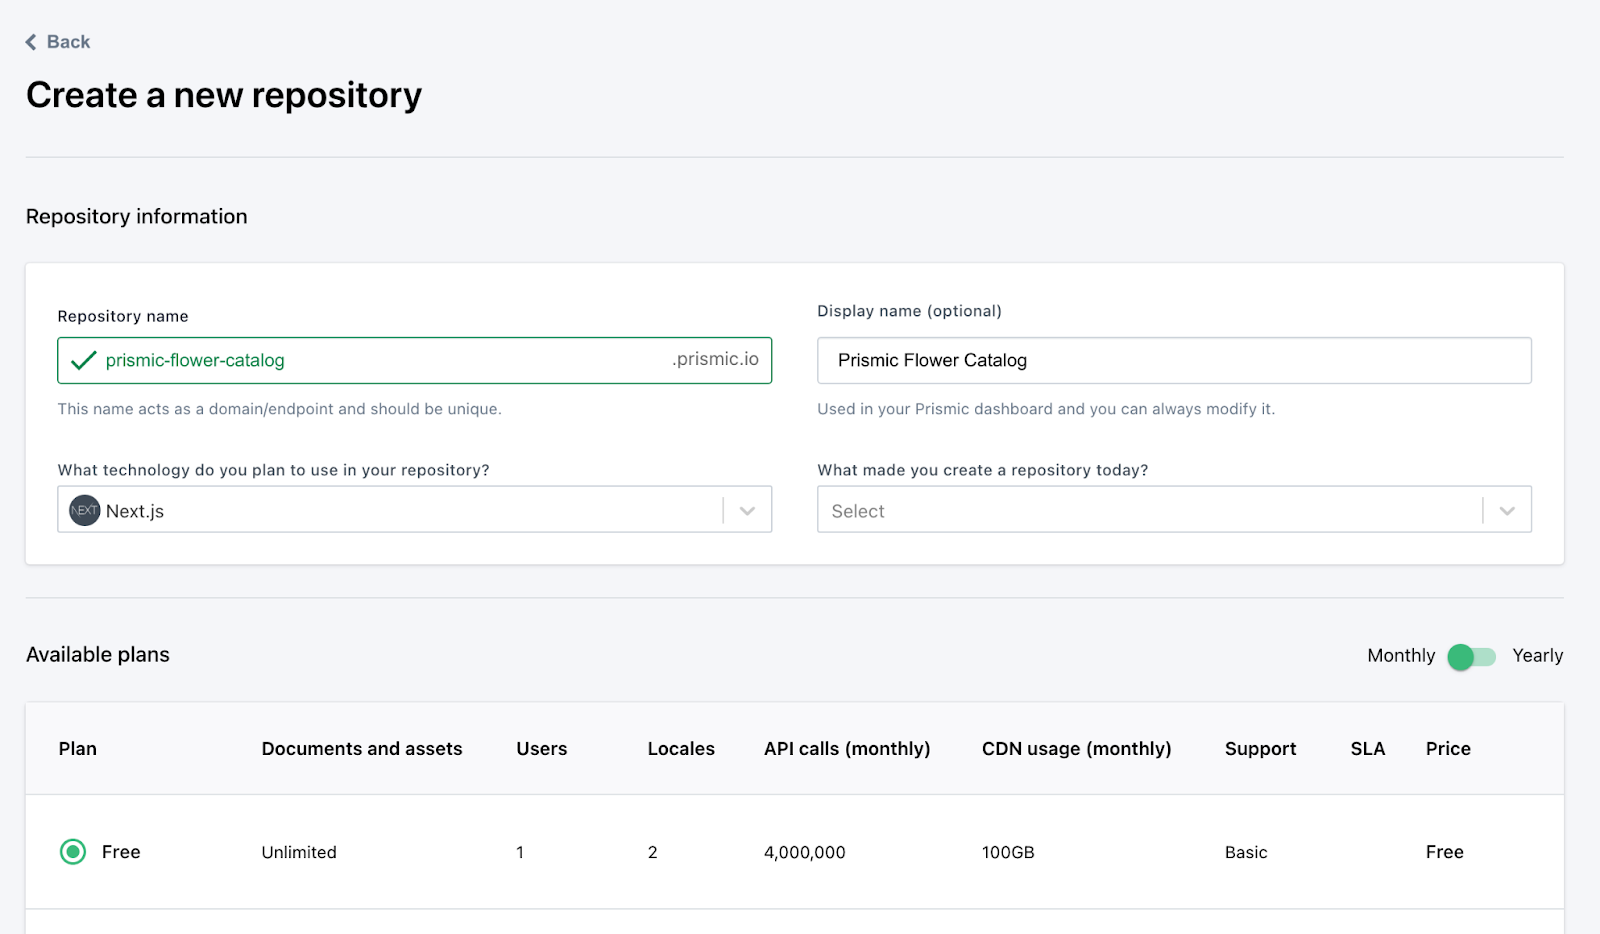
7. Clicking on Create Repository will create a Prismic repository for you, and then redirect to the Prismic CMS Dashboard connected to this repository. You will get a new URL to manage this dashboard.
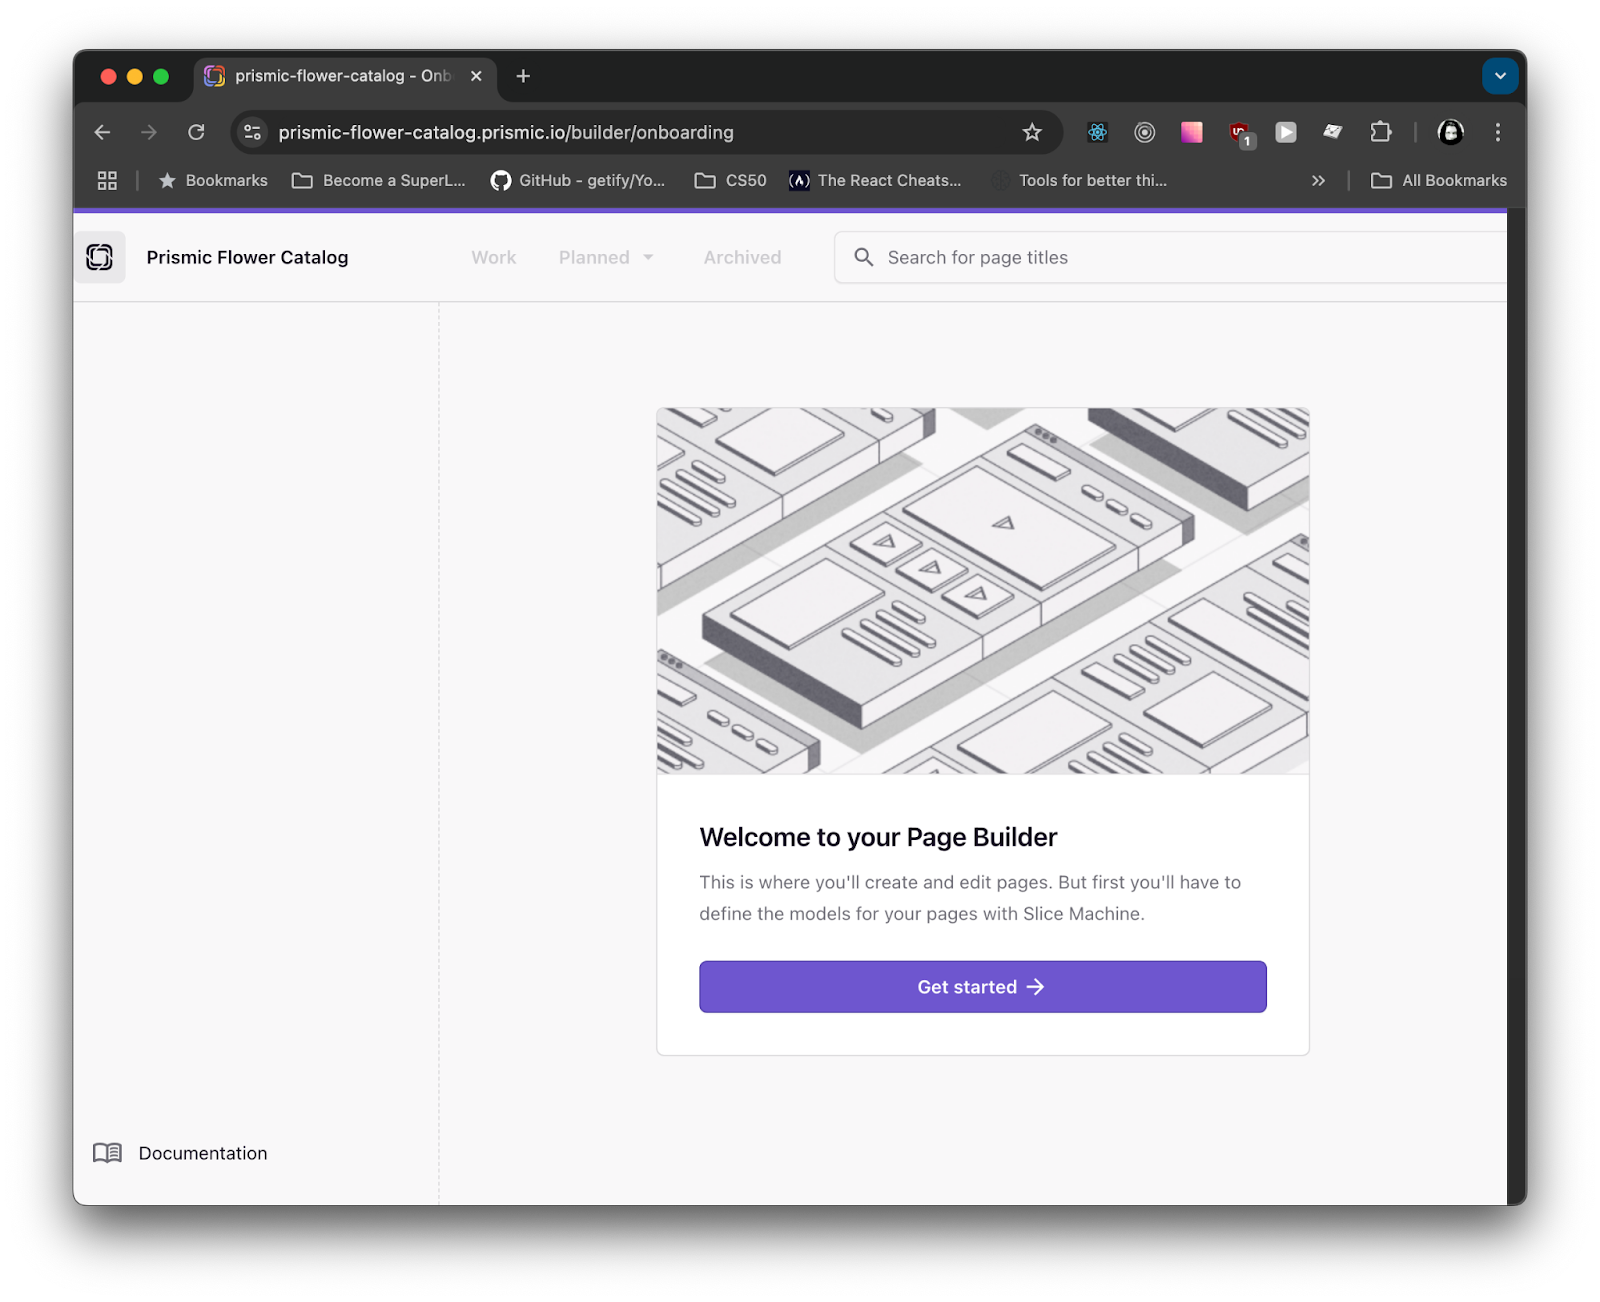
8. Click on Get started, it will ask for Language preference:

9. Since this is a newly built dashboard without any Slices, Pages and Custom Types, it will look like this:
In Local Machine
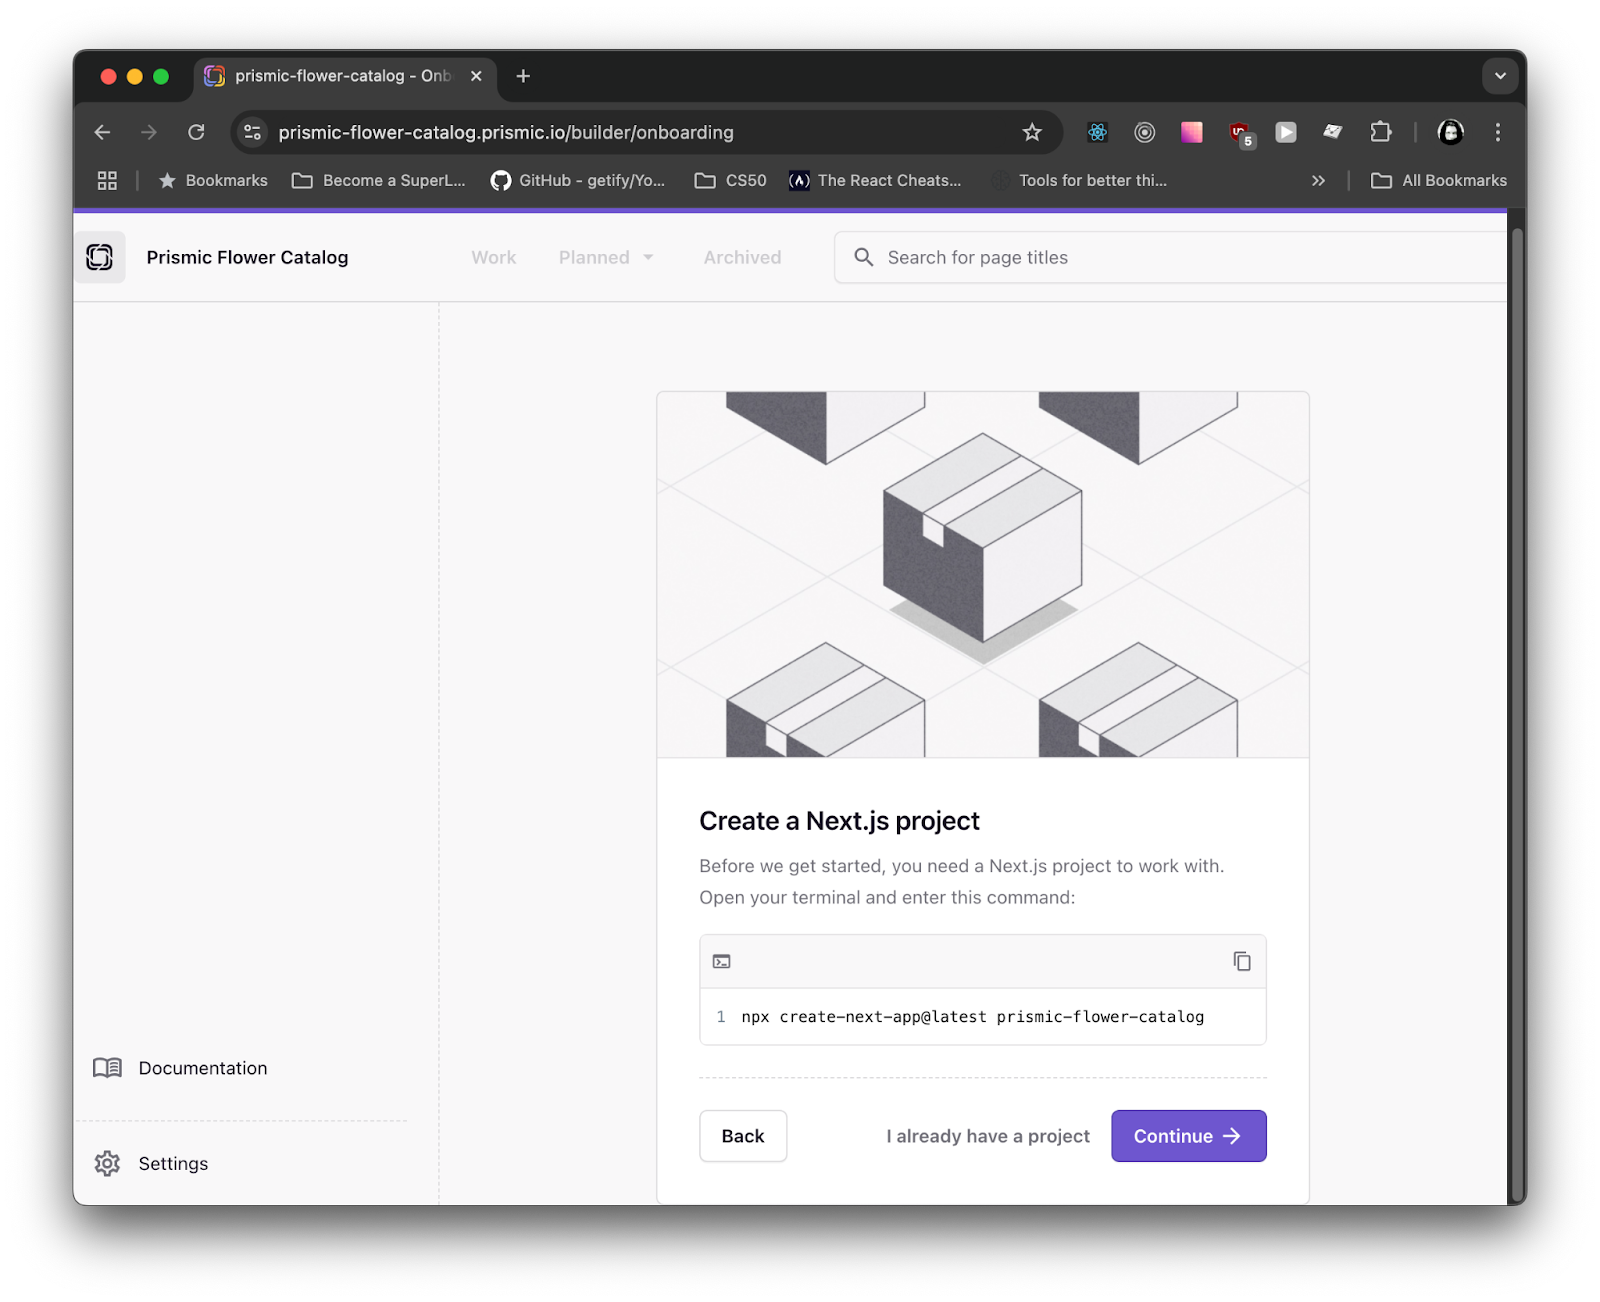
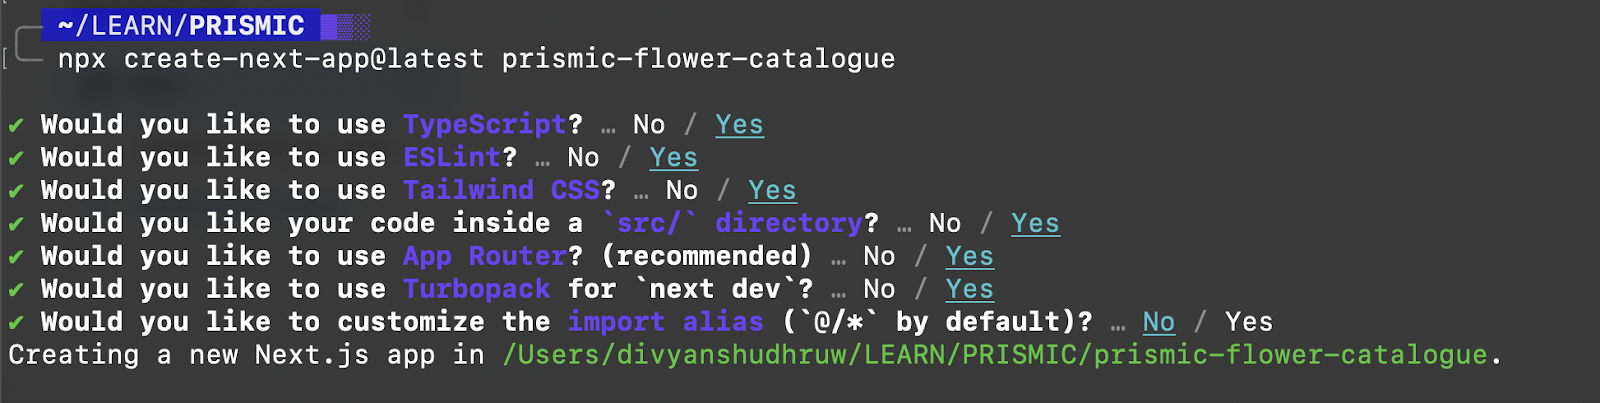
Go to your development folder and execute the following command. This will create a NextJS project of latest version (While writing the latest NextJS version is 15)
npx create-next-app@latest prismic-flower-catalogue
It will prompt you with a series of questions. We’ll go with the default options, as the best practices are already preselected.
Open prismic-flower-catalogue in your favorite code editor (We will use VSCode).
Our next task is to connect this stock NextJS project to the Prismic Repository we created in previous section. Execute following command to install slice machine and configure it:
npx @slicemachine/init@latest
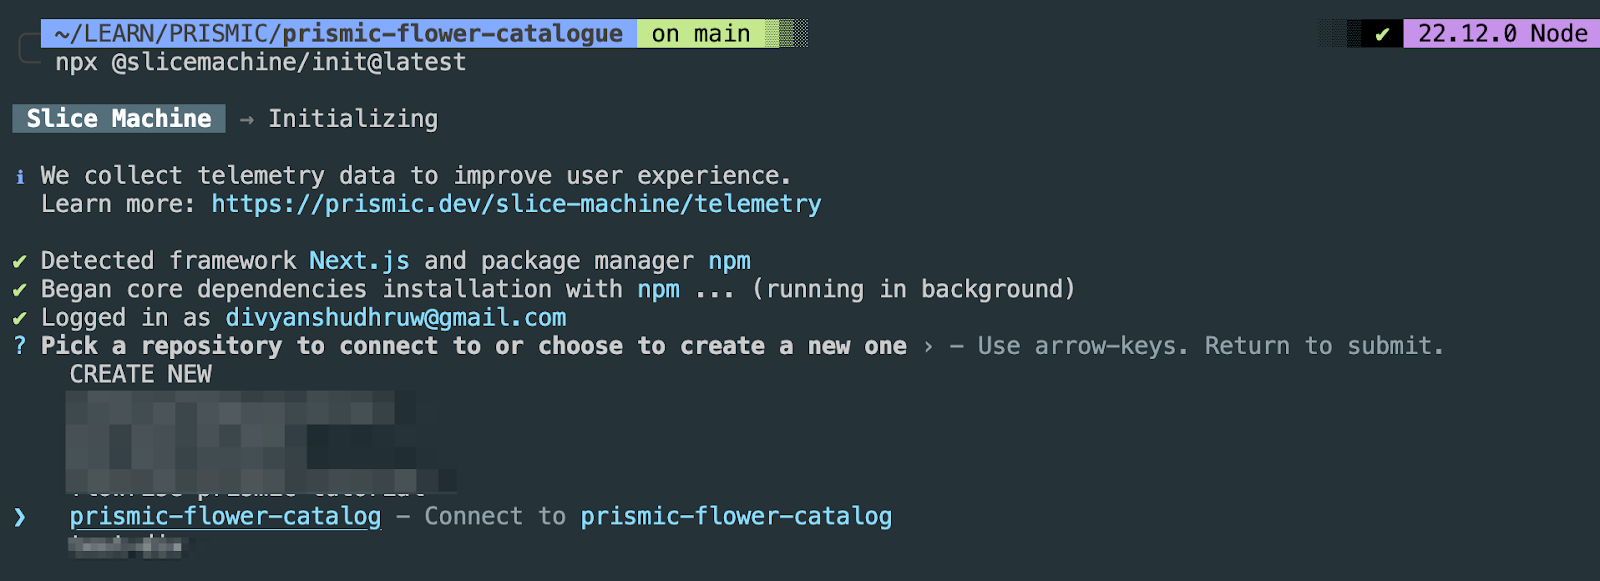
You can select an existing repository or create a new one from here also.
Post selection of repository, it will initialize everything to connect to the selected Prismic repository.
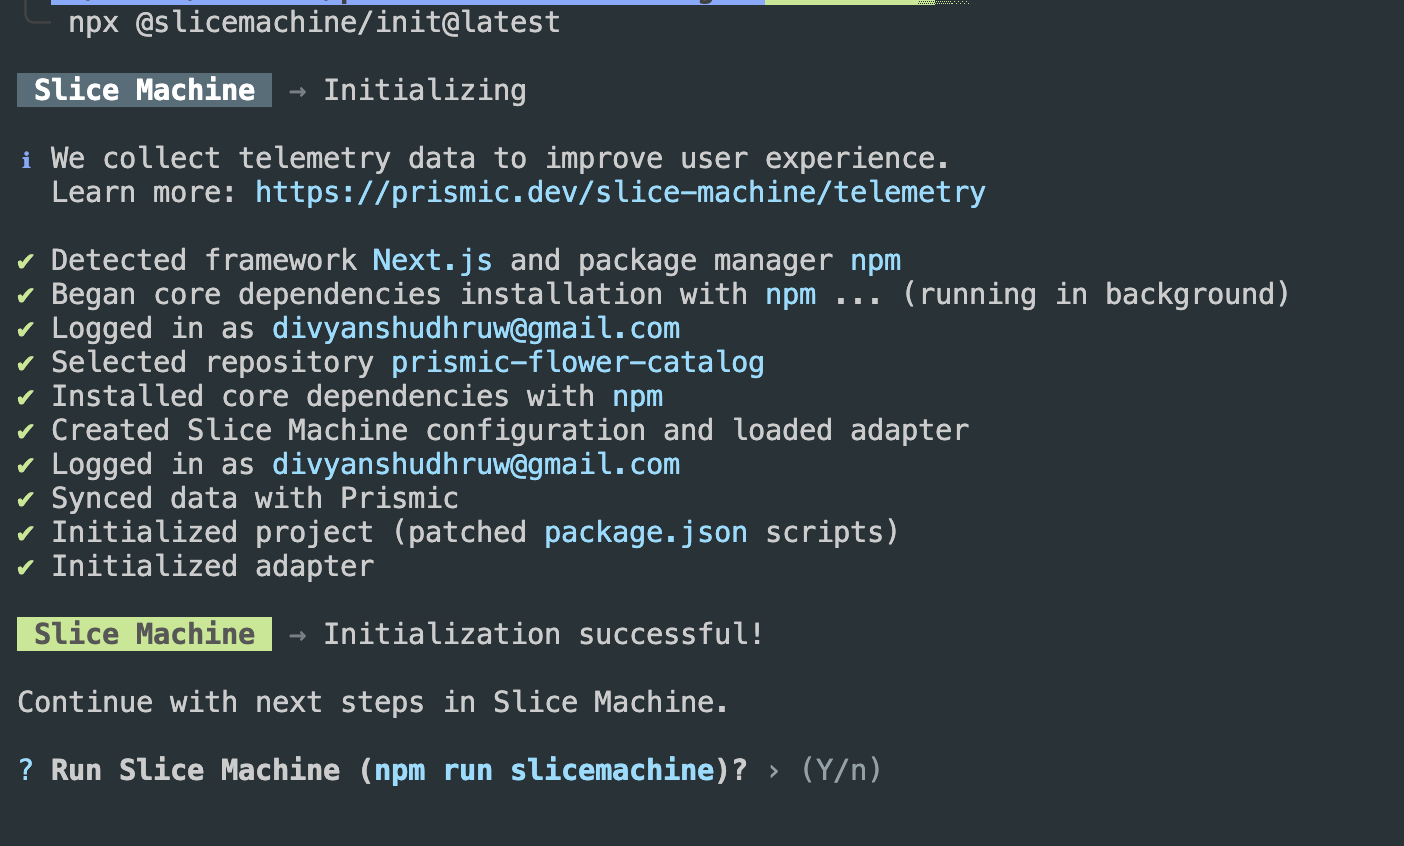
The command will automatically run the slice machine. If it does not start automatically, you can start it by command npm run slice machine
The slice machine will start running in http://localhost:9999/
It looks like this:

By executing all the steps above, package.json and package.lock.json will get modified, and following new files and folders will be created:
prismicio-types.d.ts: Do not edit this file. It contains types of core slice machine code.slicemachine.config.json: This file contains the repository and simulator URL.-
src/app/api/This is standard NextJS folder, but all the APIs files related to slice machine simulator will be added here. Do not change any of the autogenerated files here. src/app/slice-simulator:/src/appis standard NextJS folder, in this slicemachine-simulator will contain all the code for running slice machine. Do not make any changes in these files.src/prismicio.ts: This file has a lot of code to run the Prismic system. The only thing we need to care of in this file is Prismic Routes. As we add new pages to our project, this file will need to be updated accordingly.src/slices/: All the slices we create in future will be stored here.
In this section, we have created a basic Next.js project with Slice Machine connected to our Prismic repository. In the next section, we will create slices, which are the building blocks of the Prismic ecosystem.
Slice Creation

- Page Type (Single or Reusable) results in a rendered website page
- A page can be created using Slices and Custom types
- The end user is free to use any slice which the developer has created, everything will be automatically rendered by Slice Machine
For our project, we will create following slices:
- Homepage Hero Slice
- Flower Card
- Flower Details
- Flower Post
We will go in detailed steps for the first slice only. Rest all the slices can be created by following same steps. We will provide the schema screenshots for guidance.
Create Slices
Visit the slice machine interface http://localhost:9999/slices and Click on ‘Create One’
Note: Both Node dev environment and slicemahcine need to be running in the local machine.
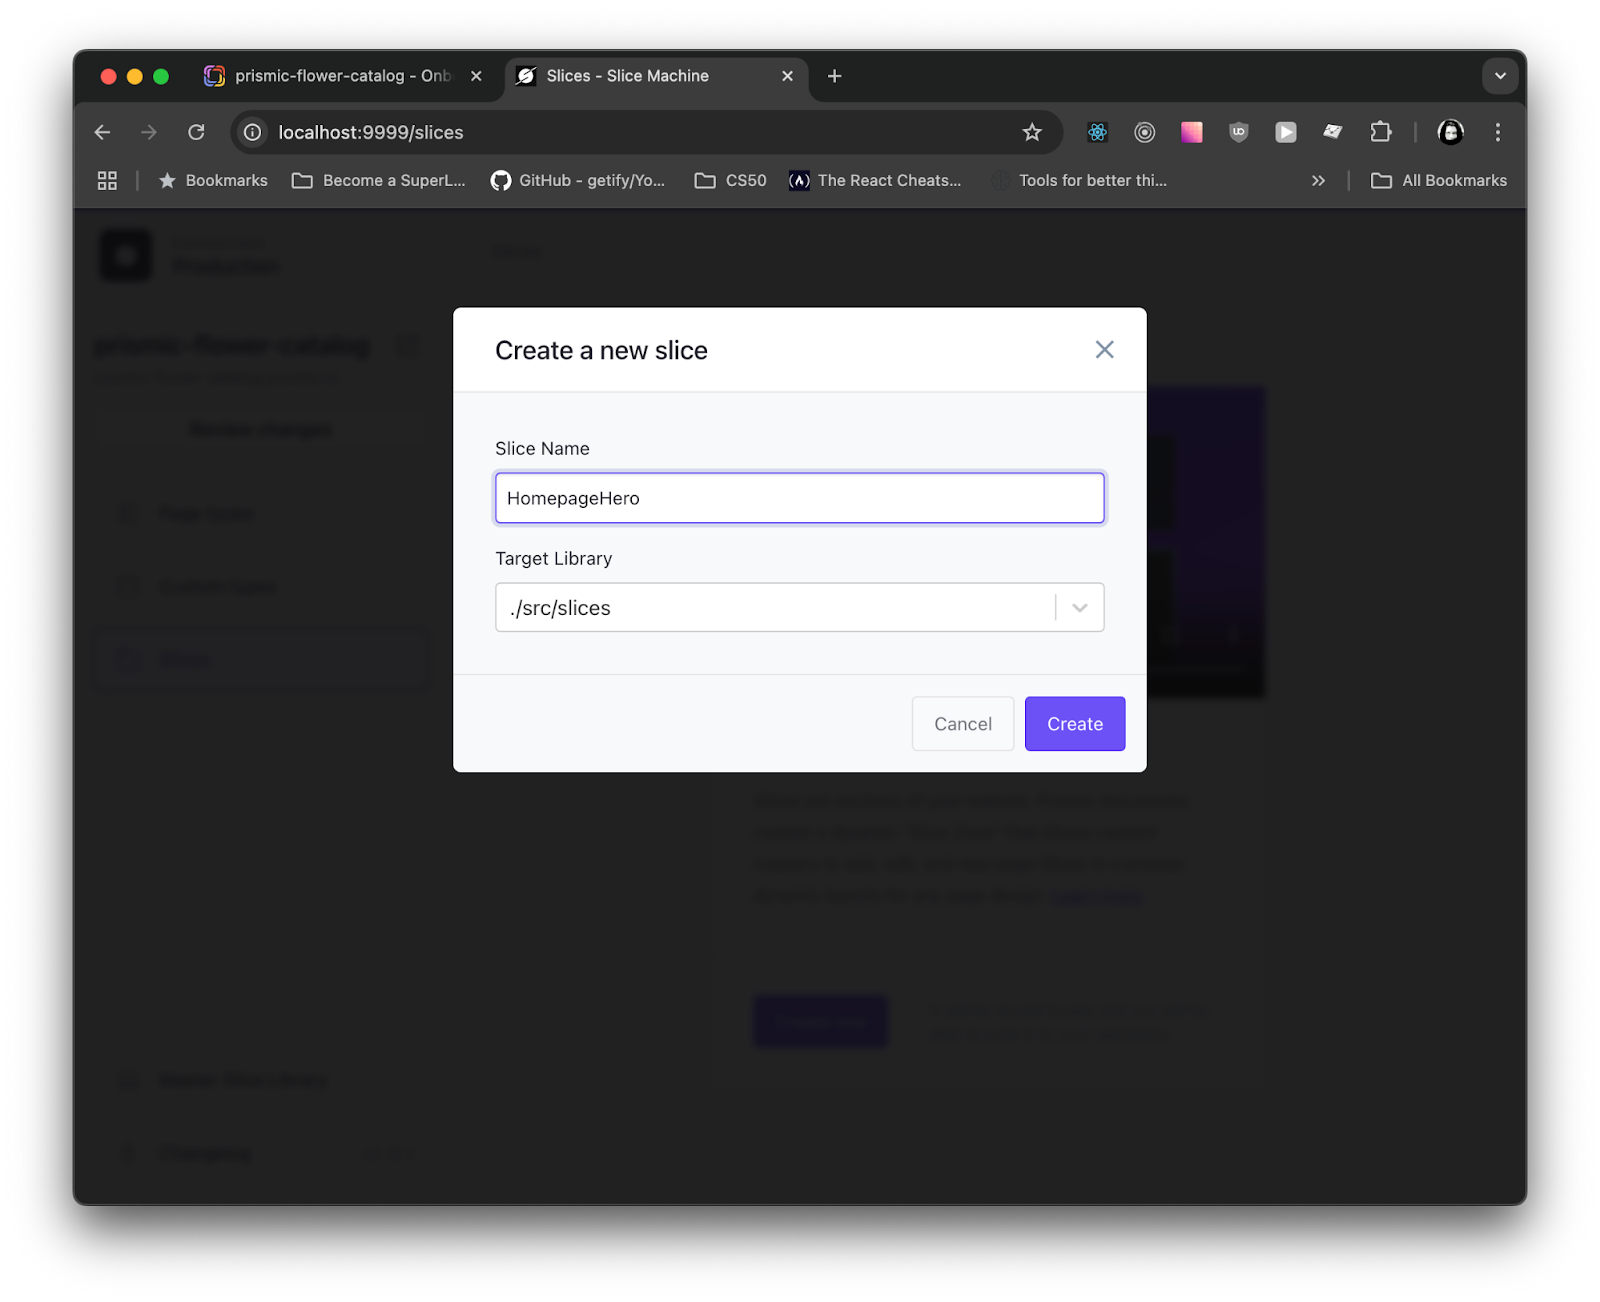
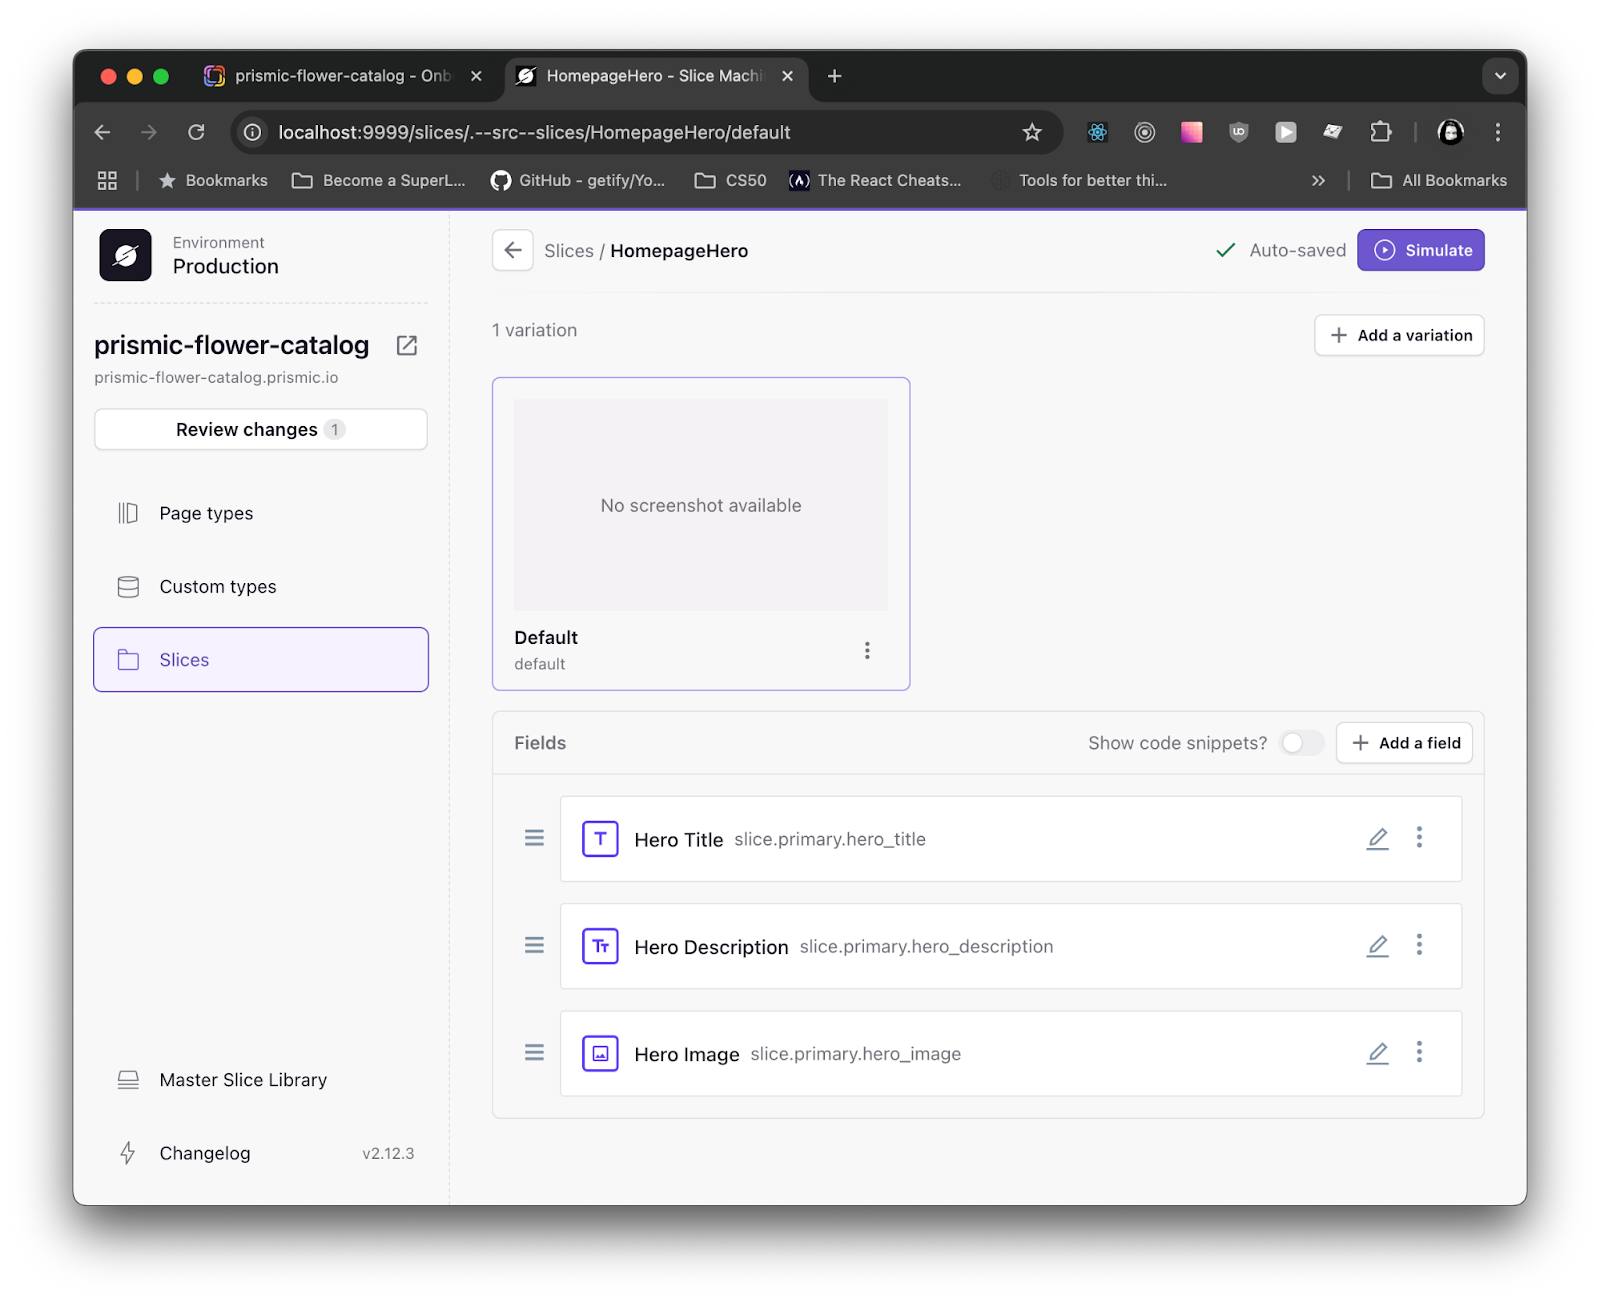
We will create a slice for the Hero Section, which will include a title, tagline, and an image. Click on Add a field to see all the elements that can be added to this slice according to the requirements. For this slice, we need to add a Text, Rich Text, and Image field. After adding these three fields, it should look like this:
Clicking the "Simulate" button at the top right will open the Slice Machine simulator. This allows you to preview how the slice looks in isolation. You can use the simulator to develop the UI of individual slices. This action will also automatically generate the following files in the Next.js project:
src/slices/HomepageHero/index.tsx: This is the main HTML & CSS part of this slice. All the styling and UI change we need to do for this slice, we need to do it in thissrc/slices/HomepageHero/mocks.json: This will contain mock data to help Slice Simulatorsrc/slices/HomepageHero/model.json: This is the data structure of this slice. Do not touch this file. This file will keep changing as we add or change fields in slices.
And it will modify following files:
prismicio-types.d.ts: Automatic addition of types of new Slicesrc/slices/index.ts: Newly created slice will be registered in this file
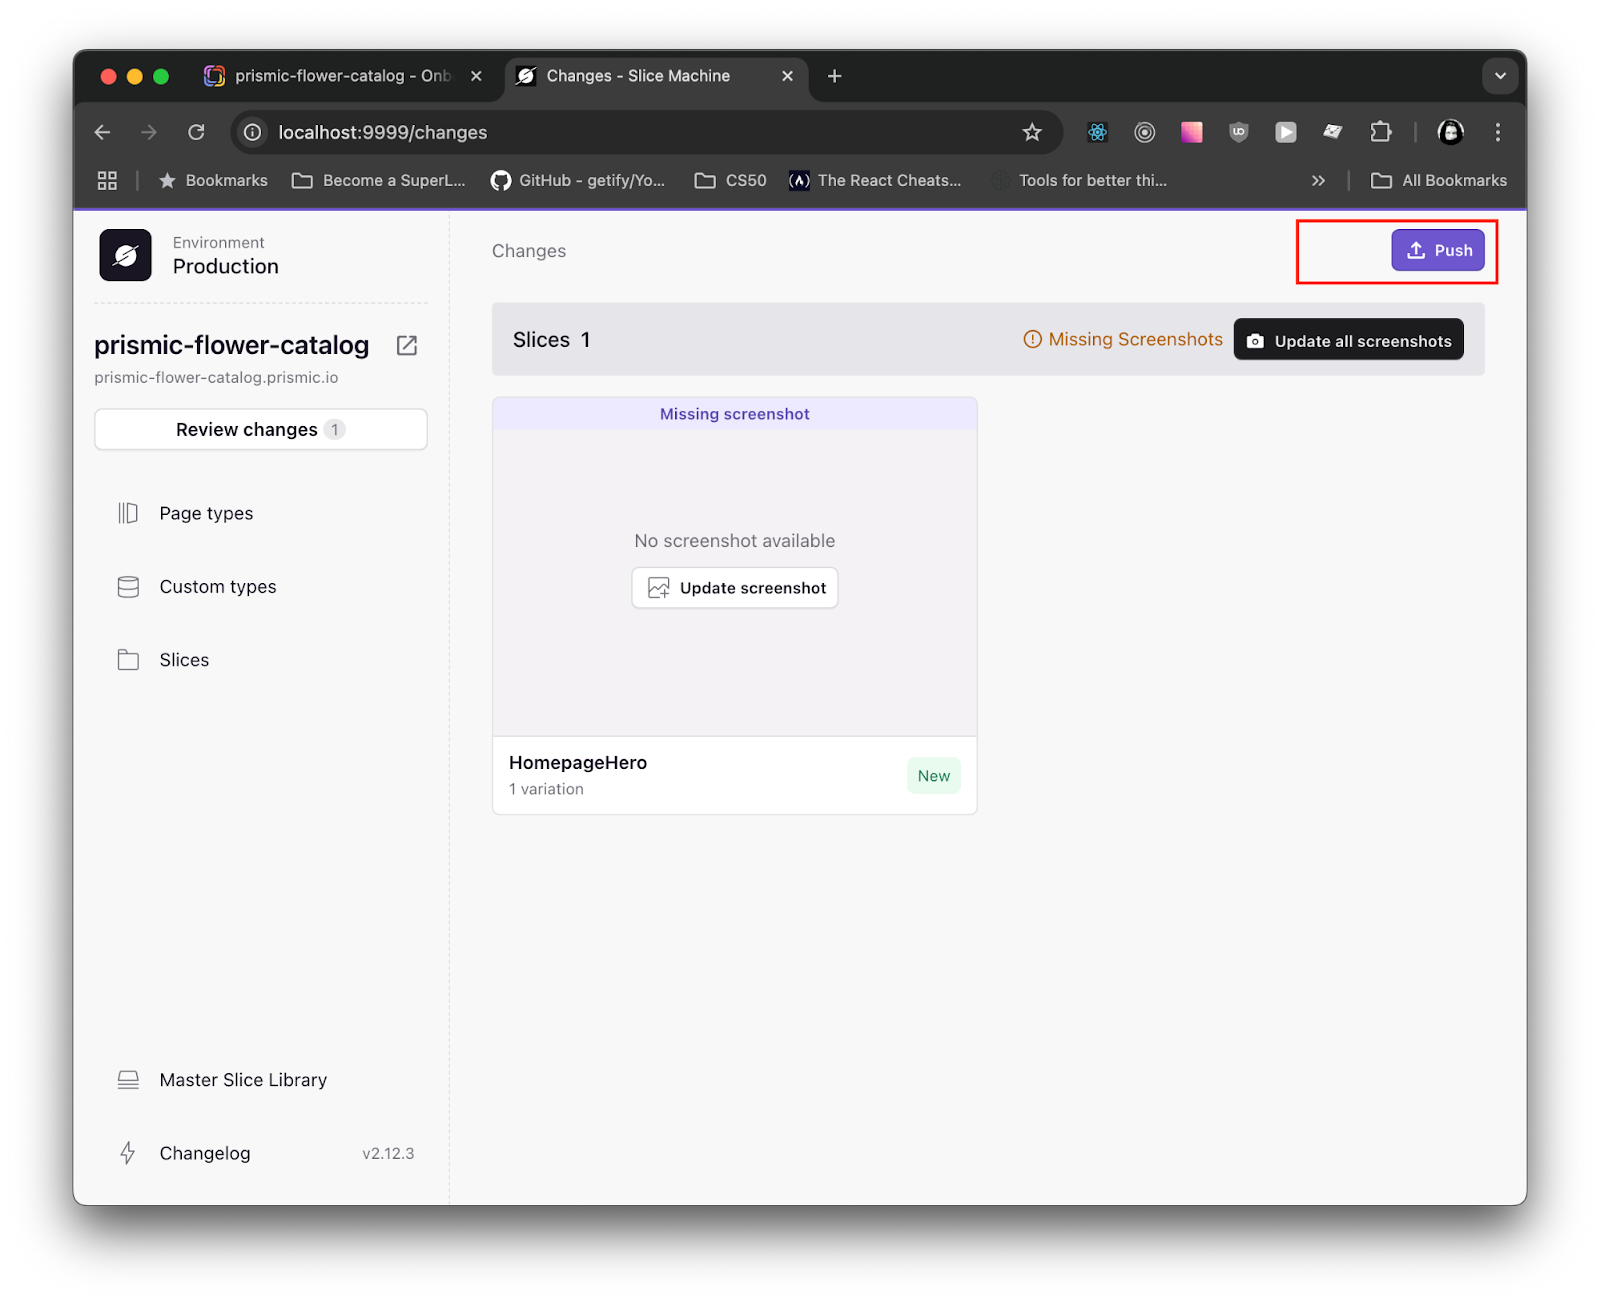
Push changes of Slice Machine to Prismic Repository
All the push to the Prismic repository will be done via Slice Machine GUI interface only. No command line push. You can click on Review Changes , then click on Push button to push all the changes to Prismic Repository. Unless all the changes are not pushed in the Prismic Repo, they will not be available in the Prismic CMS Dashboard for content management.
Styling the slice and adding using data
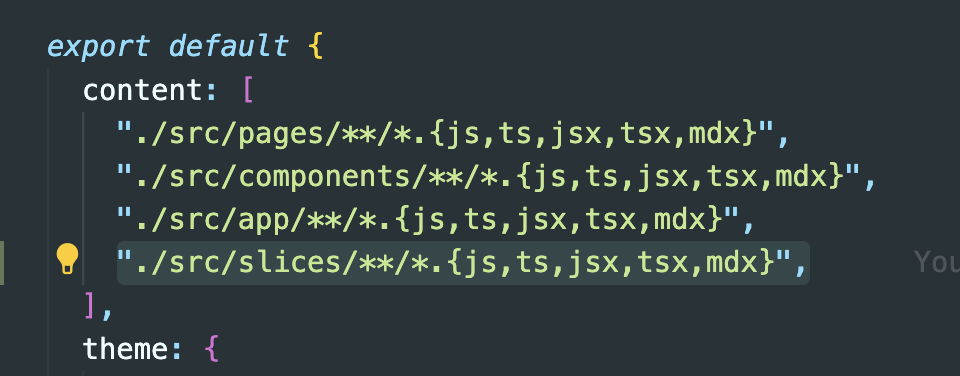
We need to make changes in src/slices/HeroSection/index.tsx autogenerated file for adding styling. Before that, just a one time task to add the src/slices folder in tailwind.config.ts so that we can use tailwind styling in all our slices.
Default JSX of src/slices/HomepageHero/index.tsx file:
const HomepageHero: FC<HomepageHeroProps> = ({ slice }) => {
 return (
   <section
     data-slice-type={slice.slice_type}
     data-slice-variation={slice.variation}
   >
     Placeholder component for homepage_hero (variation: {slice.variation})
     Slices
   </section>
 );
};
In order to use the Data fields, Prismic provide code snippets. Go to slice machine, click on the slice, then toggle the code Show code Snippets
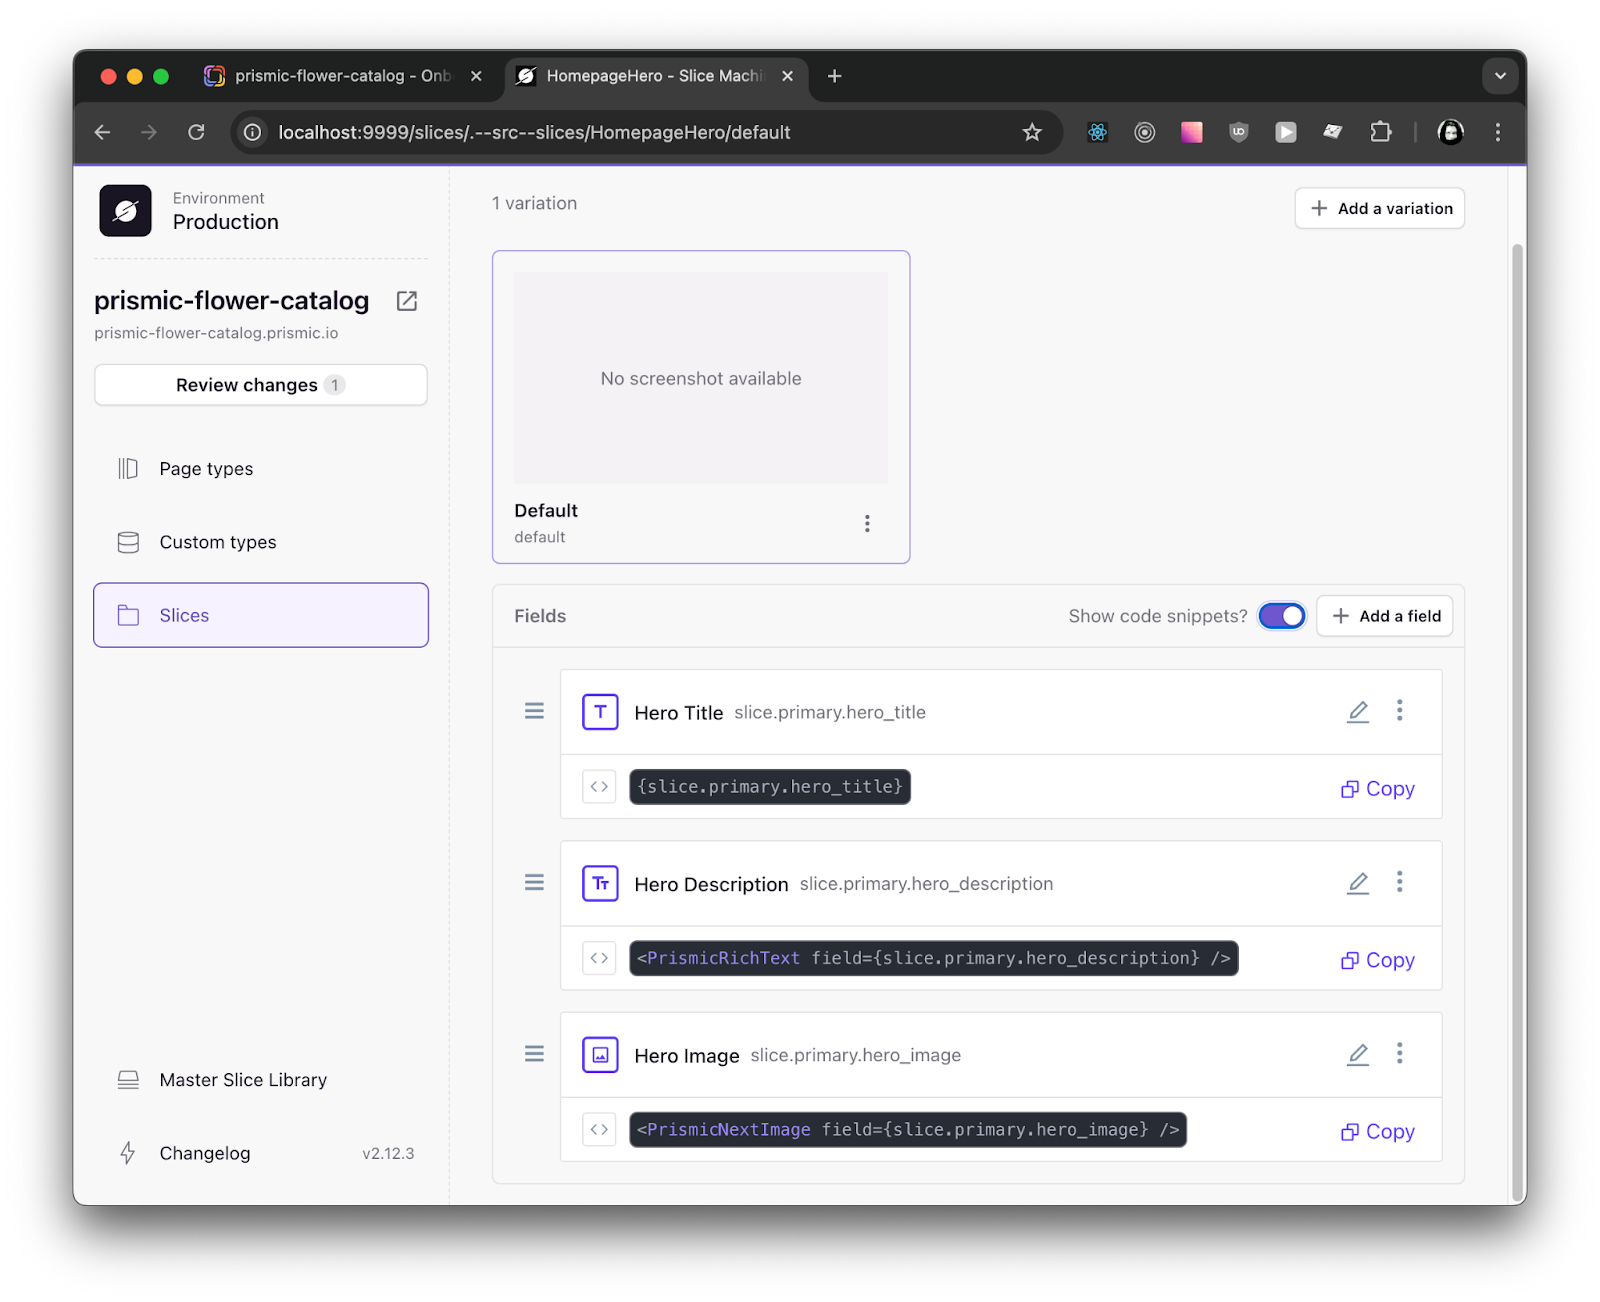
Toggling code snippets will give the fields as well as the Prismic recommended component to use in the frontend code. Code of src/slices/HomepageHero/index.tsx after adding simple styling and data fields:
const HomepageHero: FC<HomepageHeroProps> = ({ slice }) => {
return (
<section
data-slice-type={slice.slice_type}
data-slice-variation={slice.variation}
className="w-full text-slate-700 flex space"
>
<div className="mx-auto w-full max-w-6xl">
<div className="grid grid-cols-2 place-items-center text-center">
<div className="grid grid-rows-[1fr,auto,auto] gap-8 h-fit">
<div>
<h1 className="text-6xl">{slice.primary.hero_title}</h1>
<PrismicRichText field={slice.primary.hero_description} />
</div>
</div>
<PrismicNextImage
field={slice.primary.hero_image}
className="rounded drop-shadow-xl max-w-4xl w-full"
/>
</div>
</div>
</section>
);
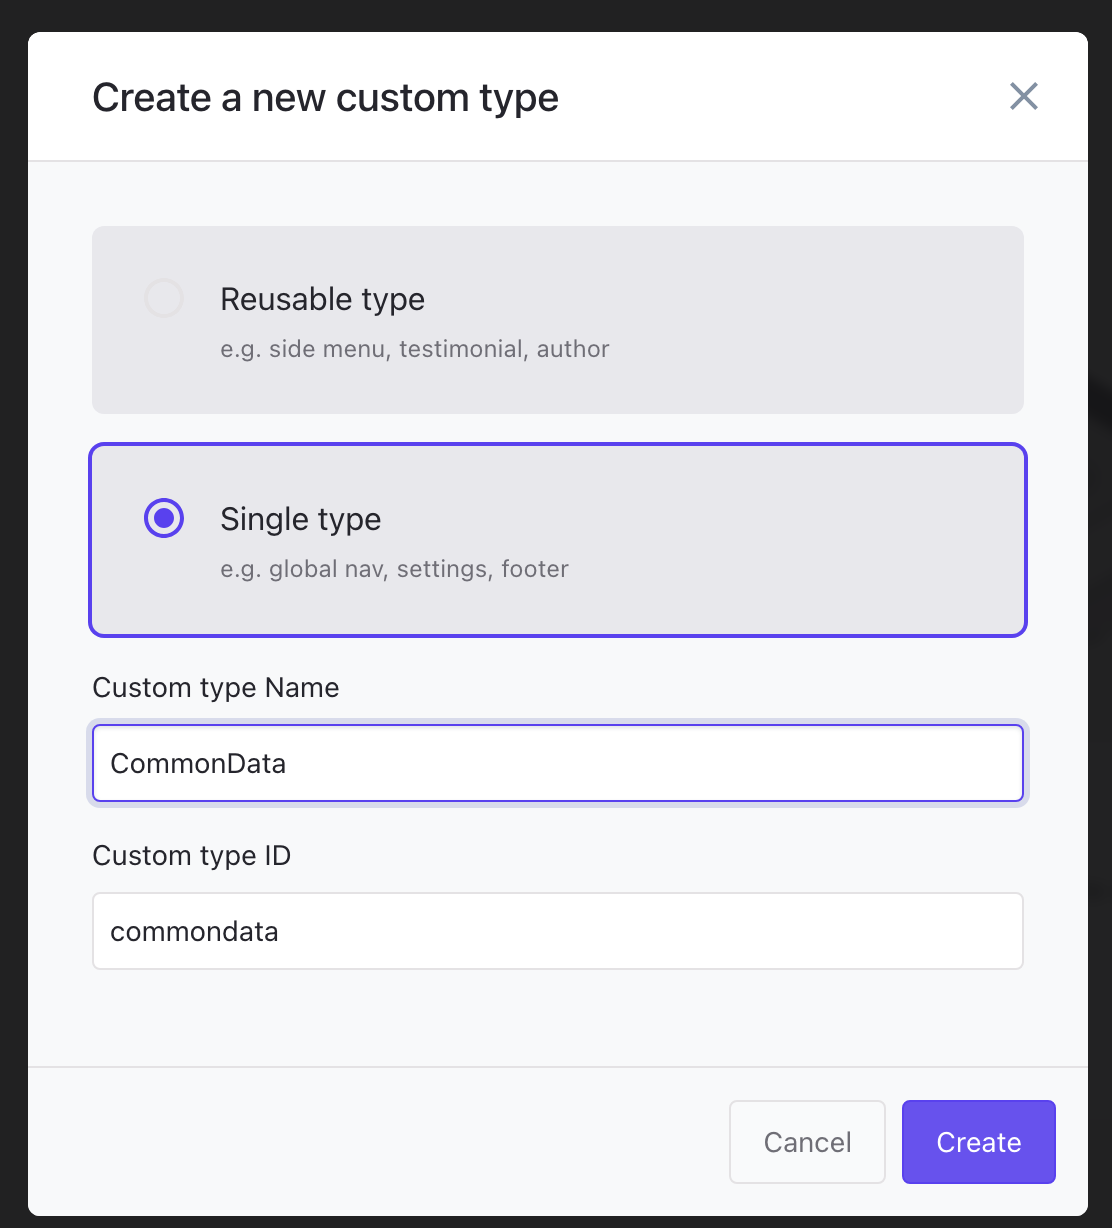
};Custom Type Creation (Single)
Some data may not fit into any specific category. For such cases, we can create a custom type. In our case, we can store the logo, company name, and navigation as a custom type. This allows us to use them in both the header and footer. Since these items are singular, we will create a Single Type. To do this, go to Custom Types in the left sidebar and create a new one:
The empty custom type will look like this:
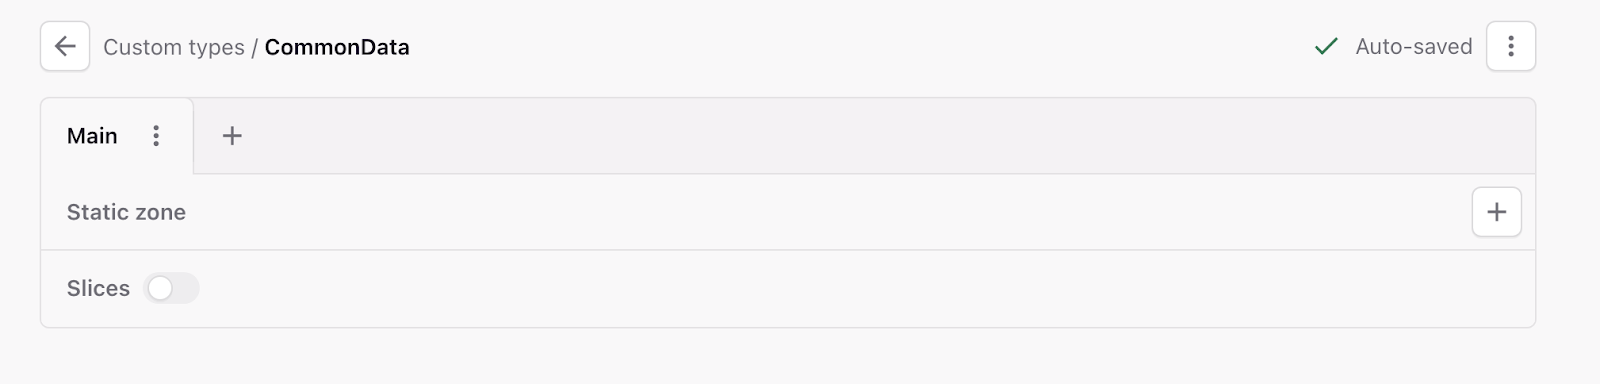
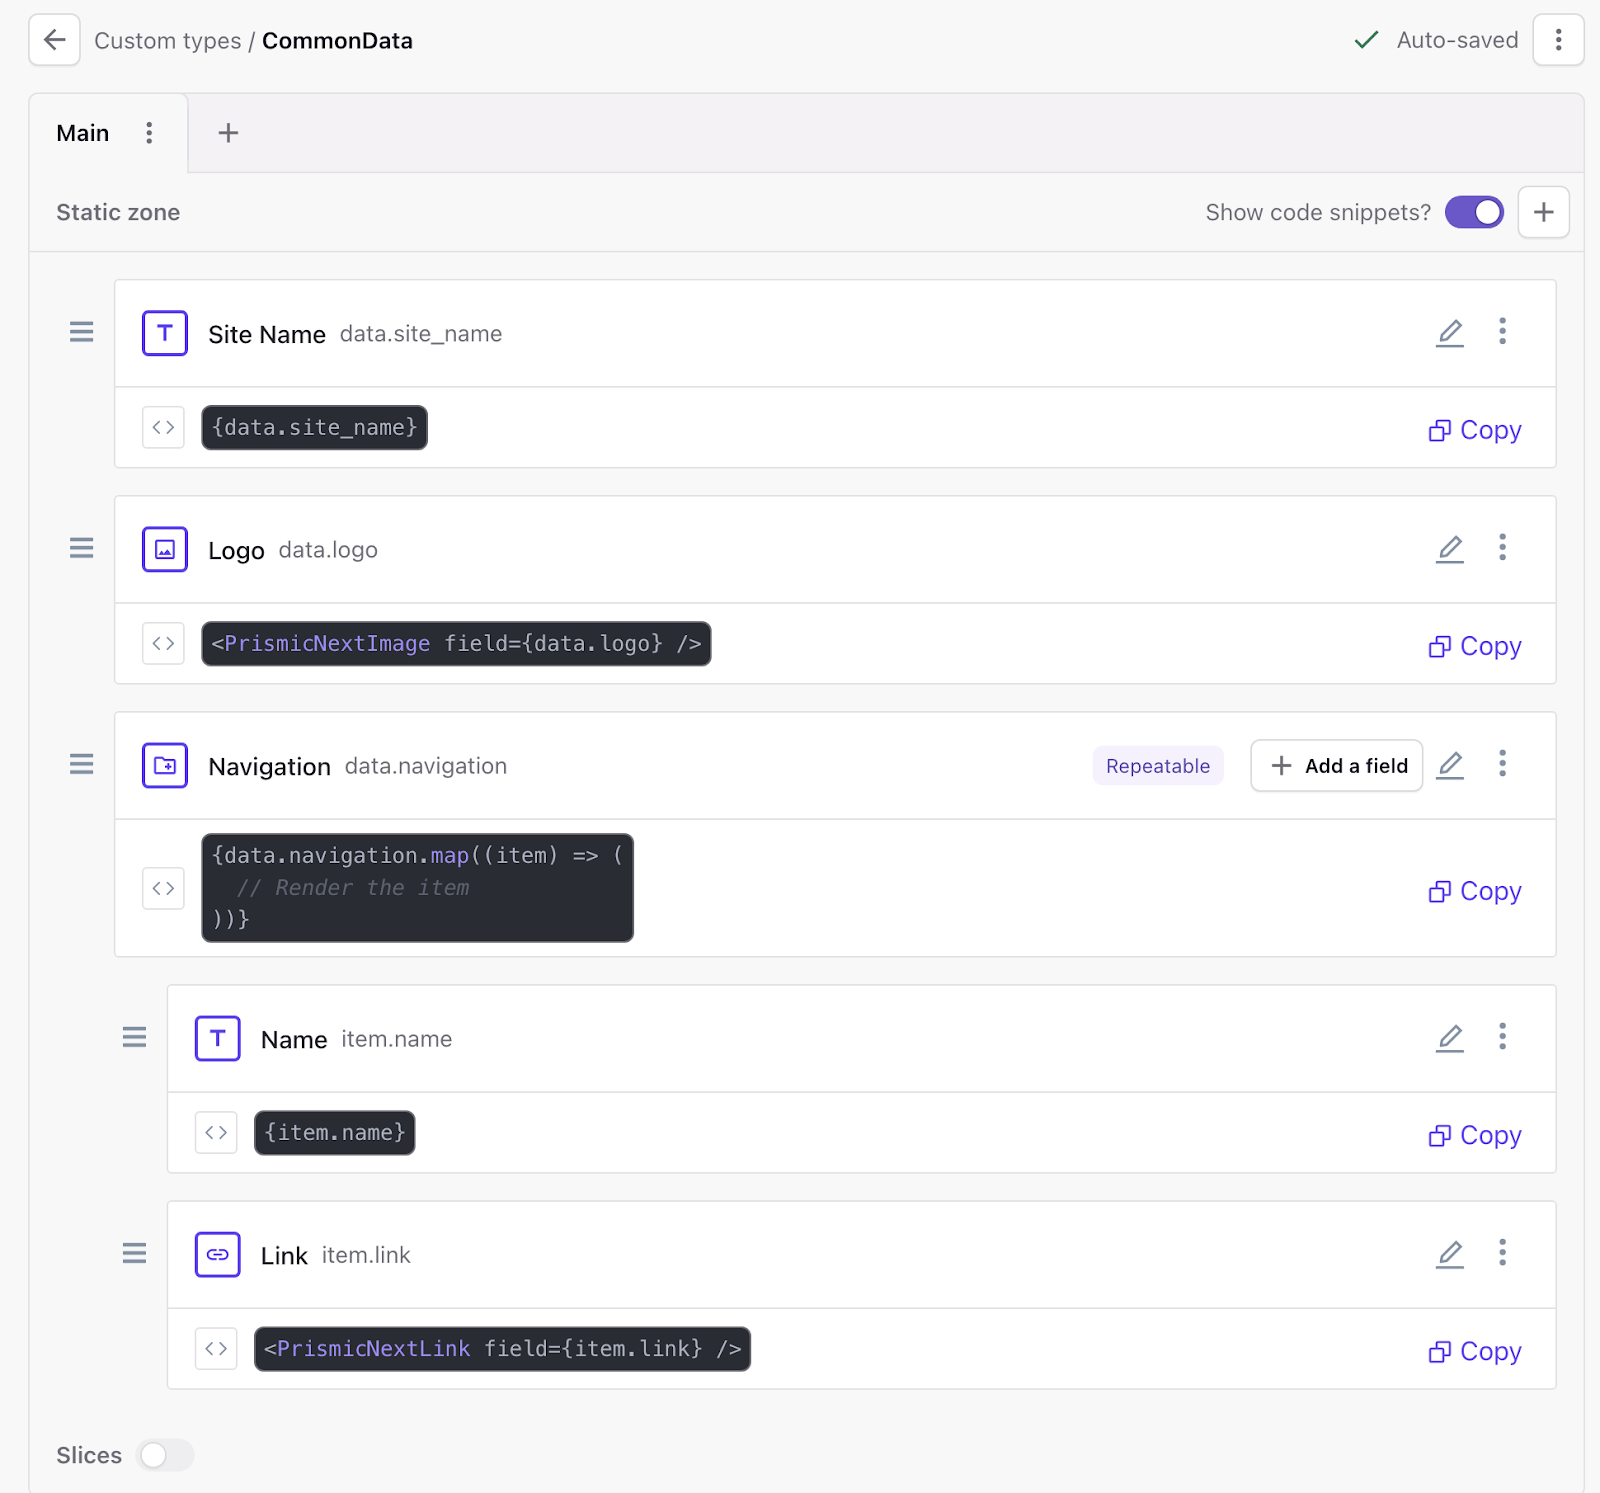
We can use both static data and slices here. We will use Repeatable Group to create navigation

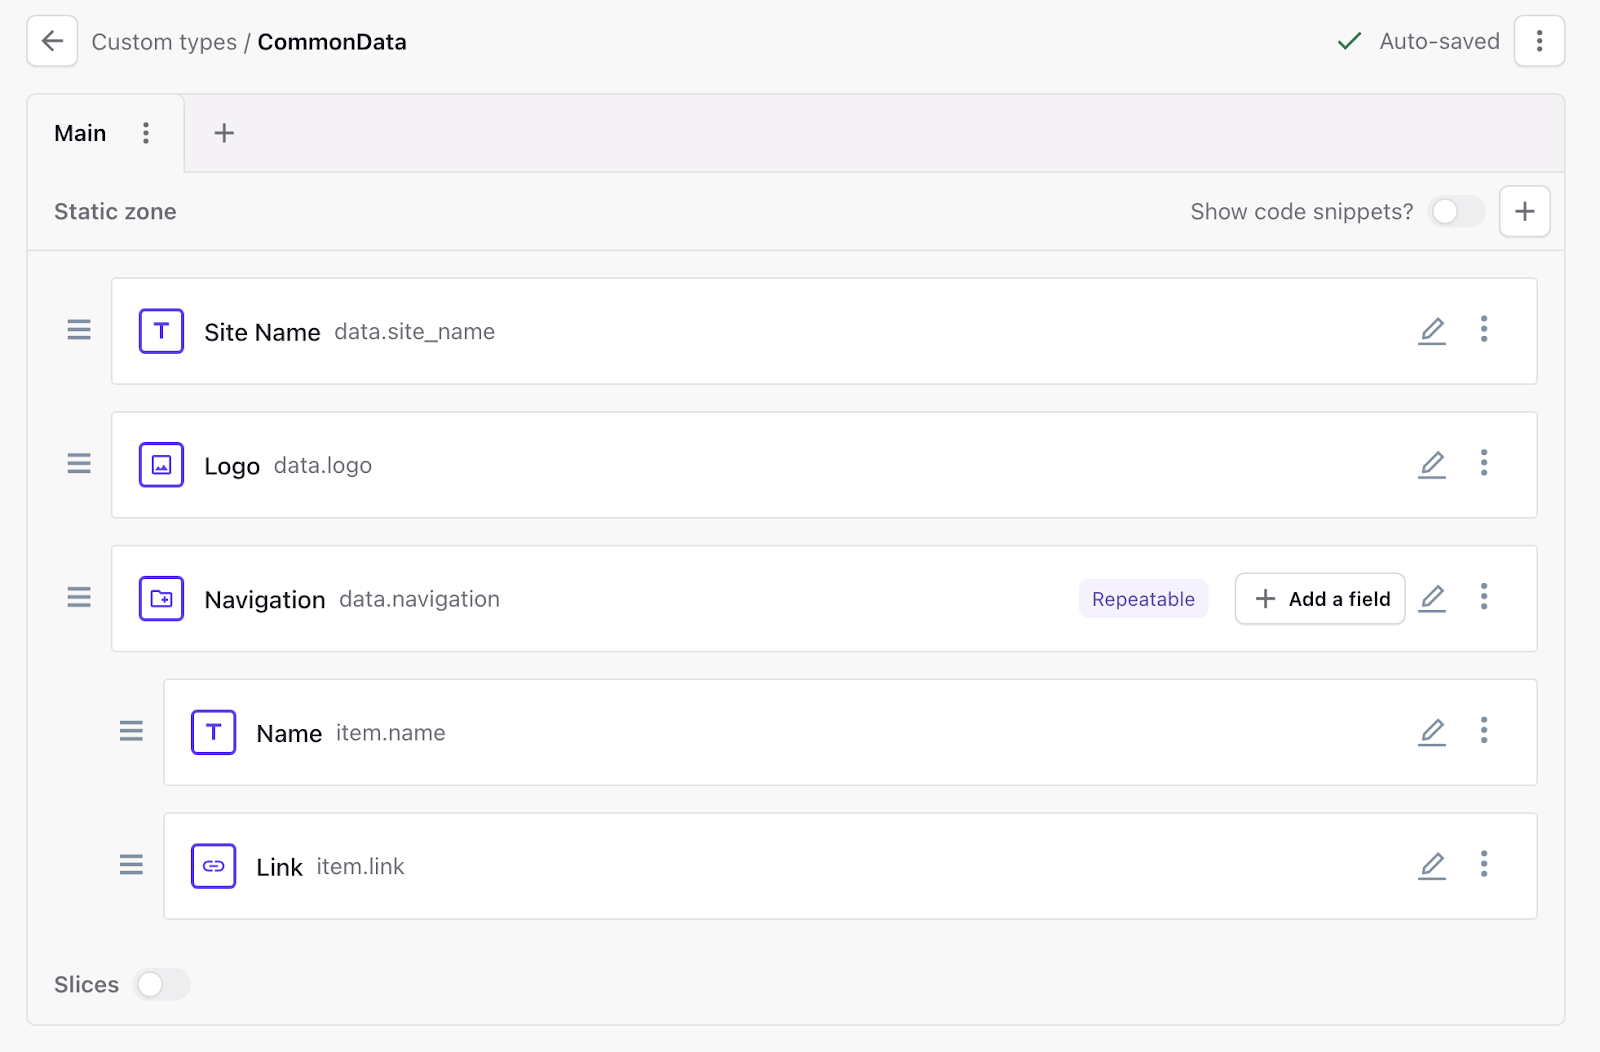
Finally it will look like this after adding all the fields:
Review the changes and push via GUI.
Populating Data in Prismic CMS - 1
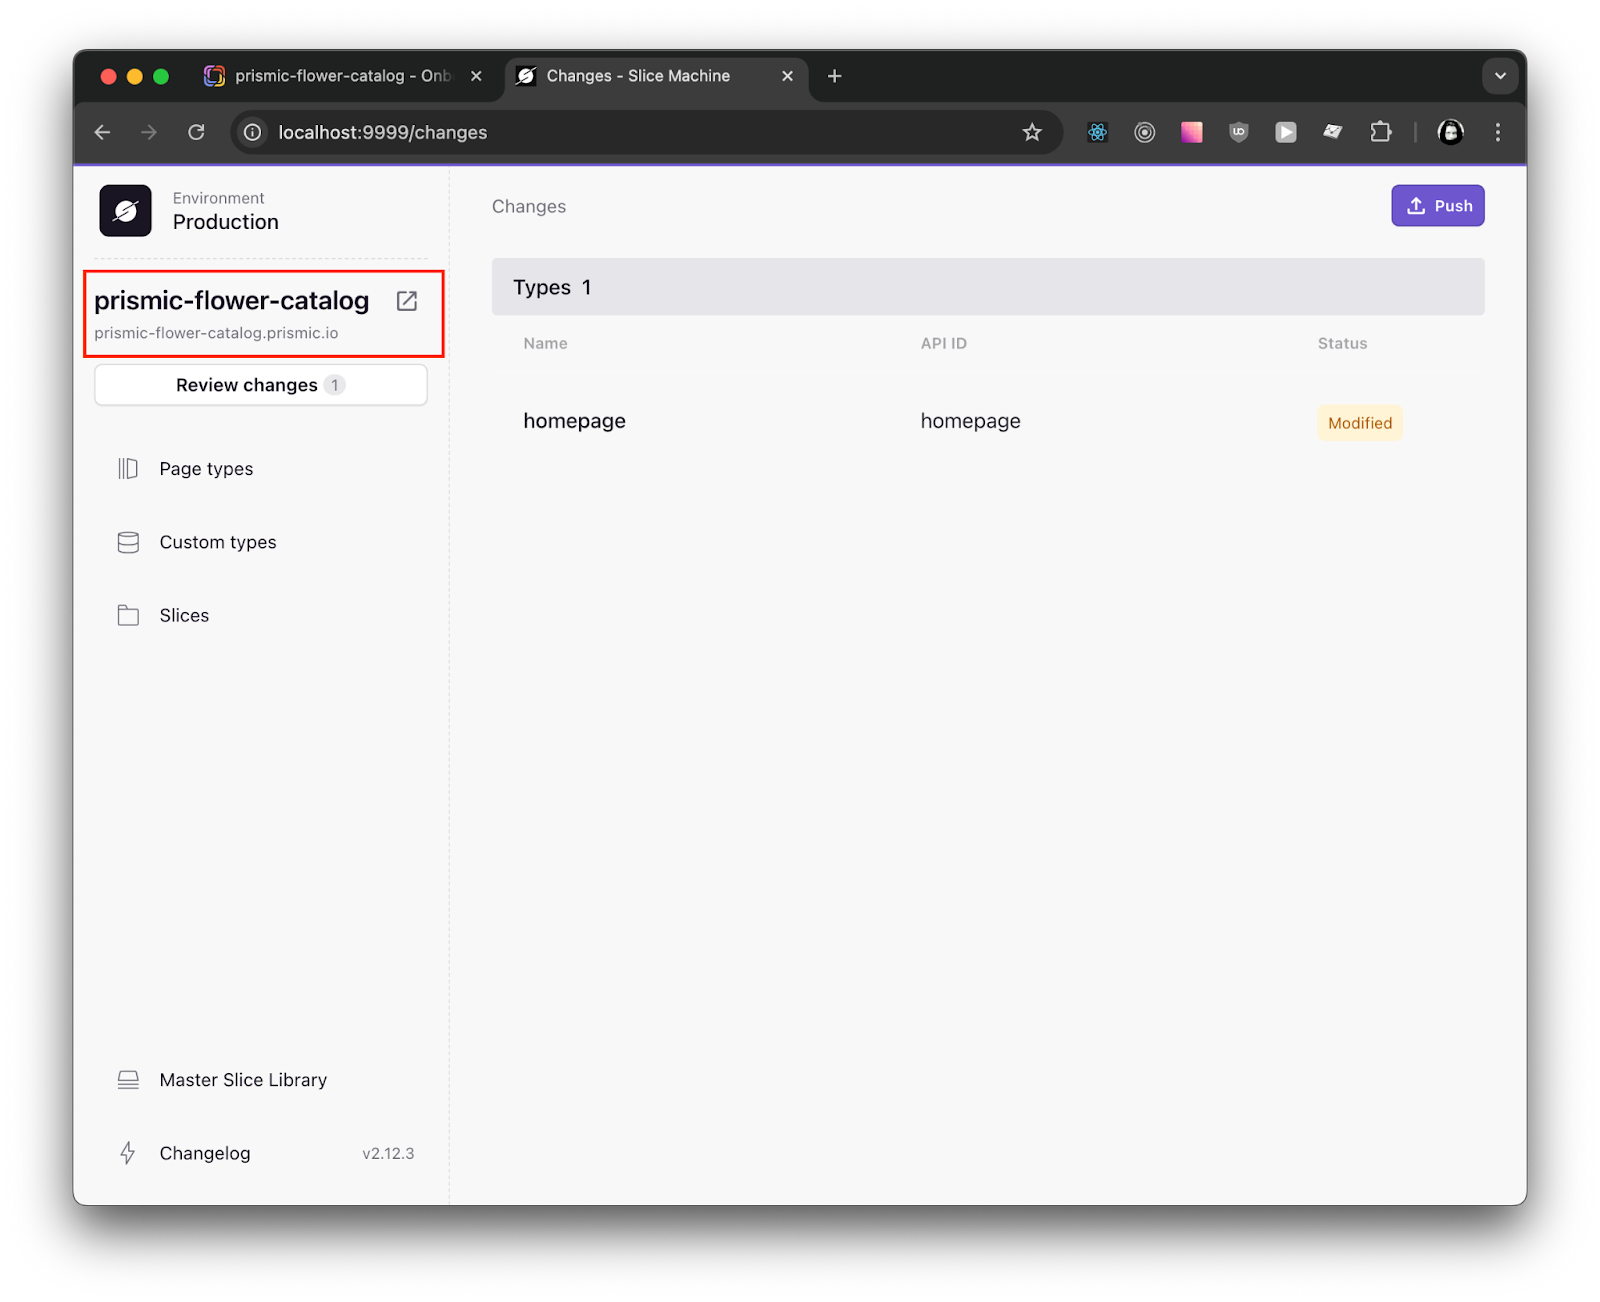
Once our pages and slices are set up and pushed to the Prismic repository, we need to populate the data via Prismic CMS. You can access the Prismic CMS from the link provided in Slicemachine:
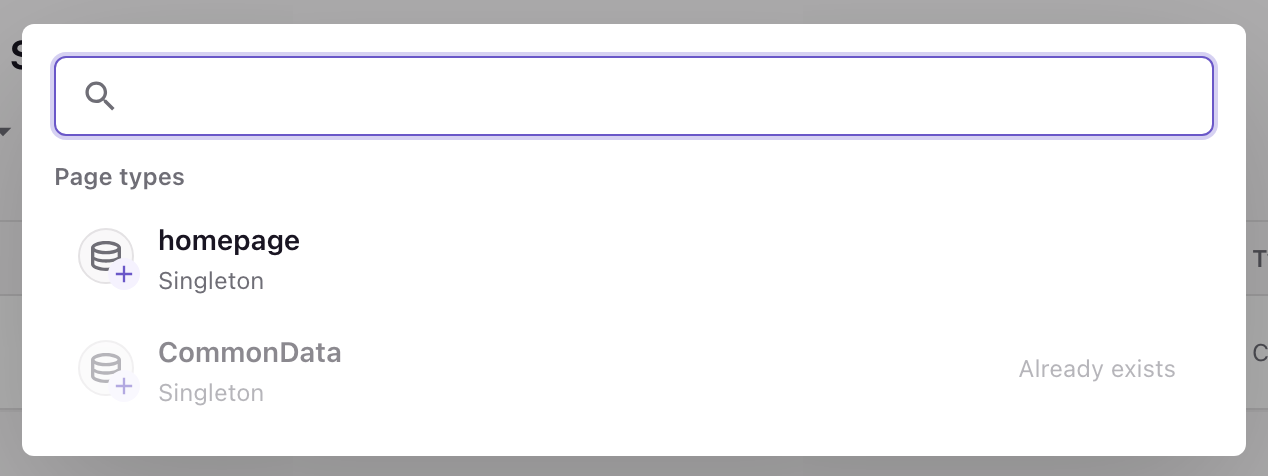
Click on Create a new page , it will show all the Page types and Custom Types which have been pushed in the Prismic Repository.
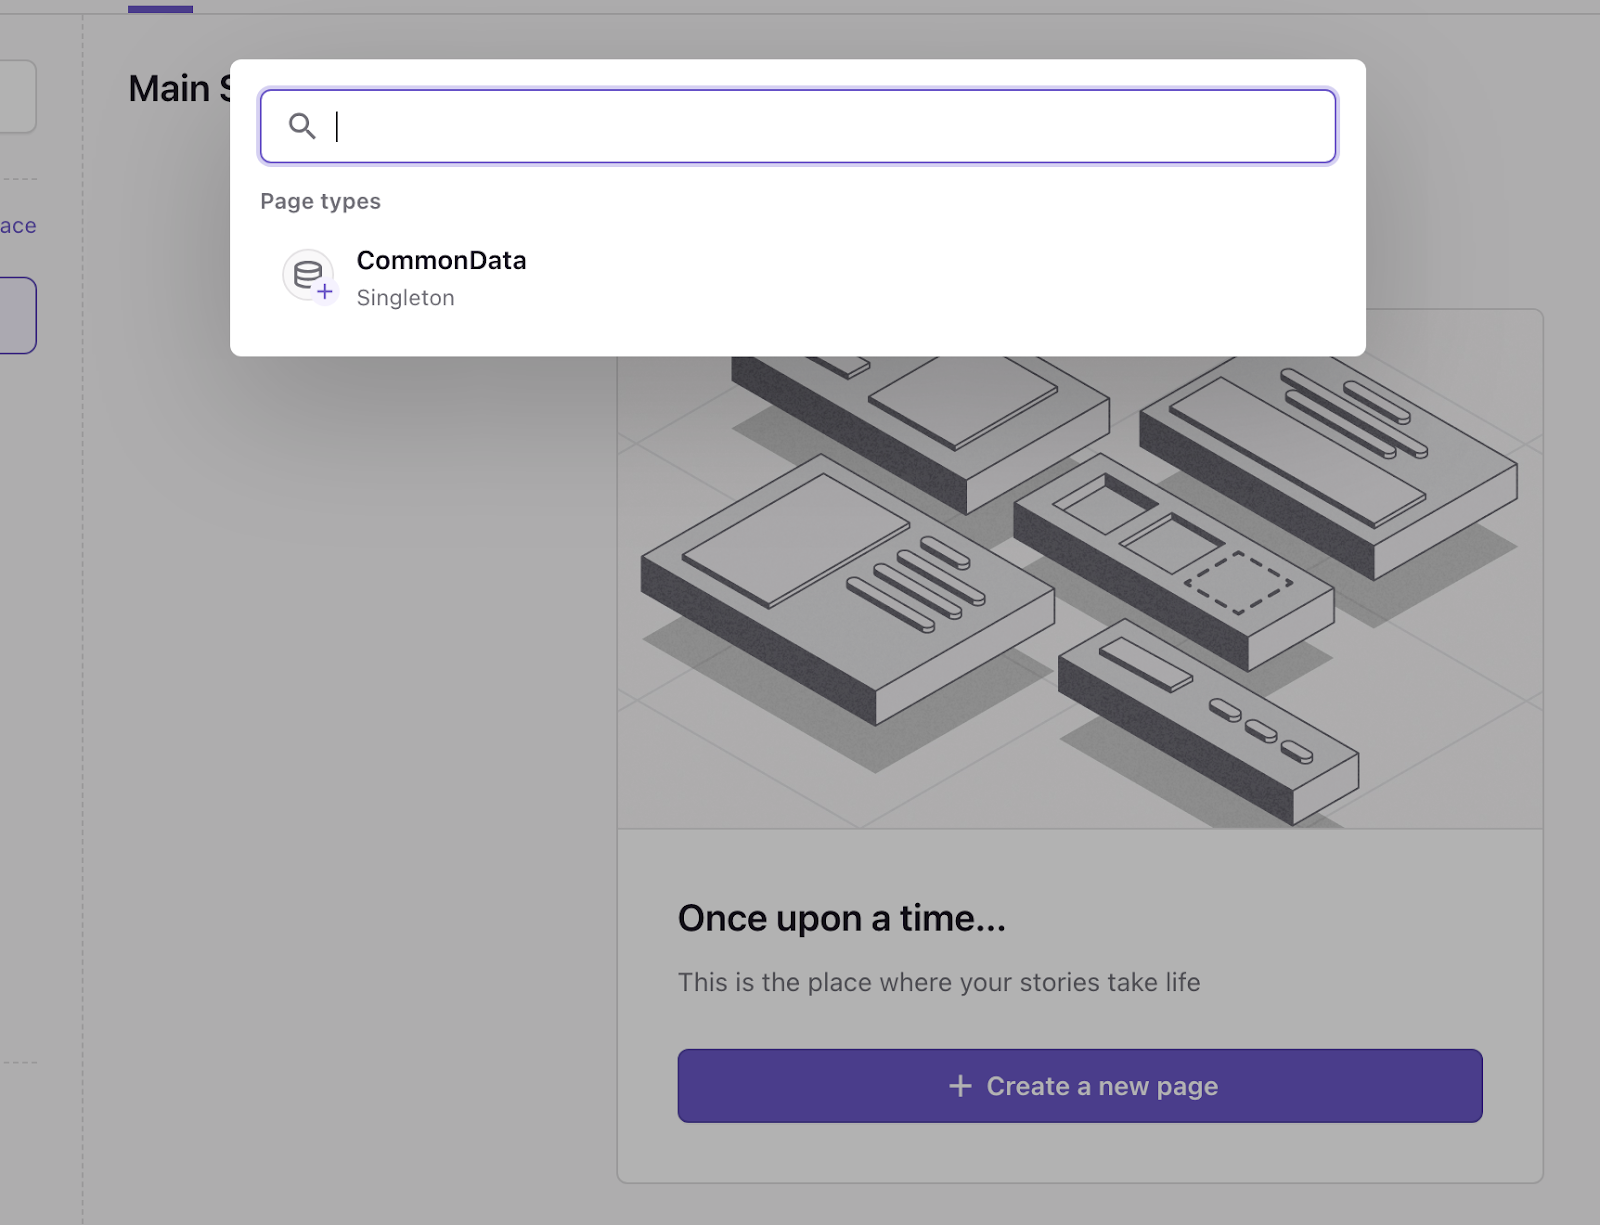
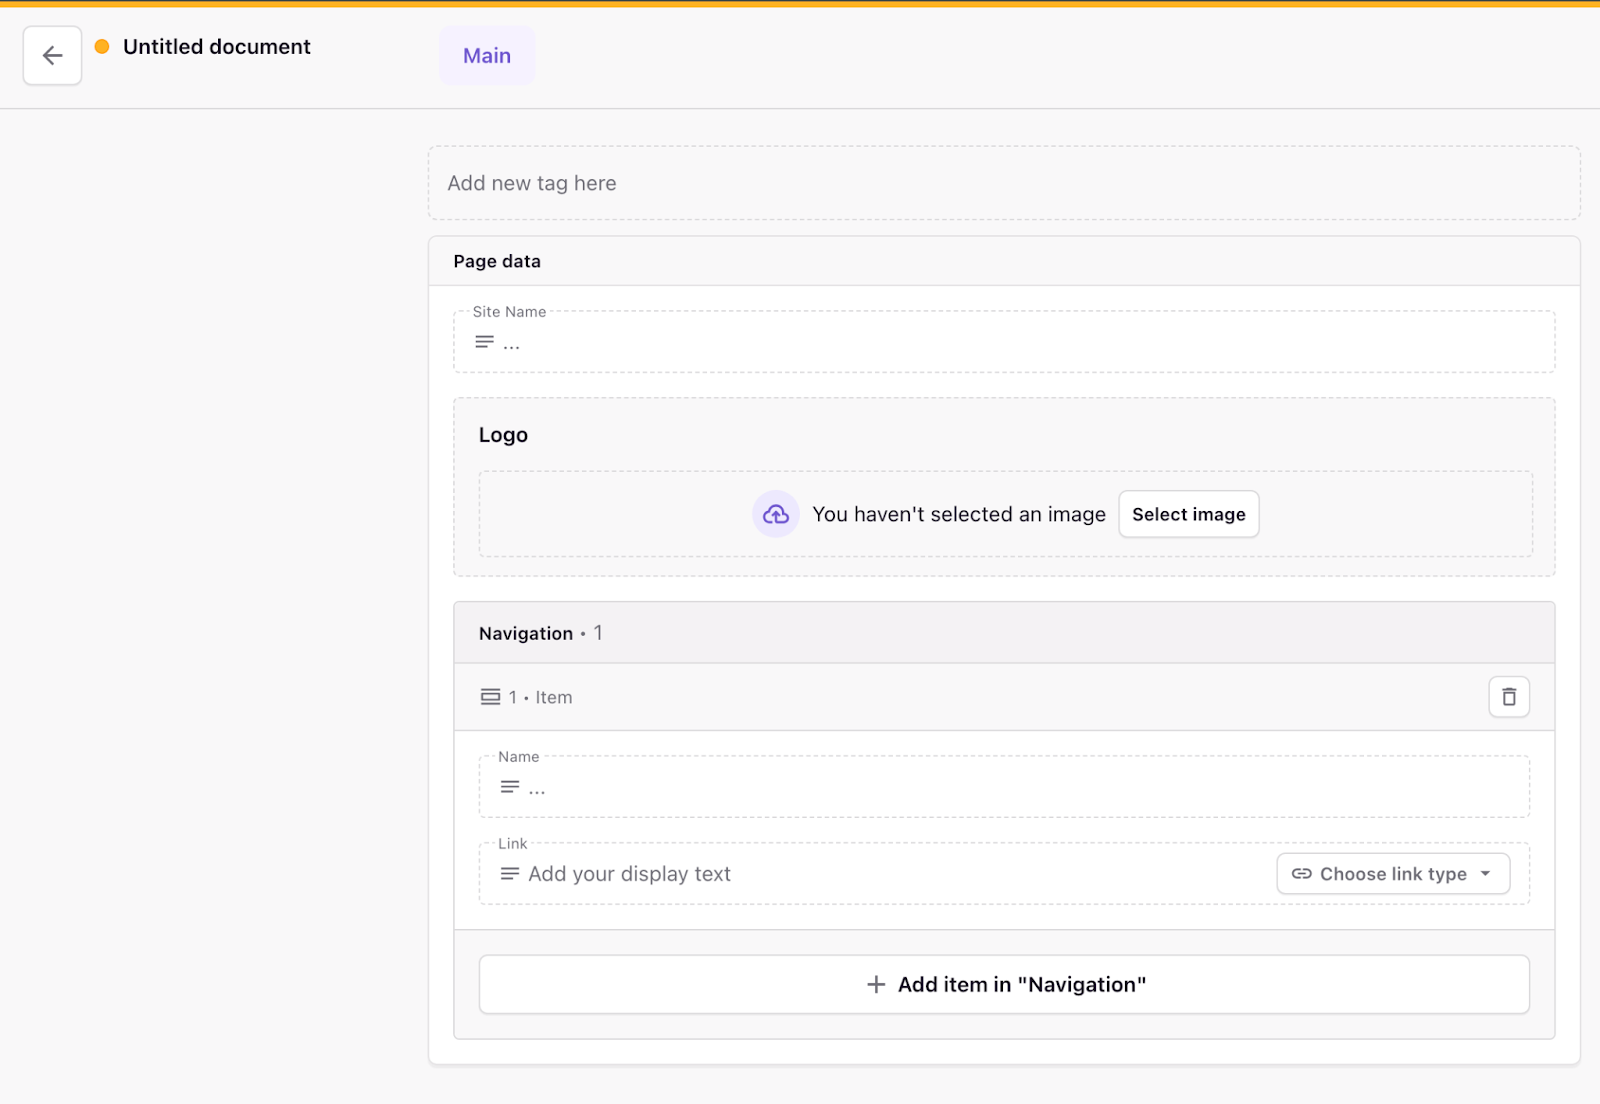
Click on CommonData, the empty common data will look like this:
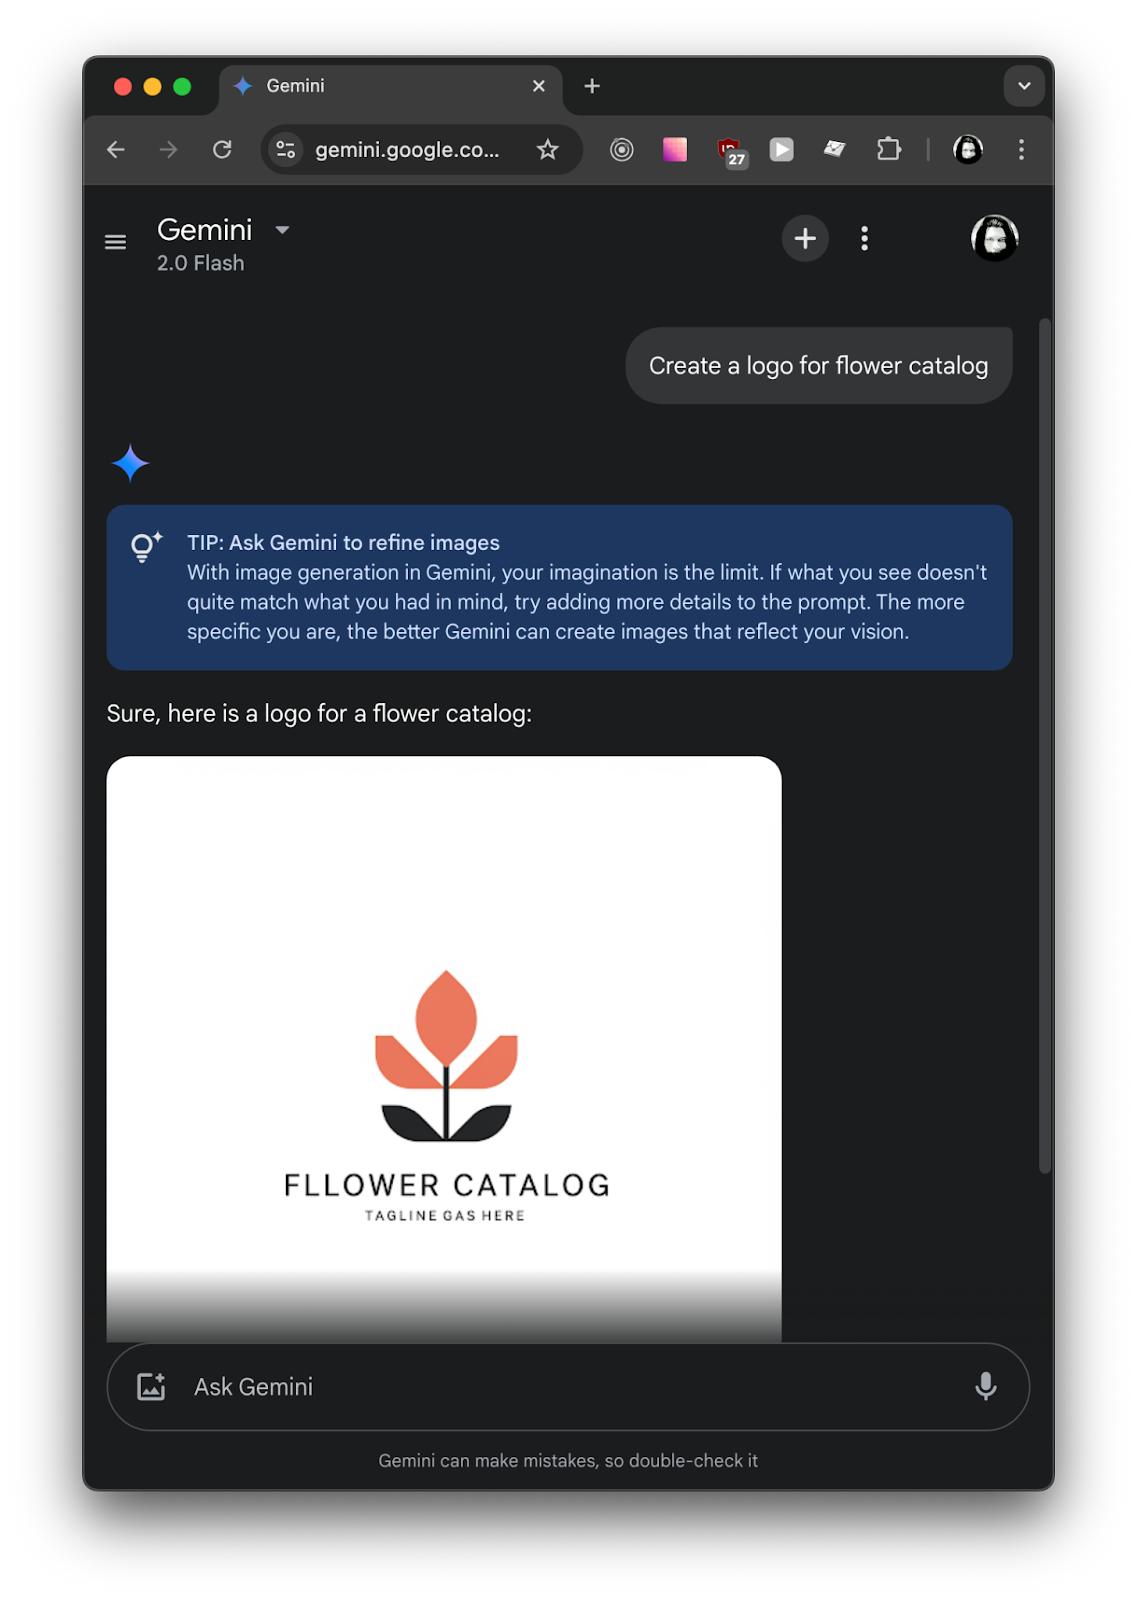
Here, We used Gemini to create a beautiful logo, and I think it has done a great job!
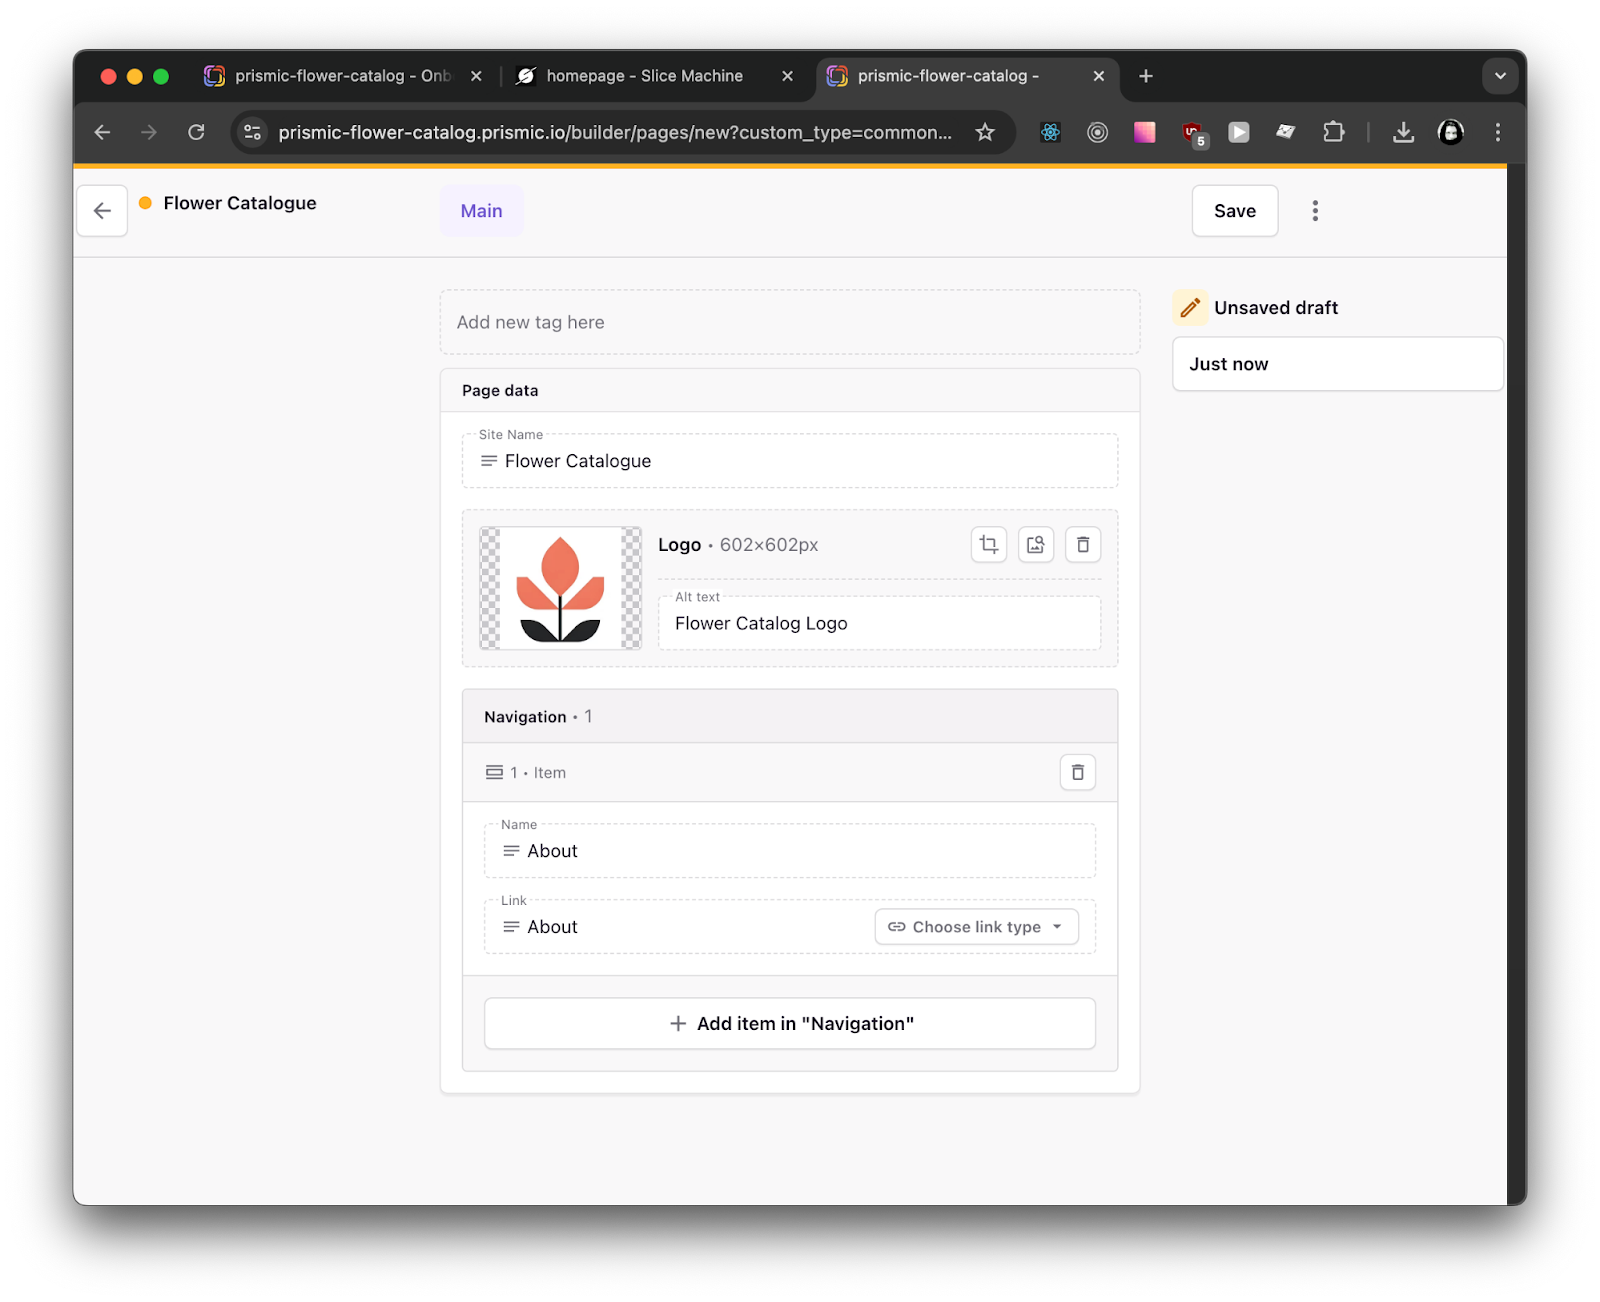
After populating the content:
Once you are done populating the data, you can save and publish to production via GUI.

Styling the Layout
Usually a website is divided into different sections. We can create a common wrapper for sections and use them in all the slices. So create a file src/components/Container.tsx and paste following code in this file:
type ContainerProps = {
 htmlTag?: React.ElementType;
 className?: string;
 children: React.ReactNode;
};
function Container({
 children,
 htmlTag: Tag = 'section',
 className,
 ...restProps
}: ContainerProps) {
 return (
   <Tag
     className={`px-4 py-10 md:py-14 xl:px-6 lg:py-16 ${className}`}
     {...restProps}
   >
     <div className="mx-auto w-full max-w-6xl">{children}</div>
   </Tag>
 );
}
export default Container;
We will need to add the header and footer first before coding the page. So create files under src/components/Header.tsx and src/components/Footer.tsx
We will use the data populated in CommonData here. Head back to your local Slicemachine and open CommonData. On the top right, you'll see a Show Code Snippets toggle. Enabling this will display all the necessary code snippets for individual fields, using Prismic's recommended components.
We will use above code snippets in our header and footer:
Header.tsx
import React from 'react';
import { createClient } from '@/prismicio';
import { PrismicNextImage, PrismicNextLink } from '@prismicio/next';
import Container from './Container';
import Link from 'next/link';
async function Header() {
 const client = createClient();
 const { data } = await client.getSingle('commondata');
 return (
   <Container htmlTag="header" className="py-2 md:pb-6 lg:py-4 bg-white">
     <div className="flex gap-4 items-center justify-between sm:flex-row flex-col">
       <div className="flex place-items-center gap-2">
         <Link href="/">
           <PrismicNextImage field={data.logo} height={50} />
           {data.site_name}
         </Link>
       </div>
       <nav>
         <ul className="flex">
           {data.navigation.map((item) => (
             <li key={item.name}>
               <PrismicNextLink field={item.link} className="p-3">
                 {item.name}
               </PrismicNextLink>
             </li>
           ))}
         </ul>
       </nav>
     </div>
   </Container>
 );
}
export default Header;
Footer.tsx
import React from 'react';
import { createClient } from '@/prismicio';
import { PrismicNextImage, PrismicNextLink } from '@prismicio/next';
import Link from 'next/link';
import Container from './Container';
async function Footer() {
const client = createClient();
const { data } = await client.getSingle('commondata');
return (
<Container htmlTag="footer">
<div className="flex sm:flex-row flex-col justify-between items-center gap-6">
<Link href="/">
<PrismicNextImage field={data.logo} height={50} />
</Link>
<p className="text-sm">
© {new Date().getFullYear()} {data.site_name}
</p>
<ul className="flex">
{data.navigation.map(({ name, link }) => (
<li key={name} className="p-2">
<PrismicNextLink field={link} />
</li>
))}
</ul>
</div>
</Container>
);
}
export default Footer;
NOTE: createClient is a function provided by Prismic themselves. We need to use createClient to fetch data from the Prismic Backend.
Add header and footer in the layout.tsx file (Completely NextJS thing, nothing to do with Prismic)
export default function RootLayout({
 children,
}: Readonly<{
 children: React.ReactNode;
}>) {
 return (
   <html lang="en">
     <body
       className={`${geistSans.variable} ${geistMono.variable} antialiased`}
     >
       <Header />
       {children}
       <Footer />
     </body>
   </html>
 );
}
Replace the code in global.css file with following css code:
@tailwind base;
@tailwind components;
@tailwind utilities;
body {
 @apply text-slate-600;
}
Once done, the website should look like this:
Creating a Page Type
We need to create page types that will use slices to generate actual web page content. To do this, go to Page Types and create a new page.
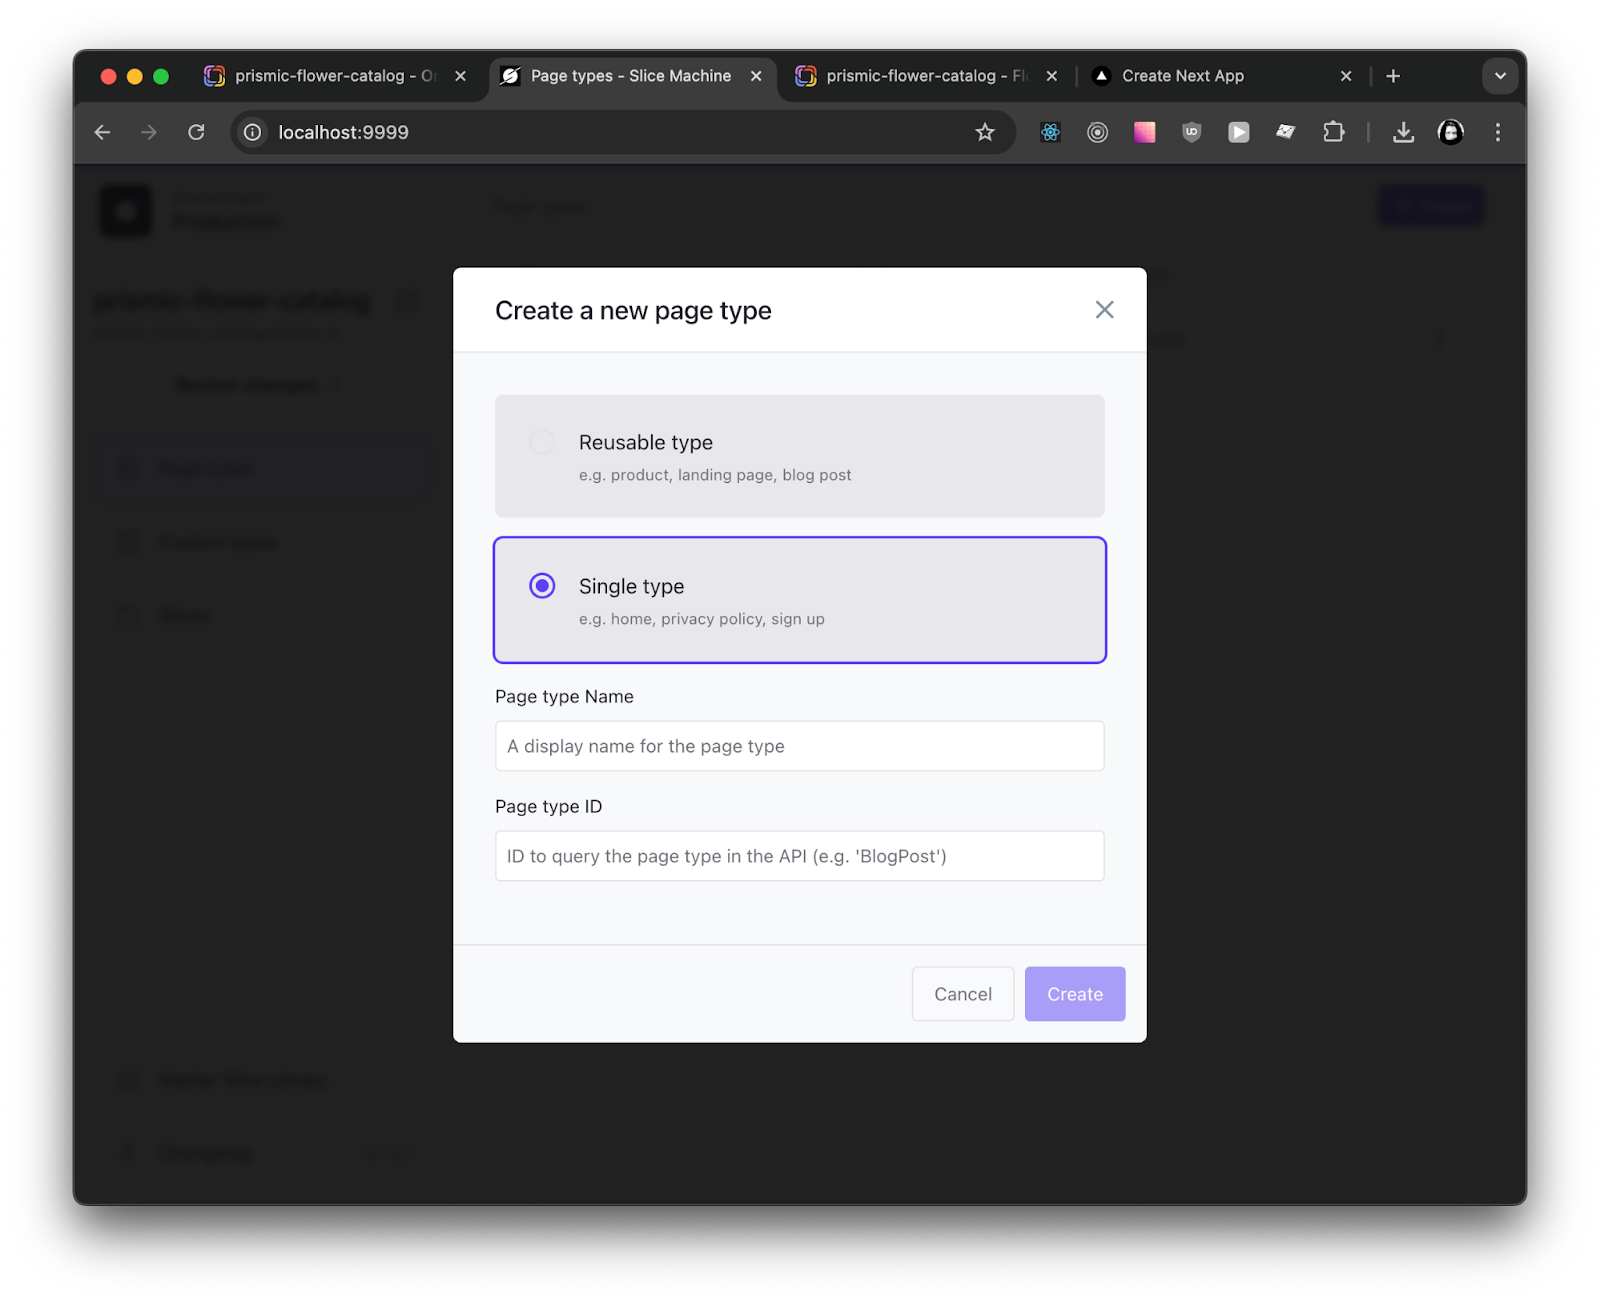
Page can be of reusable type (For example say Blog post / Plan details) or it can be of single type. Since there will be only one home page, we will go with Single Type. It will look like this when new:
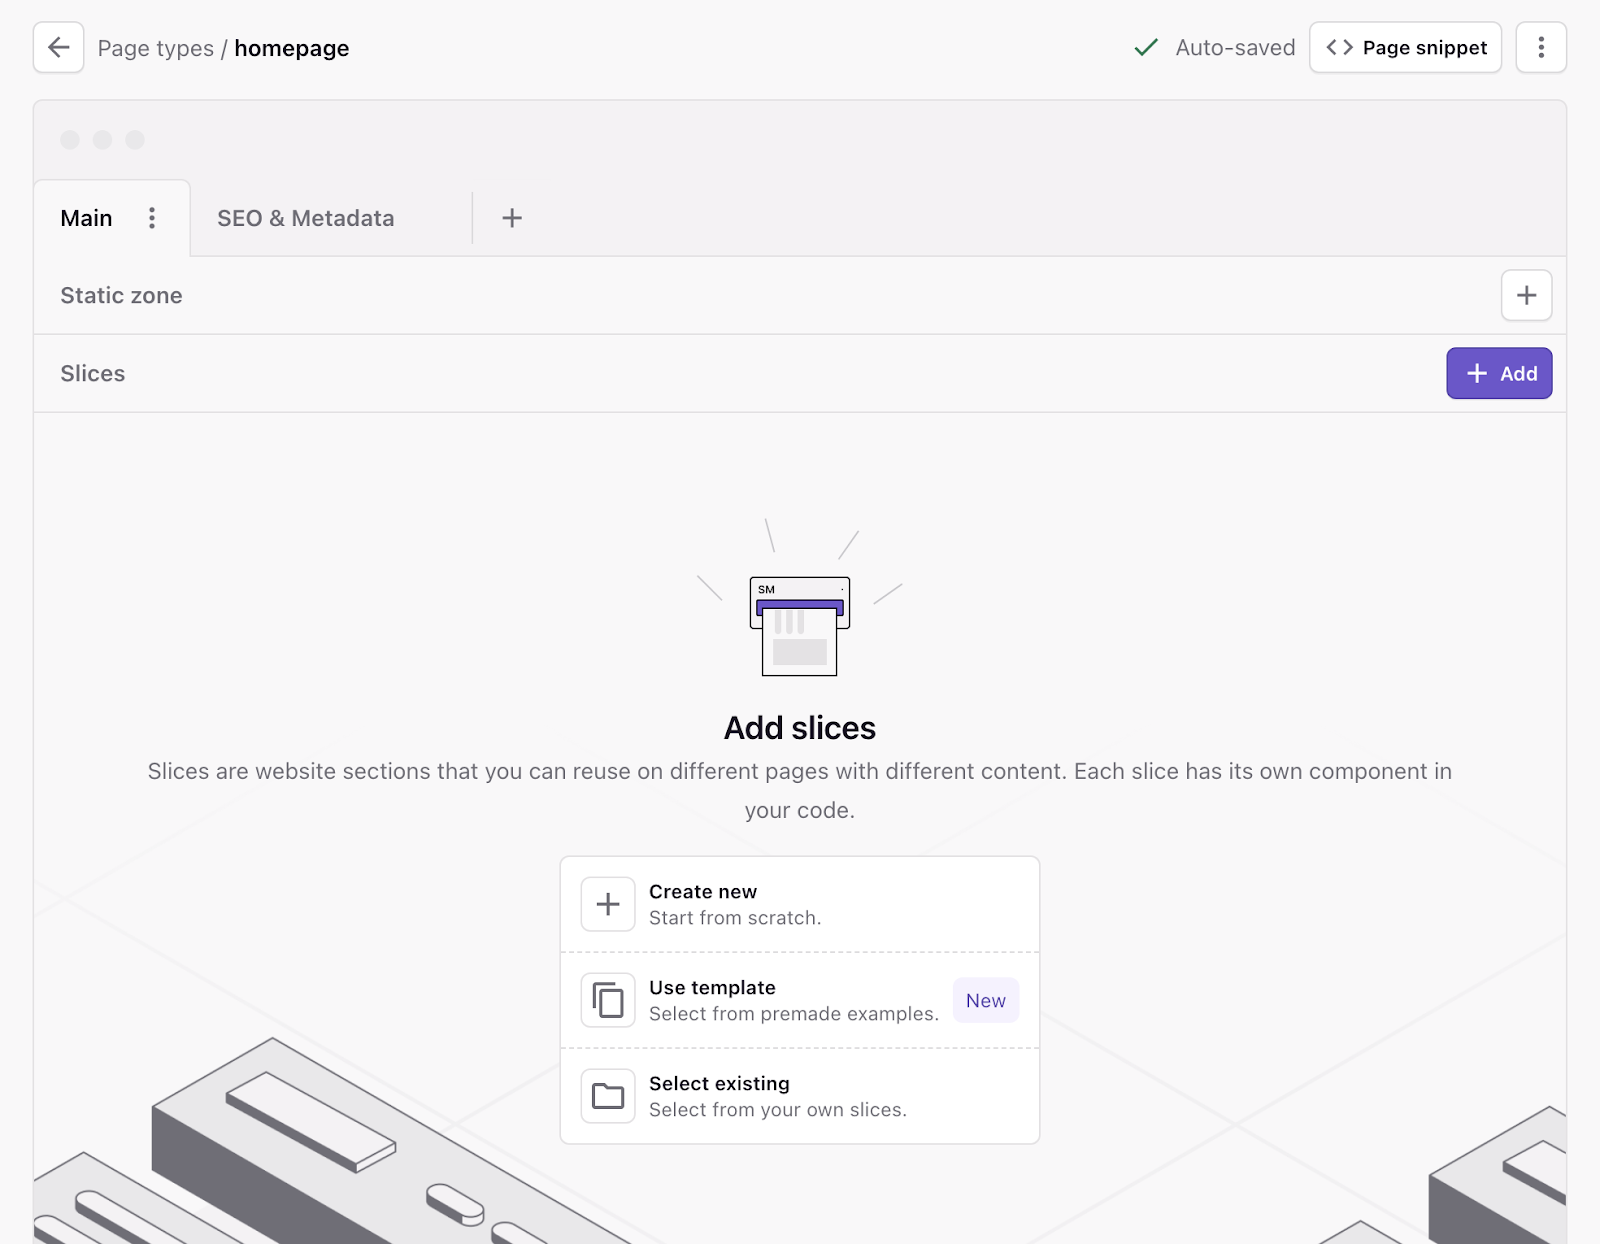
In the above UI, there are two fields, Static Zone - it is the data specific to this page only, and slice zone, we can use the slices we create above here.
Adding Single Slices
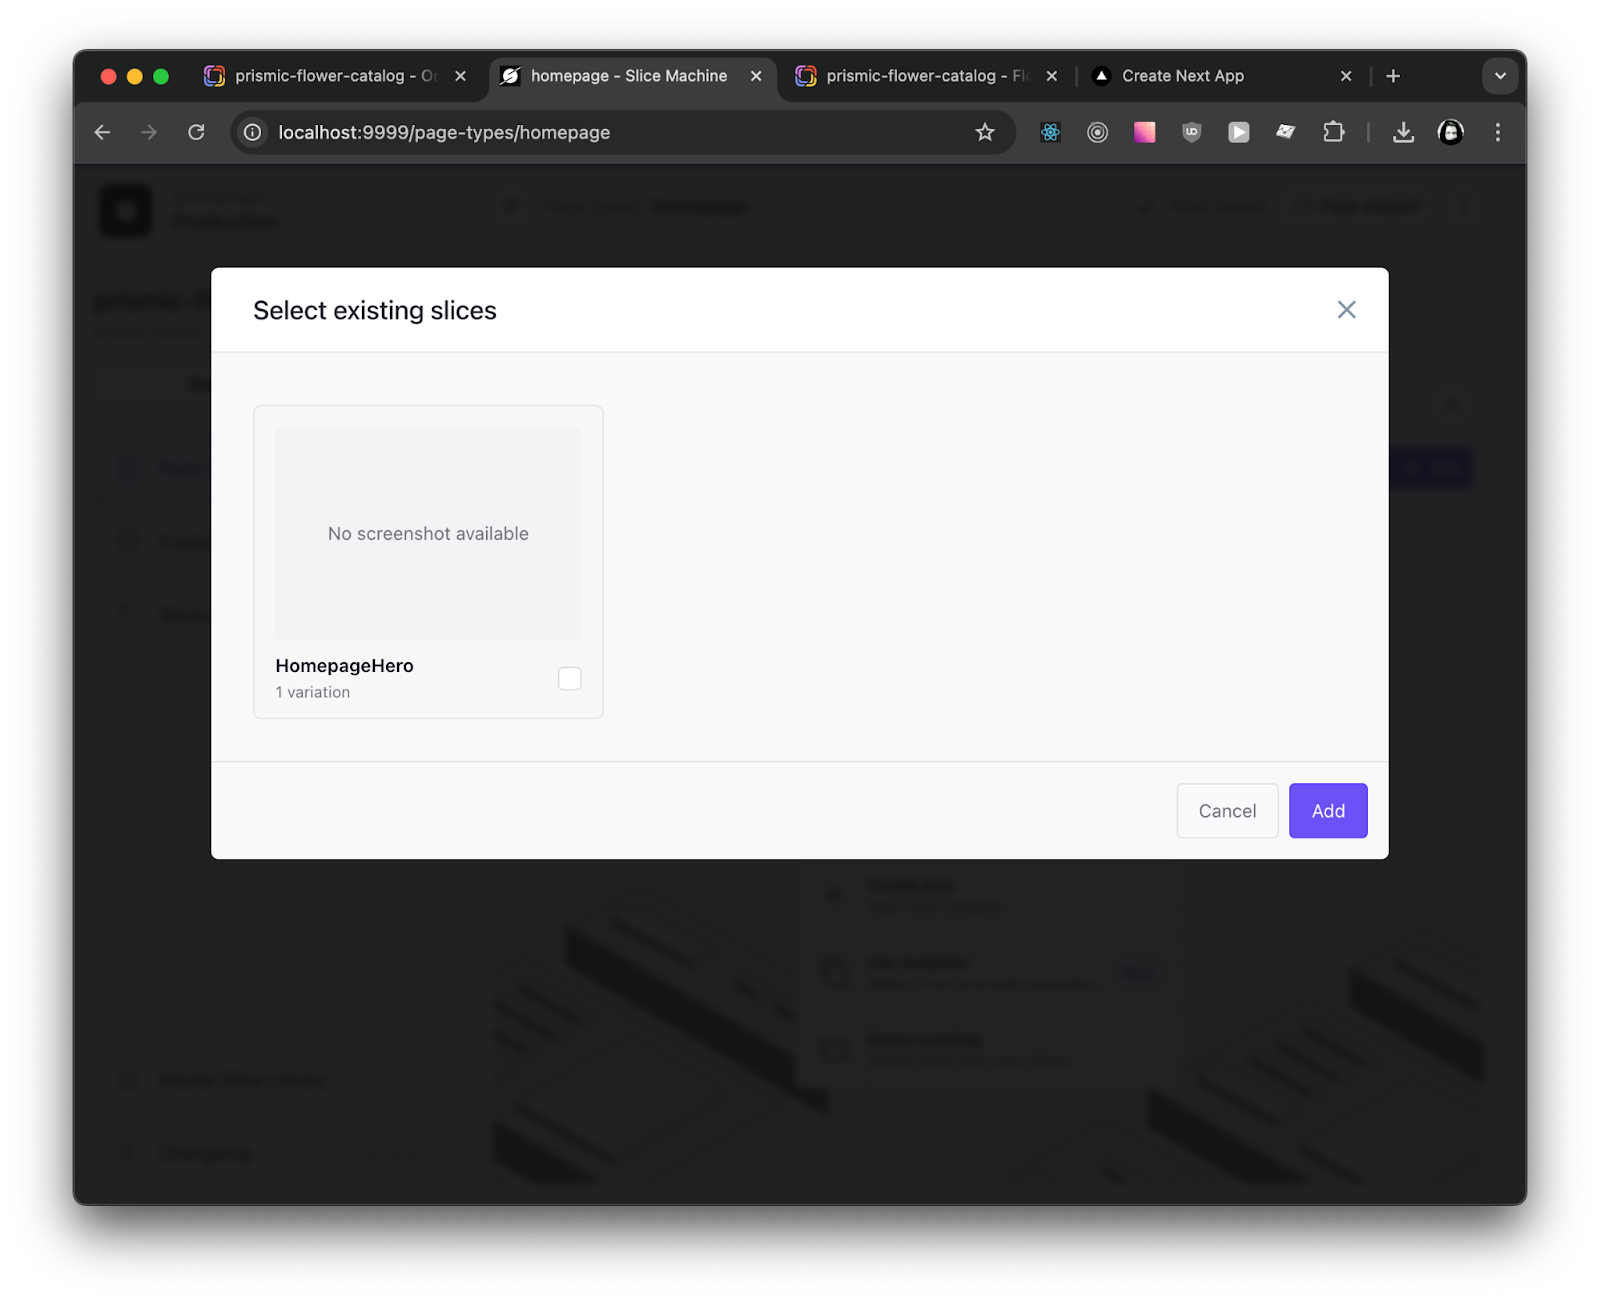
We will add the hero section to our homepage. Follow the same process: review the changes and push them to the Prismic repository via the UI. By default, Prismic provides fields for SEO and meta in the second tab. However, if we need additional fields for the meta, we can add them.
Populating Data in Prismic CMS -2
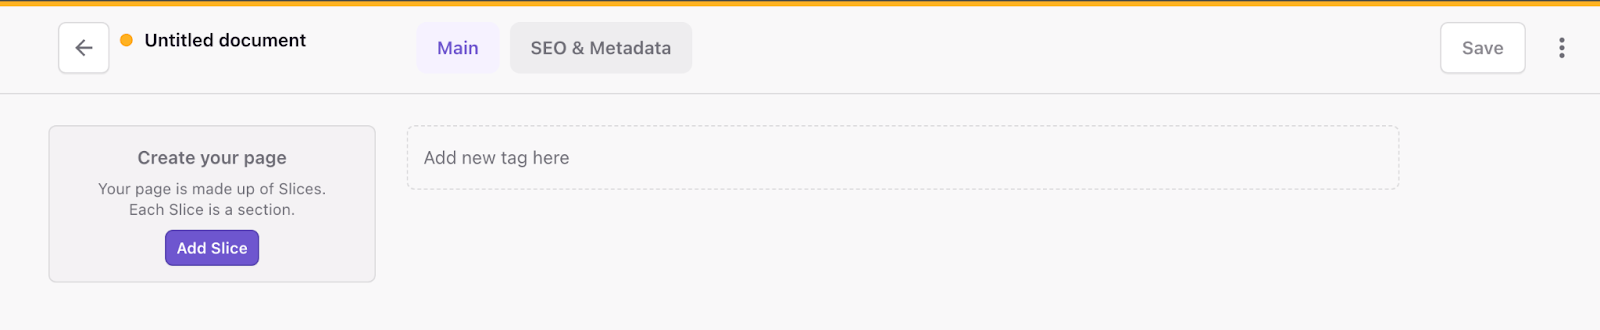
We will add content in the Home Page. Head to the Prismic CMS dashboard via the link in the slice machine. Click on Create a new page. This time it will show option of homepage also:
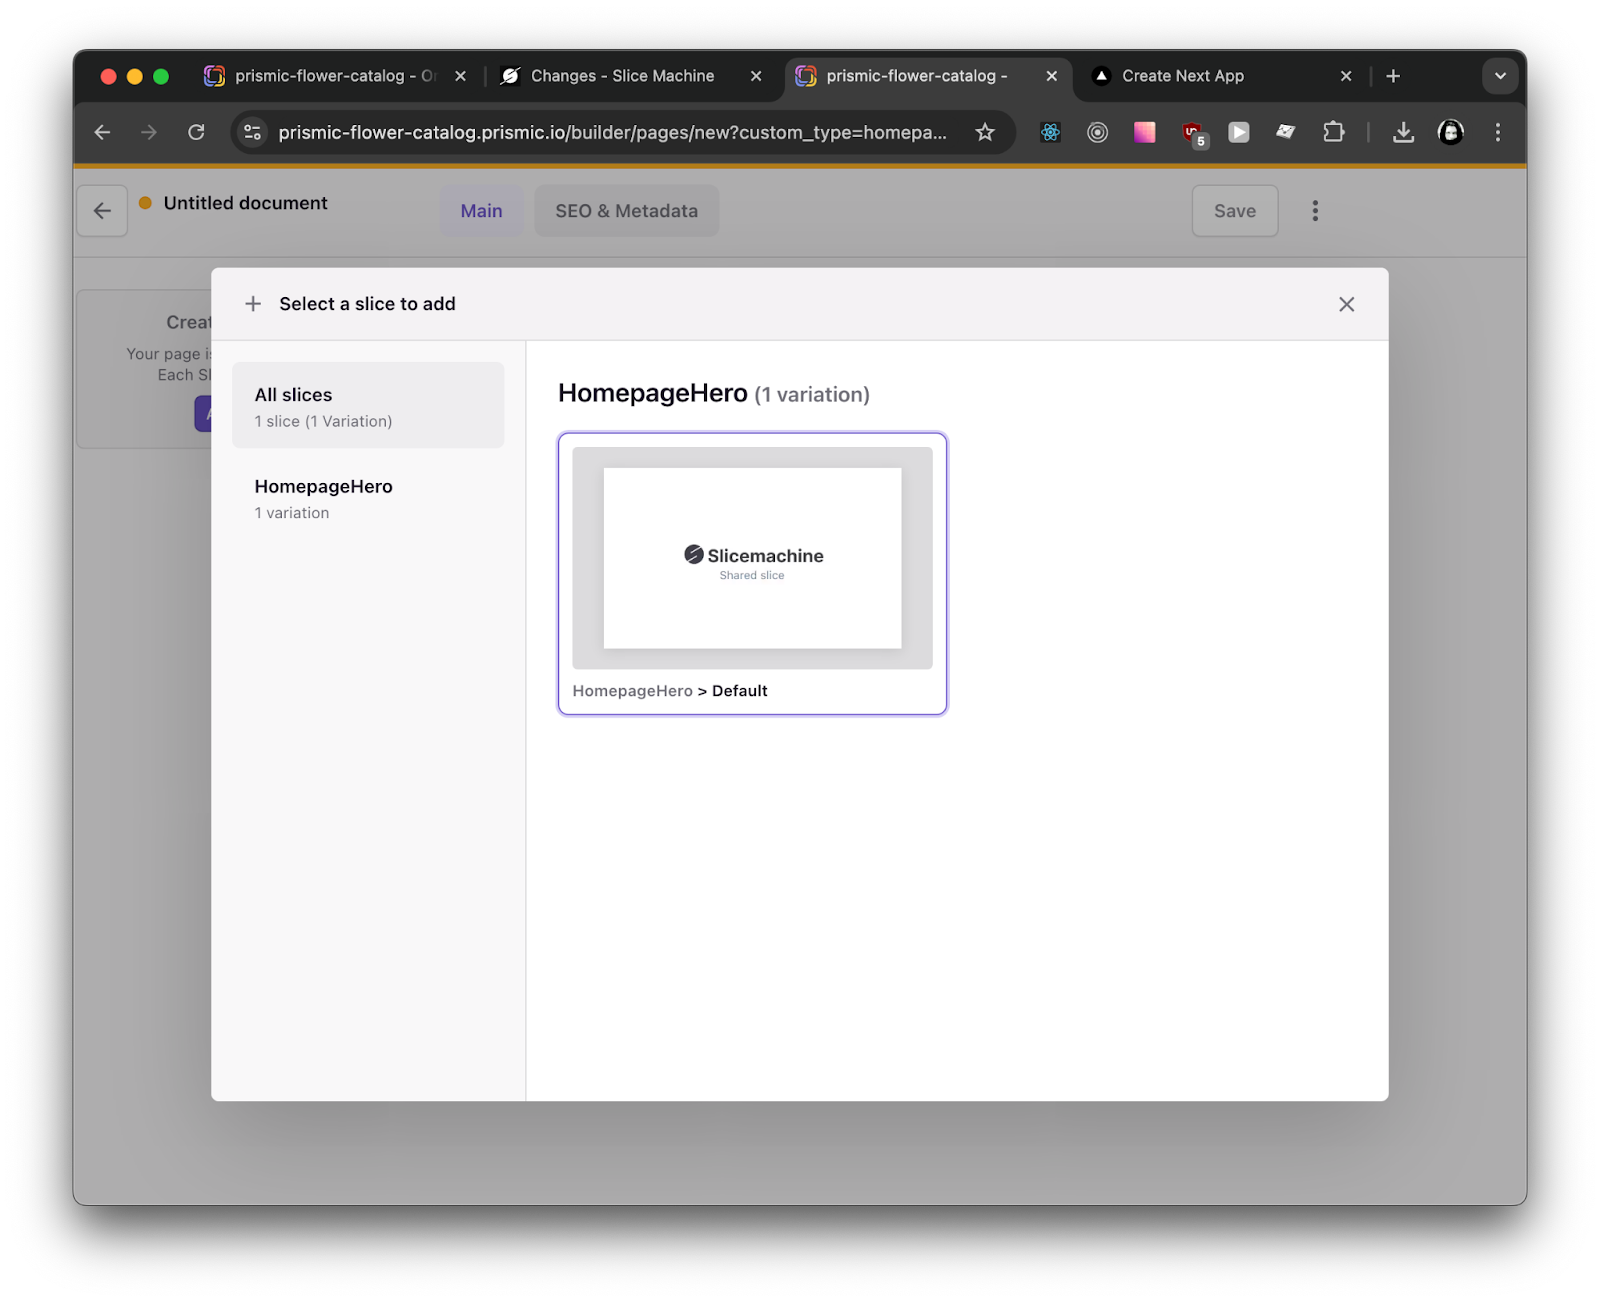
The page is empty right now. You can add slice from left:
After adding HeroSection and its content
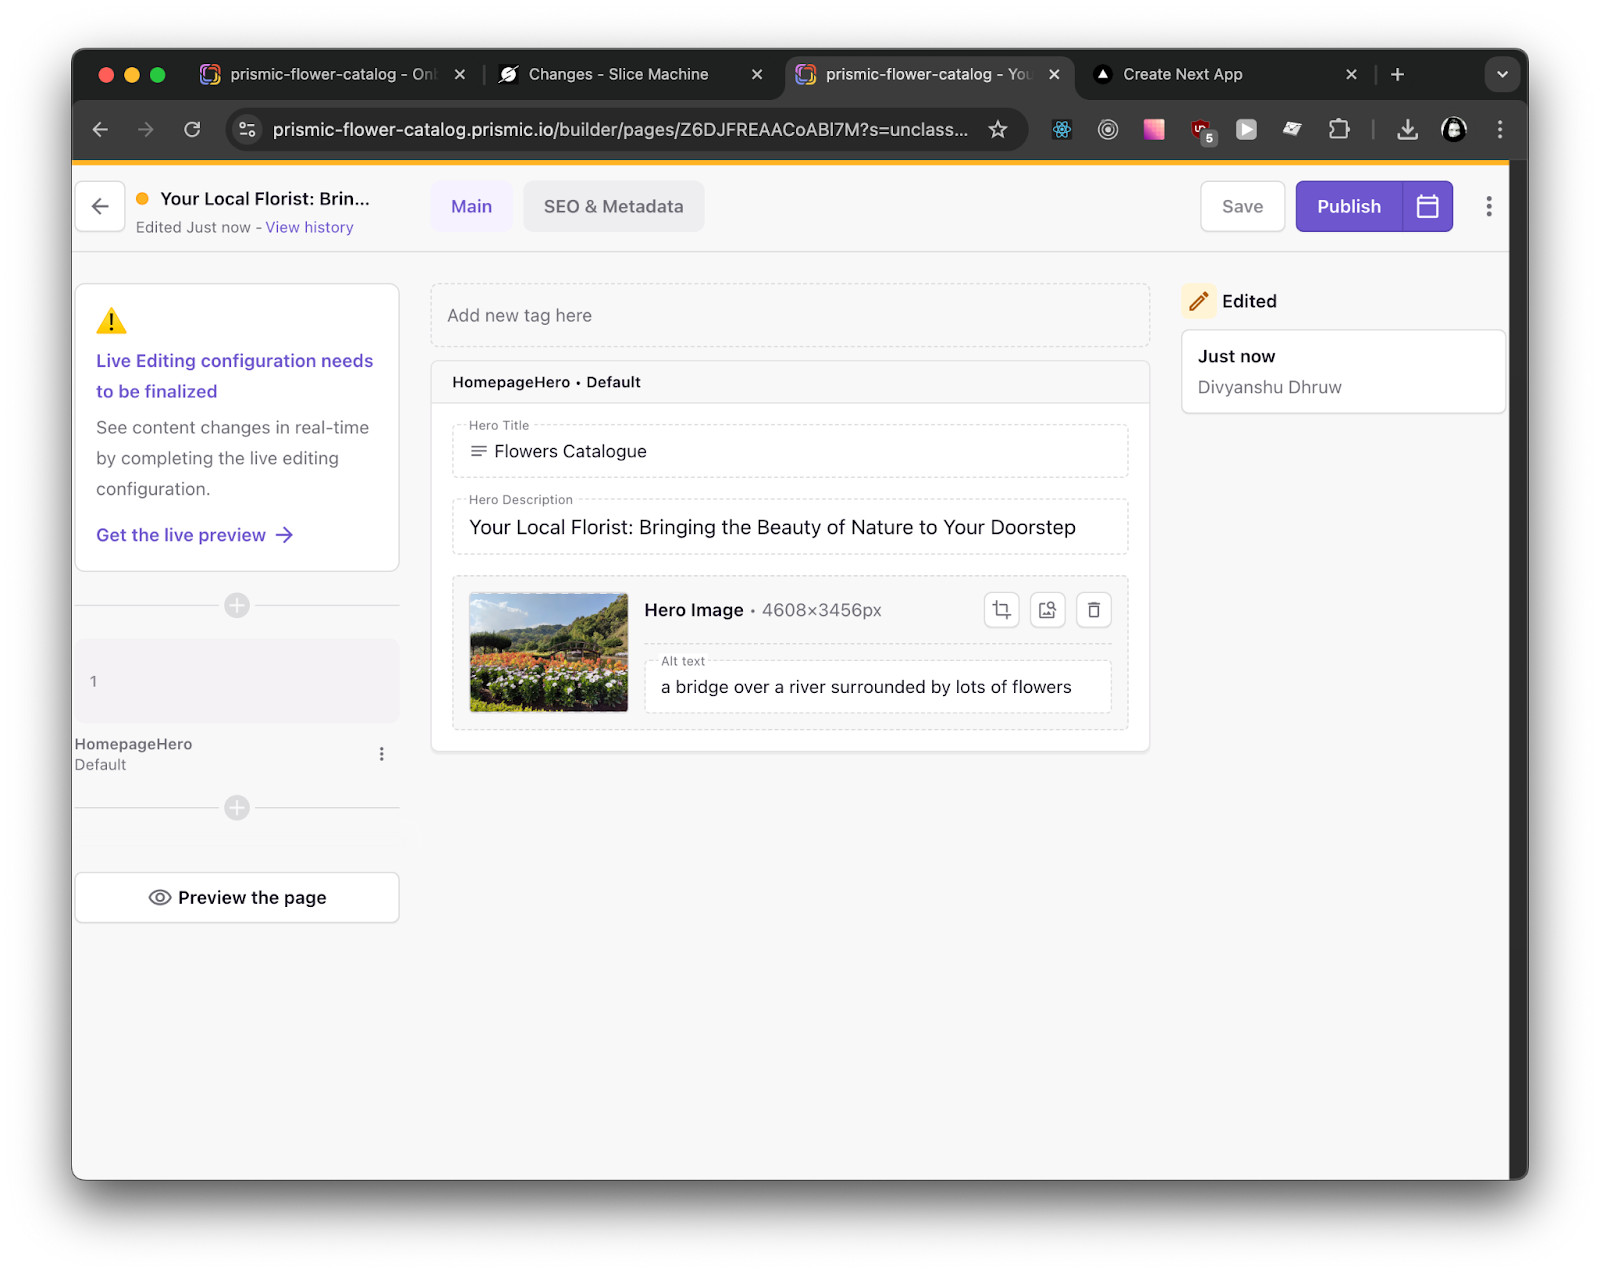
Once done, click on save and then publish it.
Styling Page and Using CMS Data
Once all the data is Populated in the Prismic CMS, head back to slice machine in localhost. Go to Page types and click the page. There is a button on top which will show Page snippet:
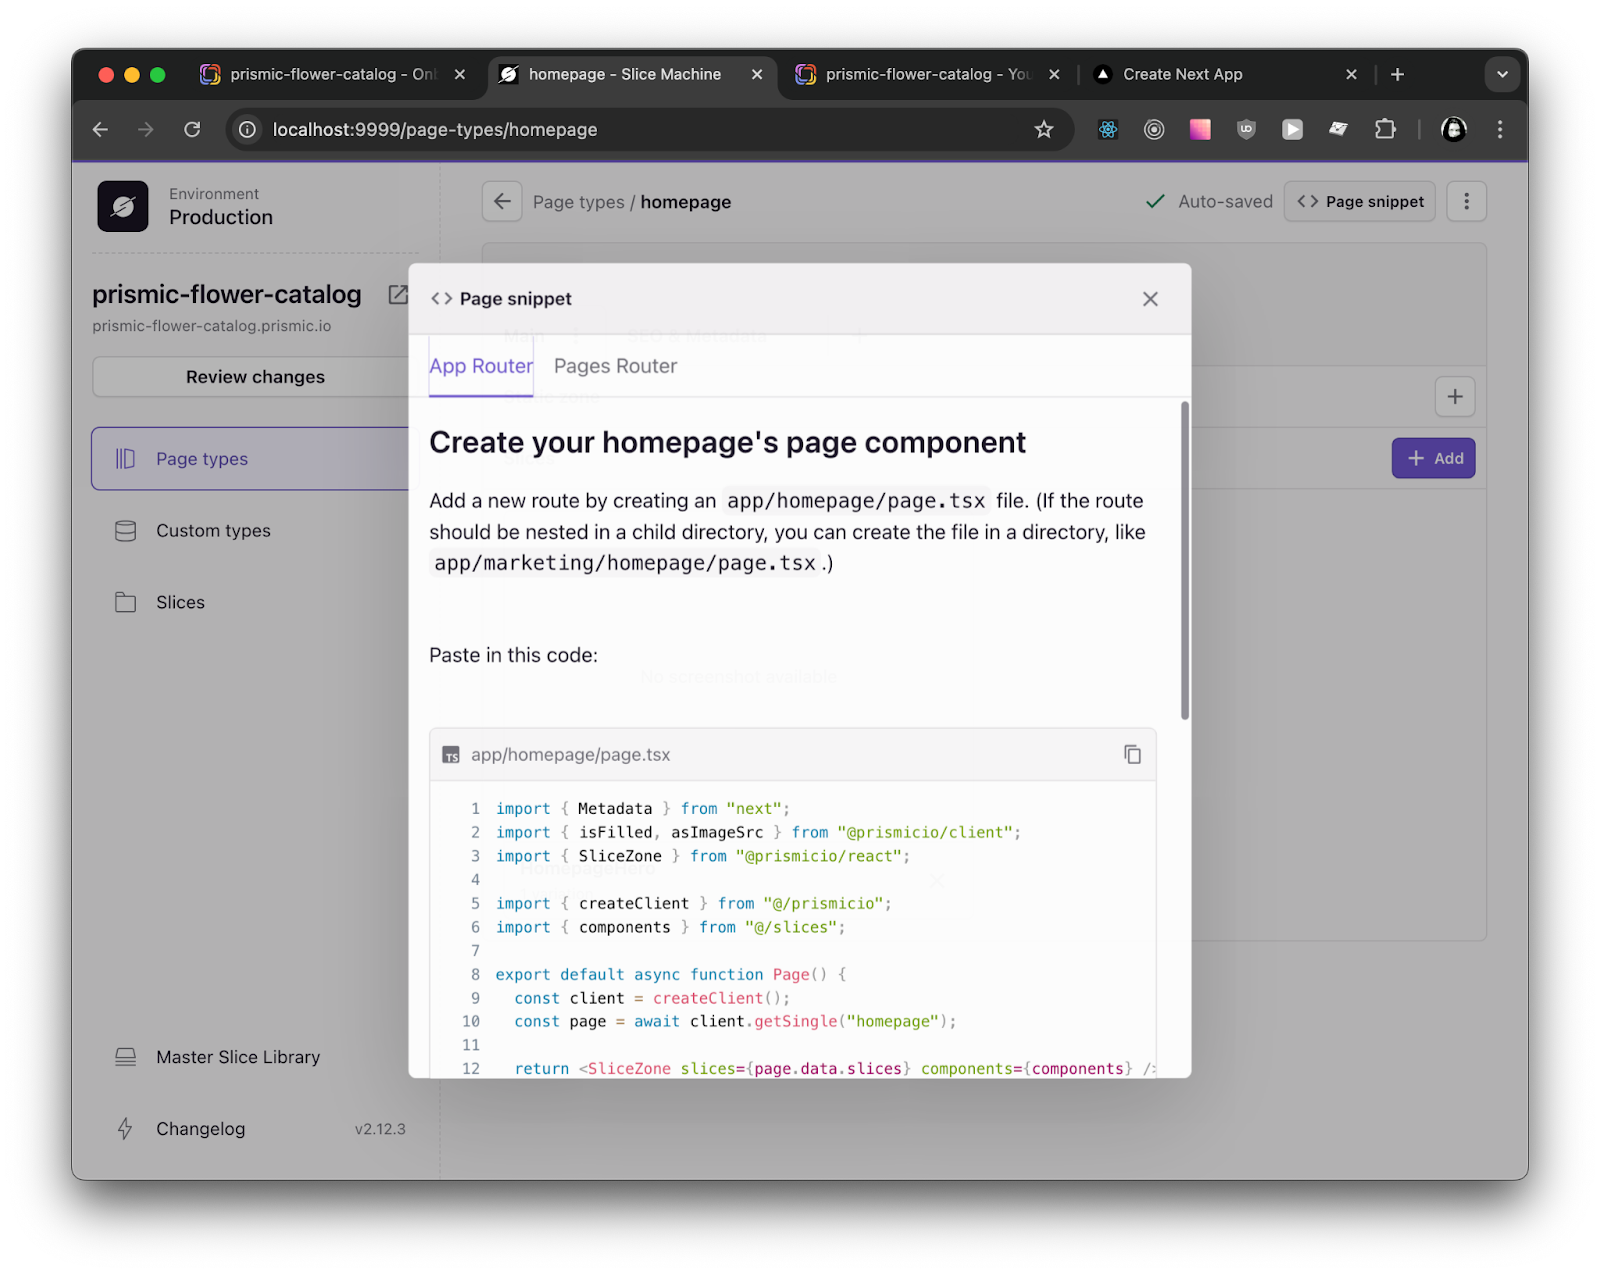
You can choose to follow the instructions given for file creation, or decide by yourself which page you want to render. Since we are creating homepage, we will not follow instructions and make change in the default homepage of NextJS src/app/page.tsx
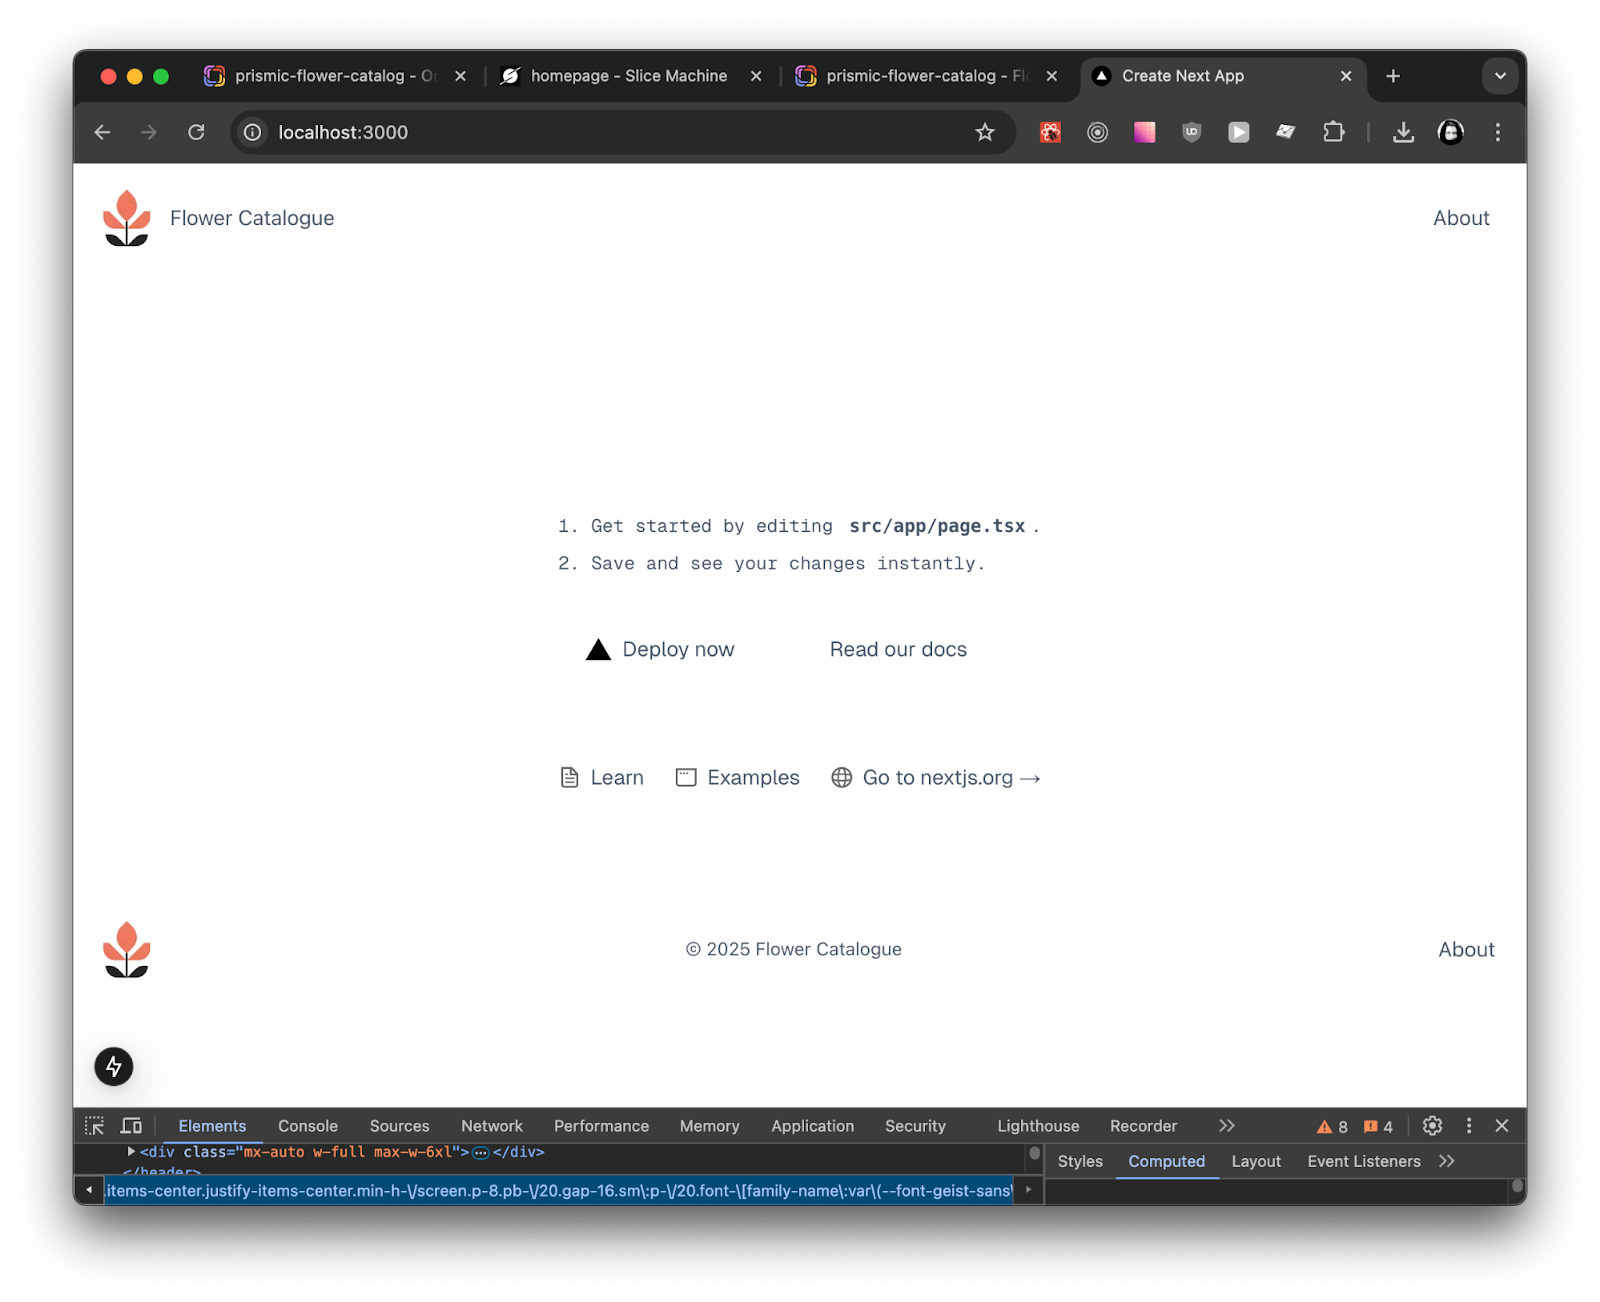
The page will look like this:
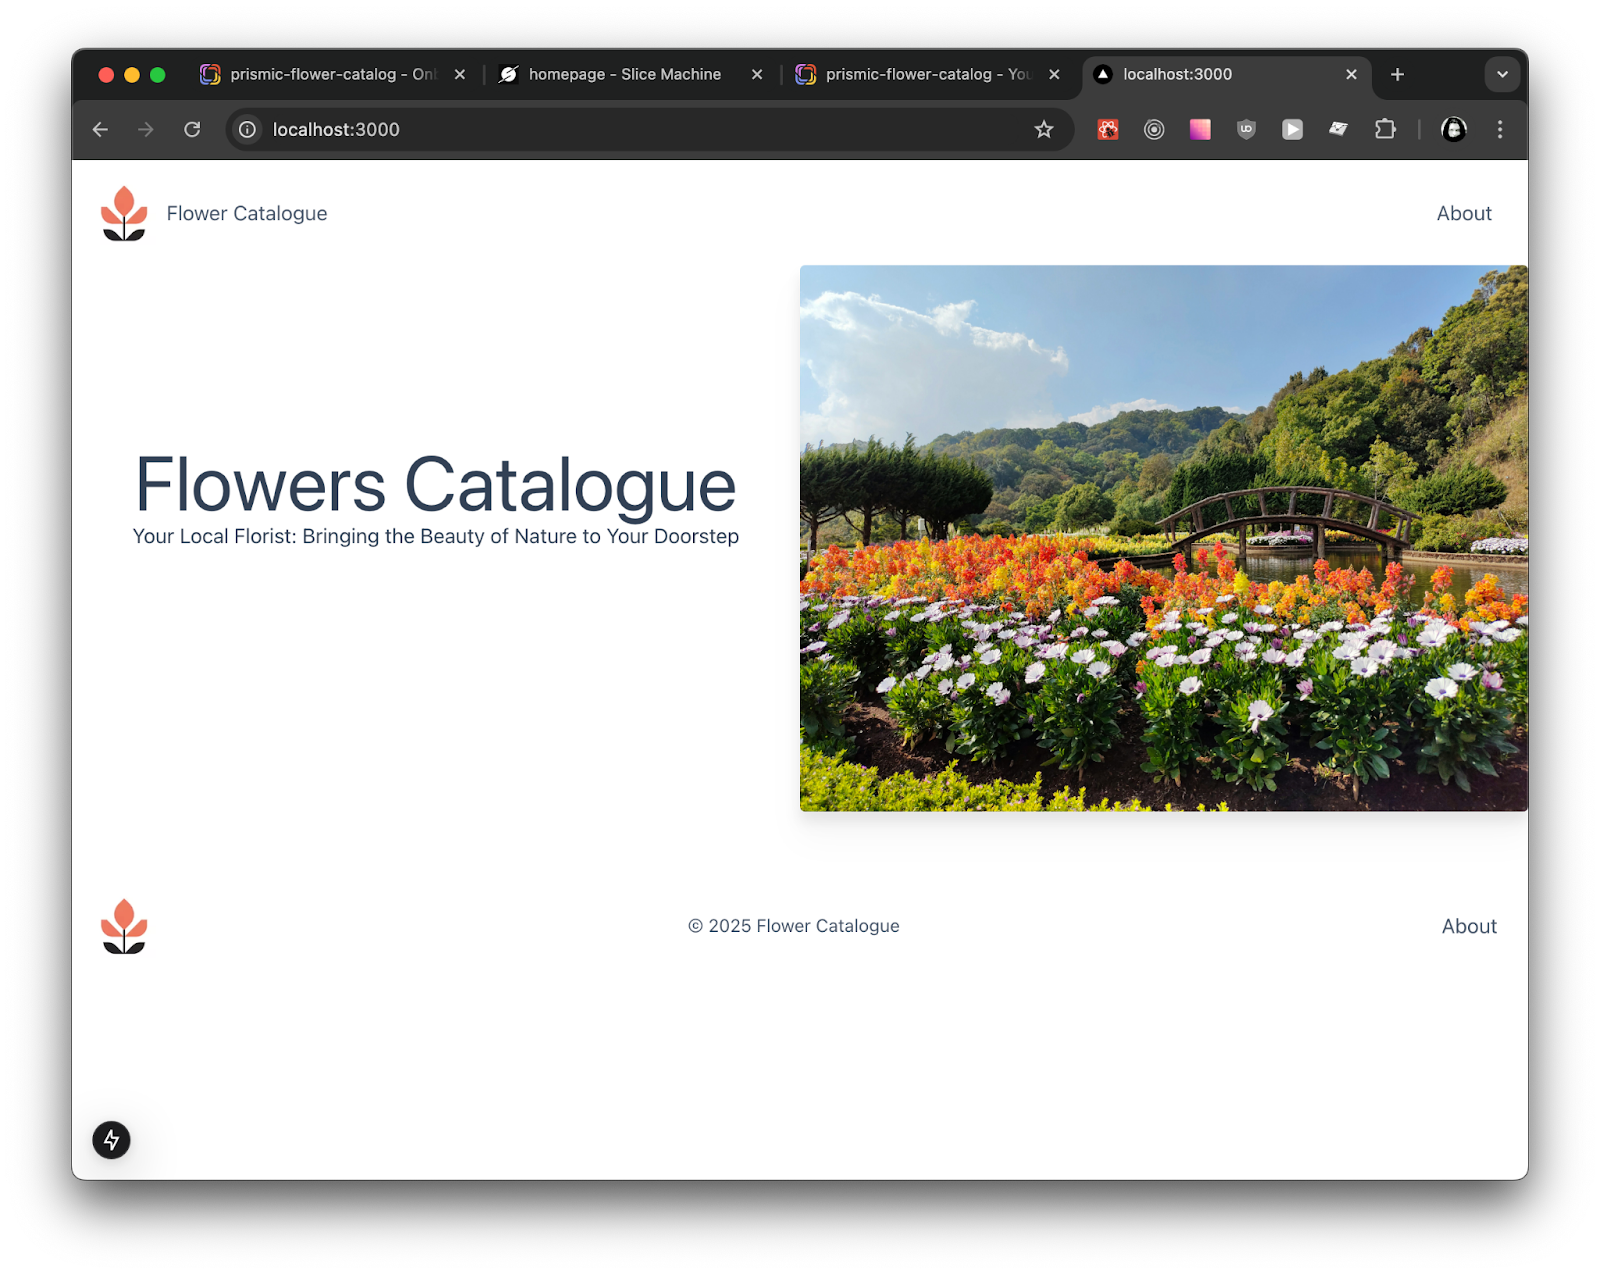
We now have the Header and Footer, which are using data from the Prismic CMS, along with the homepage that incorporates the Hero Section slice.
By this stage, the fundamentals of our website are in place. Now, we need to develop the remaining slices and integrate them into the site.
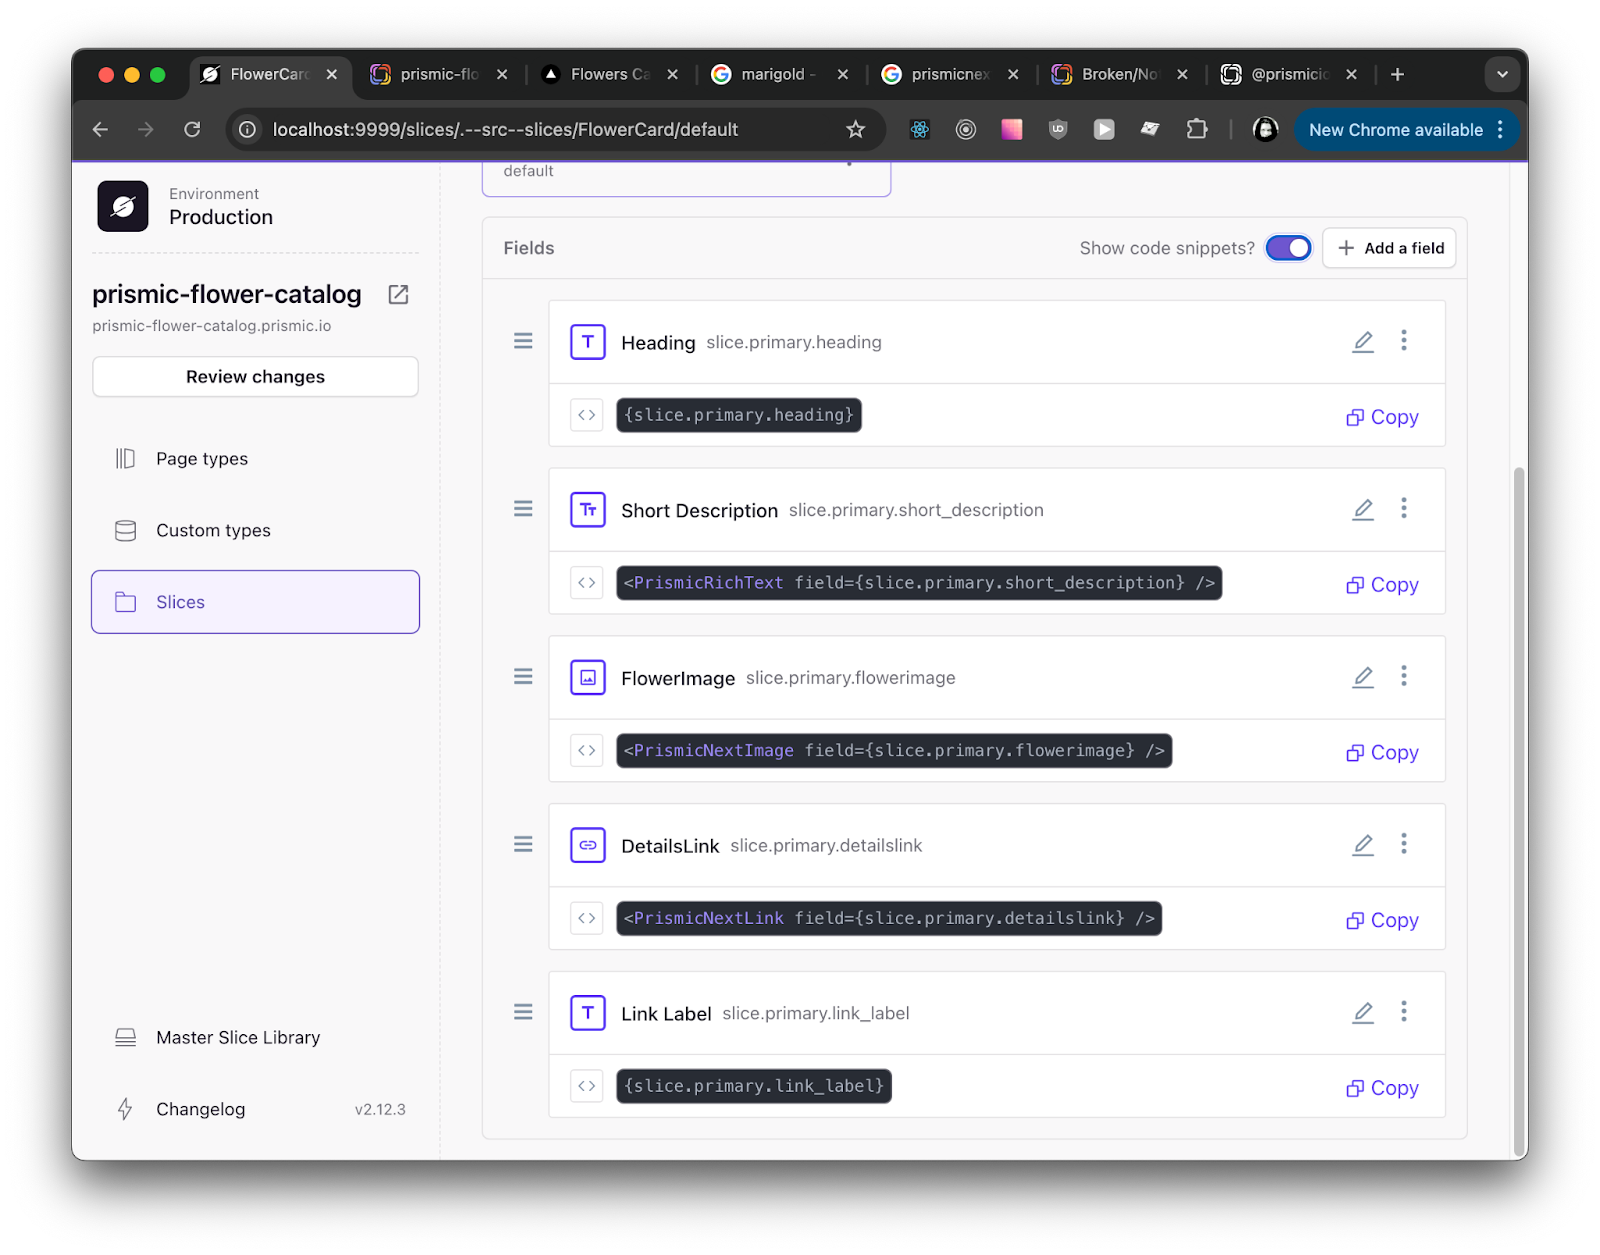
Creating Flower Card Slice
Here are the fields added for the Flower Card slice. You can refer to the previous sections for a detailed step-by-step guide on creating a slice.
Paste below code in src/slices/FlowerCard/index.tsx :
import { FC } from 'react';
import { Content } from '@prismicio/client';
import { PrismicRichText, SliceComponentProps } from '@prismicio/react';
import { PrismicNextImage, PrismicNextLink } from '@prismicio/next';
import Container from '@/components/Container';
/**
* Props for `FlowerCard`.
*/
export type FlowerCardProps = SliceComponentProps<Content.FlowerCardSlice>;
/**
* Component for "FlowerCard" Slices.
*/
const FlowerCard: FC<FlowerCardProps> = ({ slice }) => {
 return (
   <Container
     data-slice-type={slice.slice_type}
     data-slice-variation={slice.variation}
   >
     <div className="grid grid-cols-3 max-w-screen-lg m-auto gap-10 my-10 place-items-center">
       <PrismicNextImage
         field={slice.primary.flowerimage}
         className="w-fit rounded shadow-2xl"
       />
       <div className="grid grid-cols-1 gap-5 col-span-2">
         <h2 className="text-2xl">{slice.primary.heading}</h2>
         <PrismicRichText field={slice.primary.short_description} />
         <PrismicNextLink
           field={slice.primary.detailslink}
           className=" w-fit bg-red-300 hover:bg-red-400 transition-colors duration-200 ease-in-out py-3 px-8 rounded-full text-white font-bold"
         >
           {slice.primary.link_label}
         </PrismicNextLink>
       </div>
     </div>
   </Container>
 );
};
export default FlowerCard;
Creating Flower Details Slice
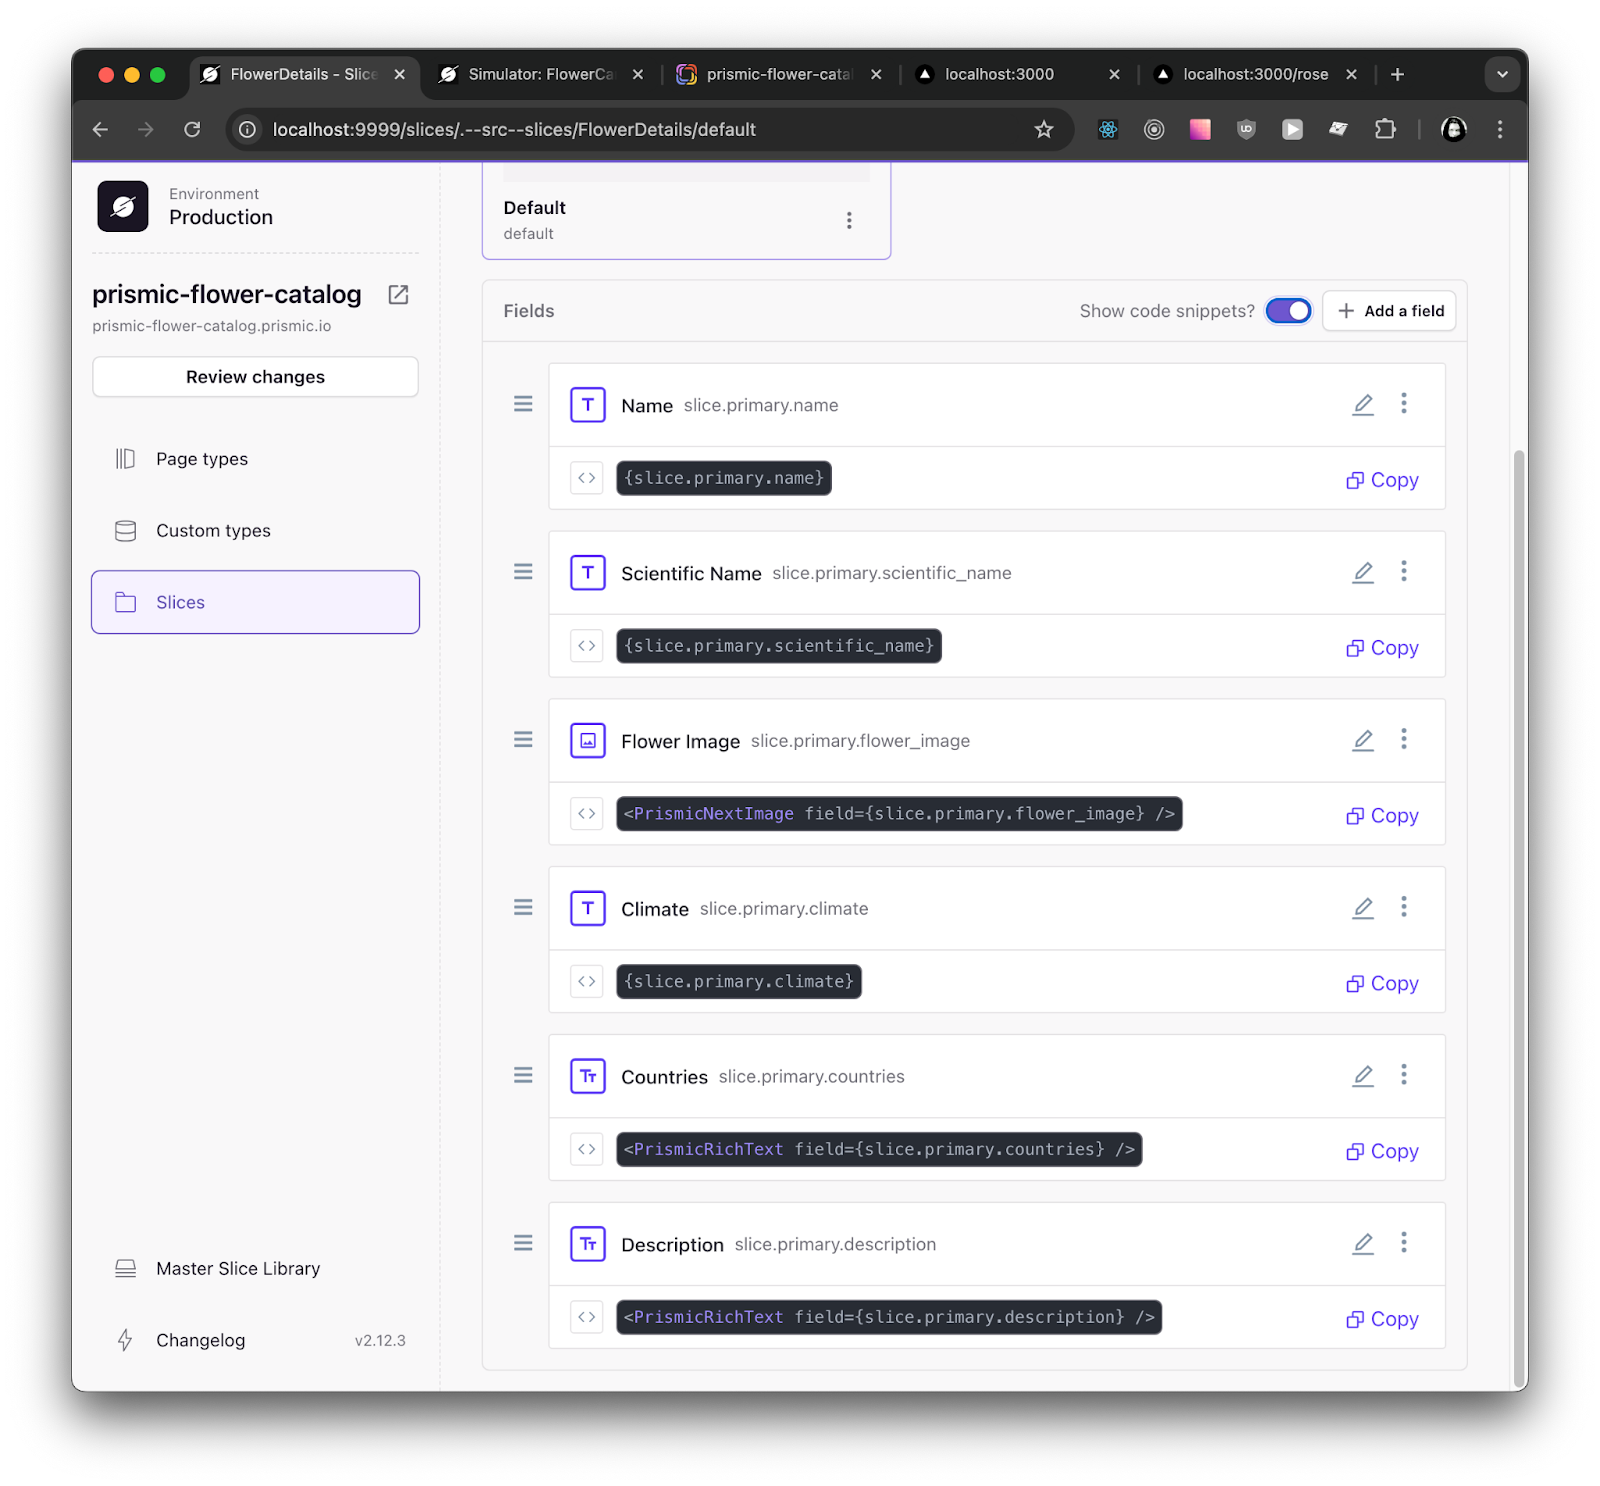
Paste following code in src/slices/FlowerDetails/index.tsx :
import { FC } from 'react';
import { Content } from '@prismicio/client';
import { PrismicRichText, SliceComponentProps } from '@prismicio/react';
import { PrismicNextImage } from '@prismicio/next';
import Container from '@/components/Container';
/**
* Props for `FlowerDetails`.
*/
export type FlowerDetailsProps =
 SliceComponentProps<Content.FlowerDetailsSlice>;
/**
* Component for "FlowerDetails" Slices.
*/
const FlowerDetails: FC<FlowerDetailsProps> = ({ slice }) => {
 return (
   <Container
     data-slice-type={slice.slice_type}
     data-slice-variation={slice.variation}
   >
     <h2 className="text-4xl font-bold py-6">{slice.primary.name}</h2>
     <PrismicNextImage
       field={slice.primary.flower_image}
       className="max-w-xs rounded shadow-xl"
     />
     <div className="py-4 grid grid-cols-1 gap-4">
       <div>
         <b> Scientific Name:</b> {slice.primary.scientific_name}
       </div>
       <div>
         <b> Climate:</b> {slice.primary.climate}
       </div>
       <div>
         <b> Countries:</b>
         <PrismicRichText field={slice.primary.countries} />{' '}
       </div>
       <div>
         <PrismicRichText field={slice.primary.description} />
       </div>
     </div>
   </Container>
 );
};
export default FlowerDetails;
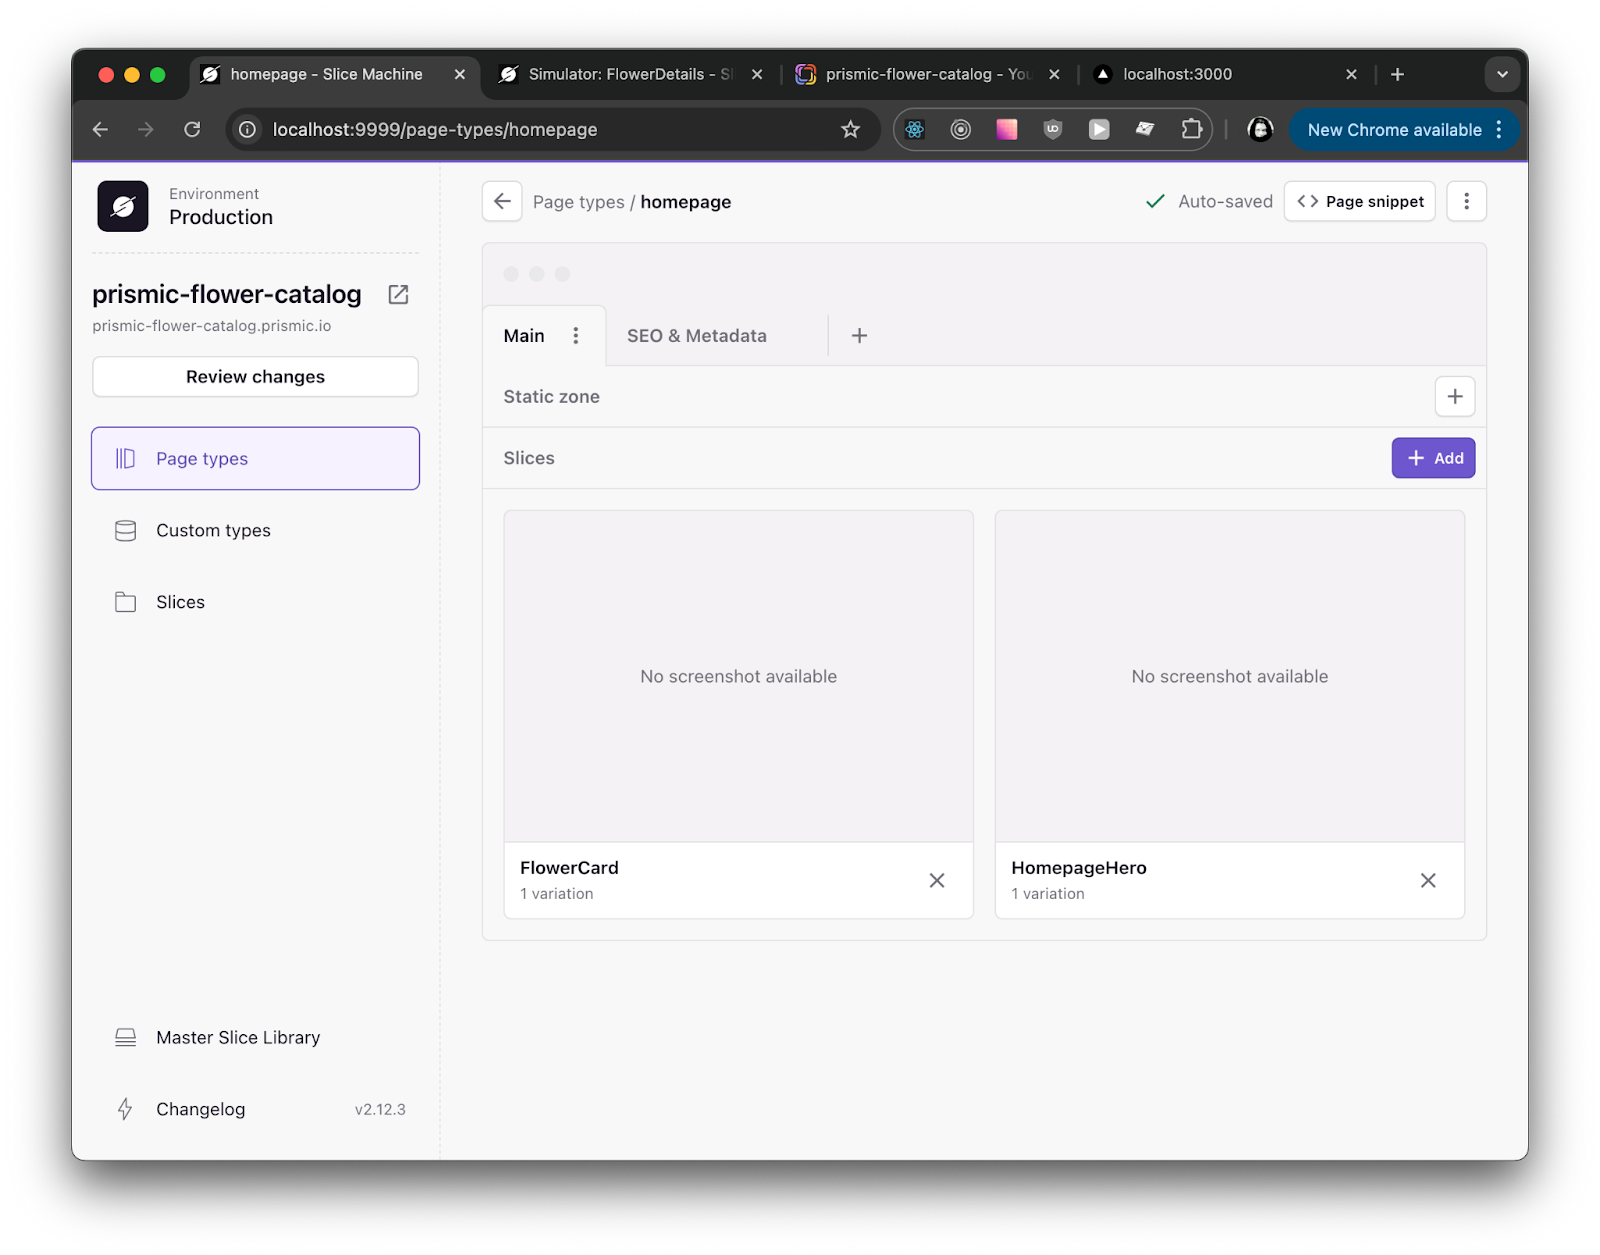
Adding Flower Card Slice in Homepage
In the slice machine (http://localhost:9999/page-types/homepage ) then add FlowerCard slice.
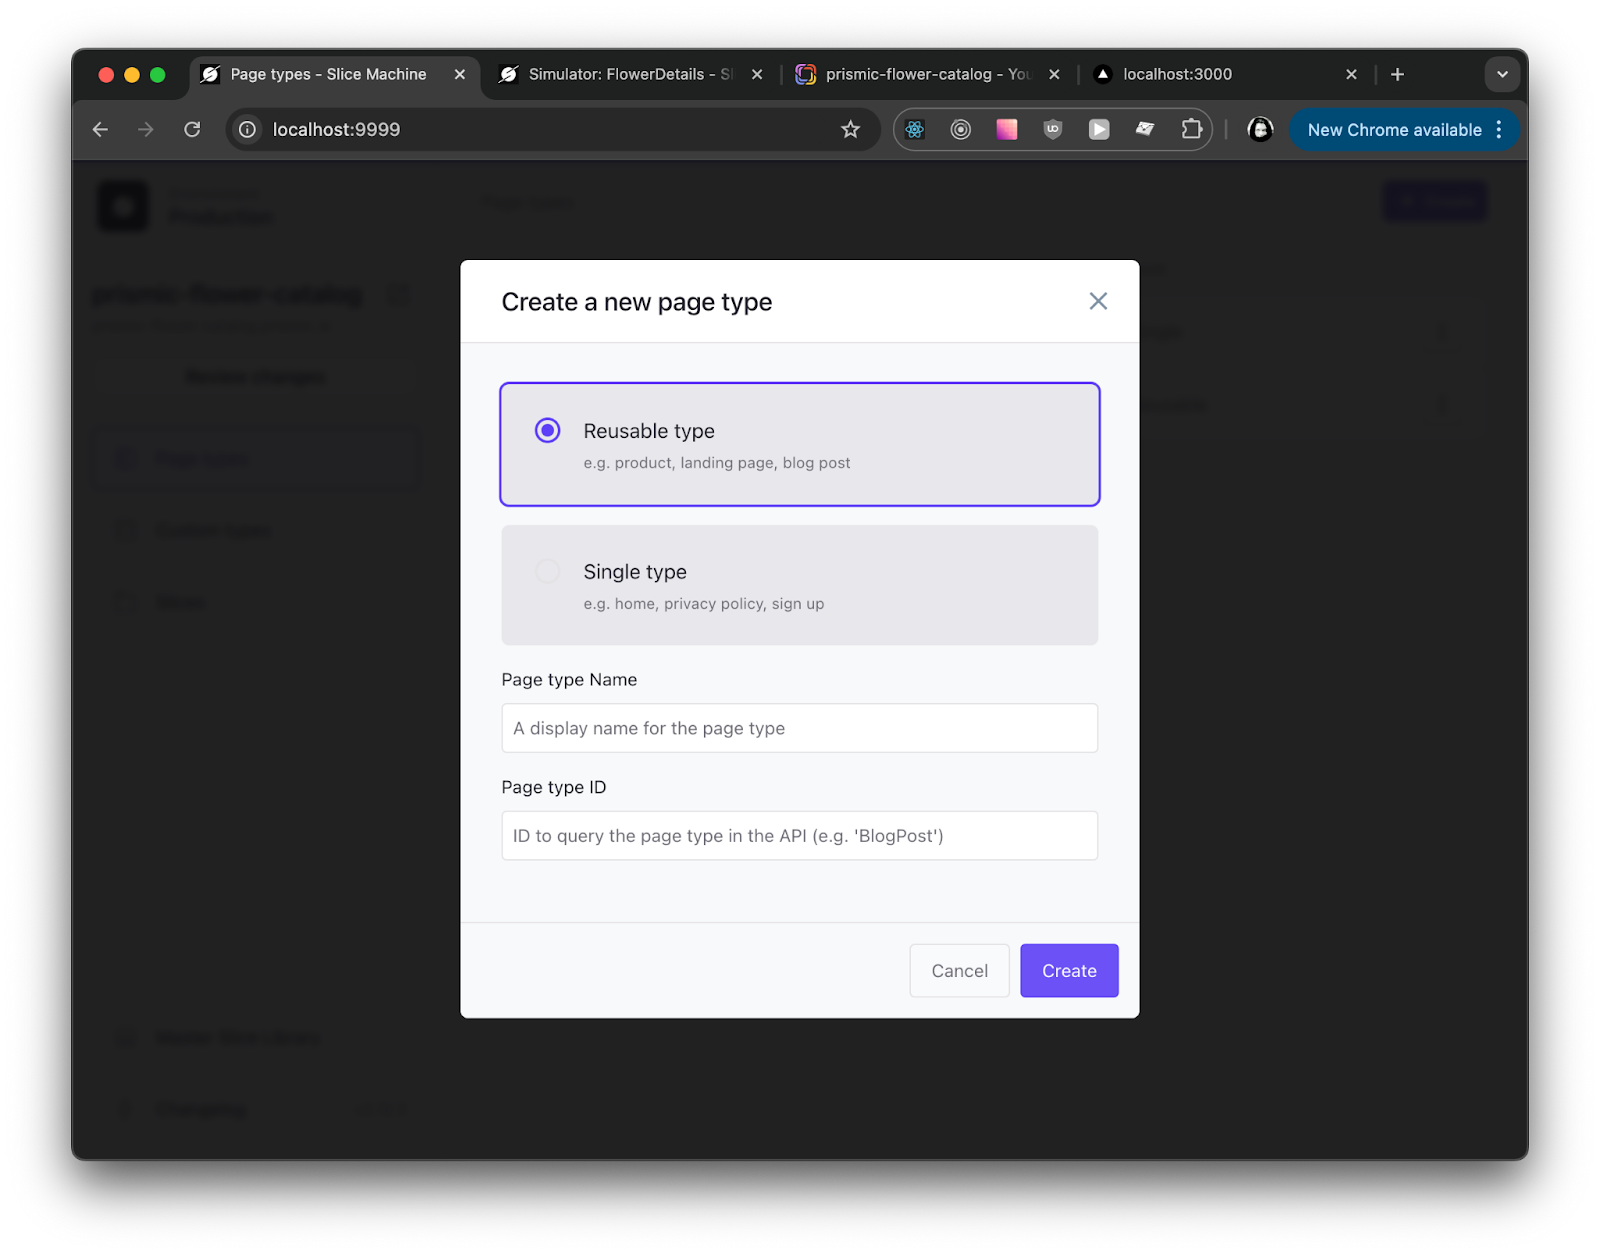
Creating New Dynamic Page
Our homepage is a single type, but to display the details of individual flowers, we’ll need a dynamic page. This will include the Flower Details Slice. In Slice Machine, go to Page Types, click on Create, and then select Reusable Types.
Adding Flower Details Slice in Dynamic page

Push all the changes via GUI.
Frontend Changes to Handle Dynamic Page
Create a file src/app/[uid]/page.tsx and paste following code (Hint: this is also autogenerated by slice machine 😉 ) :
import { Metadata } from "next";
import { notFound } from "next/navigation";
import { isFilled, asImageSrc } from "@prismicio/client";
import { SliceZone } from "@prismicio/react";
import { createClient } from "@/prismicio";
import { components } from "@/slices";
type Params = { uid: string };
export default async function Page({ params }: { params: Promise<Params> }) {
 const { uid } = await params;
 const client = createClient();
 const page = await client.getByUID("page", uid).catch(() => notFound());
 return <SliceZone slices={page.data.slices} components={components} />;
}
export async function generateMetadata({
 params,
}: {
 params: Promise<Params>;
}): Promise<Metadata> {
 const { uid } = await params;
 const client = createClient();
 const page = await client.getByUID("page", uid).catch(() => notFound());
 return {
   title: page.data.meta_title,
   description: page.data.meta_description,
   openGraph: {
     title: isFilled.keyText(page.data.meta_title)
       ? page.data.meta_title
       : undefined,
     description: isFilled.keyText(page.data.meta_description)
       ? page.data.meta_description
       : undefined,
     images: isFilled.image(page.data.meta_image)
       ? [asImageSrc(page.data.meta_image)]
       : undefined,
   },
 };
}
export async function generateStaticParams() {
 const client = createClient();
 const pages = await client.getAllByType("page");
 return pages.map((page) => {
   return { uid: page.uid };
 });
}
Now, in order to handle the dynamic routes, we need to make changes in src/prismicio.ts also. Open this file and uncomment following code block related to routes:
const routes: prismic.ClientConfig["routes"] = [
 // Examples:
 {
   type: "homepage",
   path: "/",
 },
 {
   type: "page",
   path: "/:uid",
 },
];
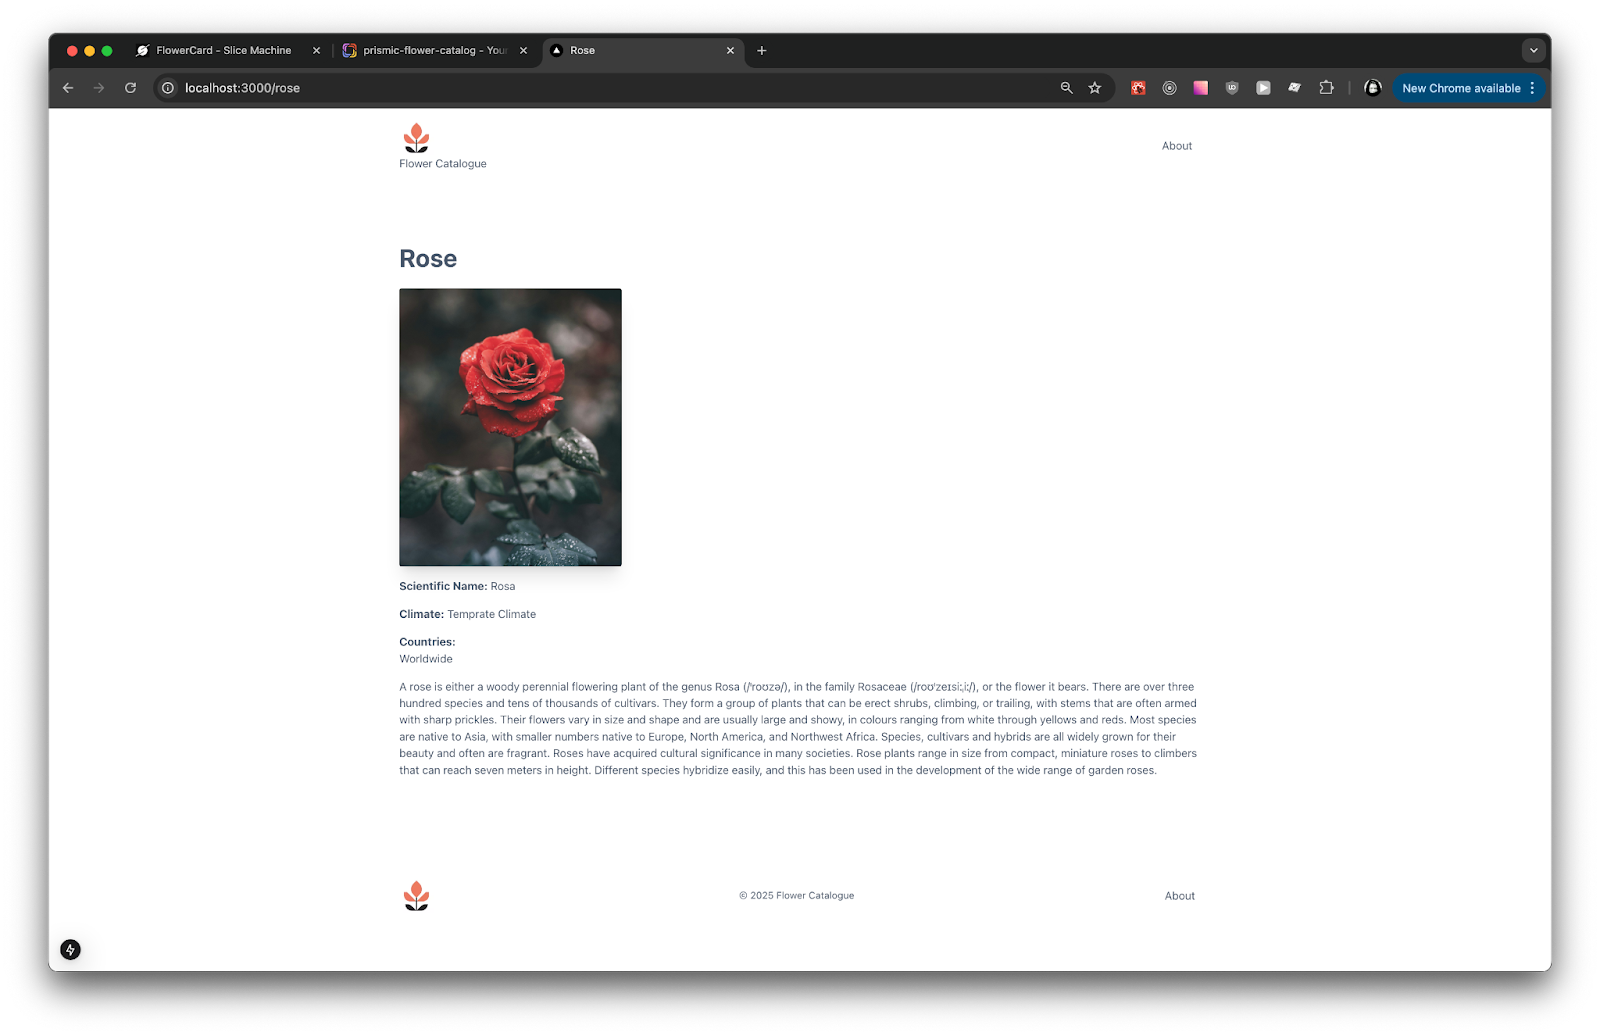
Login to the Prismic CMS Dashboard and add all the content. The final website should look like this:

By clicking on any more information button, you’ll get redirected to dynamic page with Flower Details Slice:
Adding Internationalization
Prismic CMS Updates
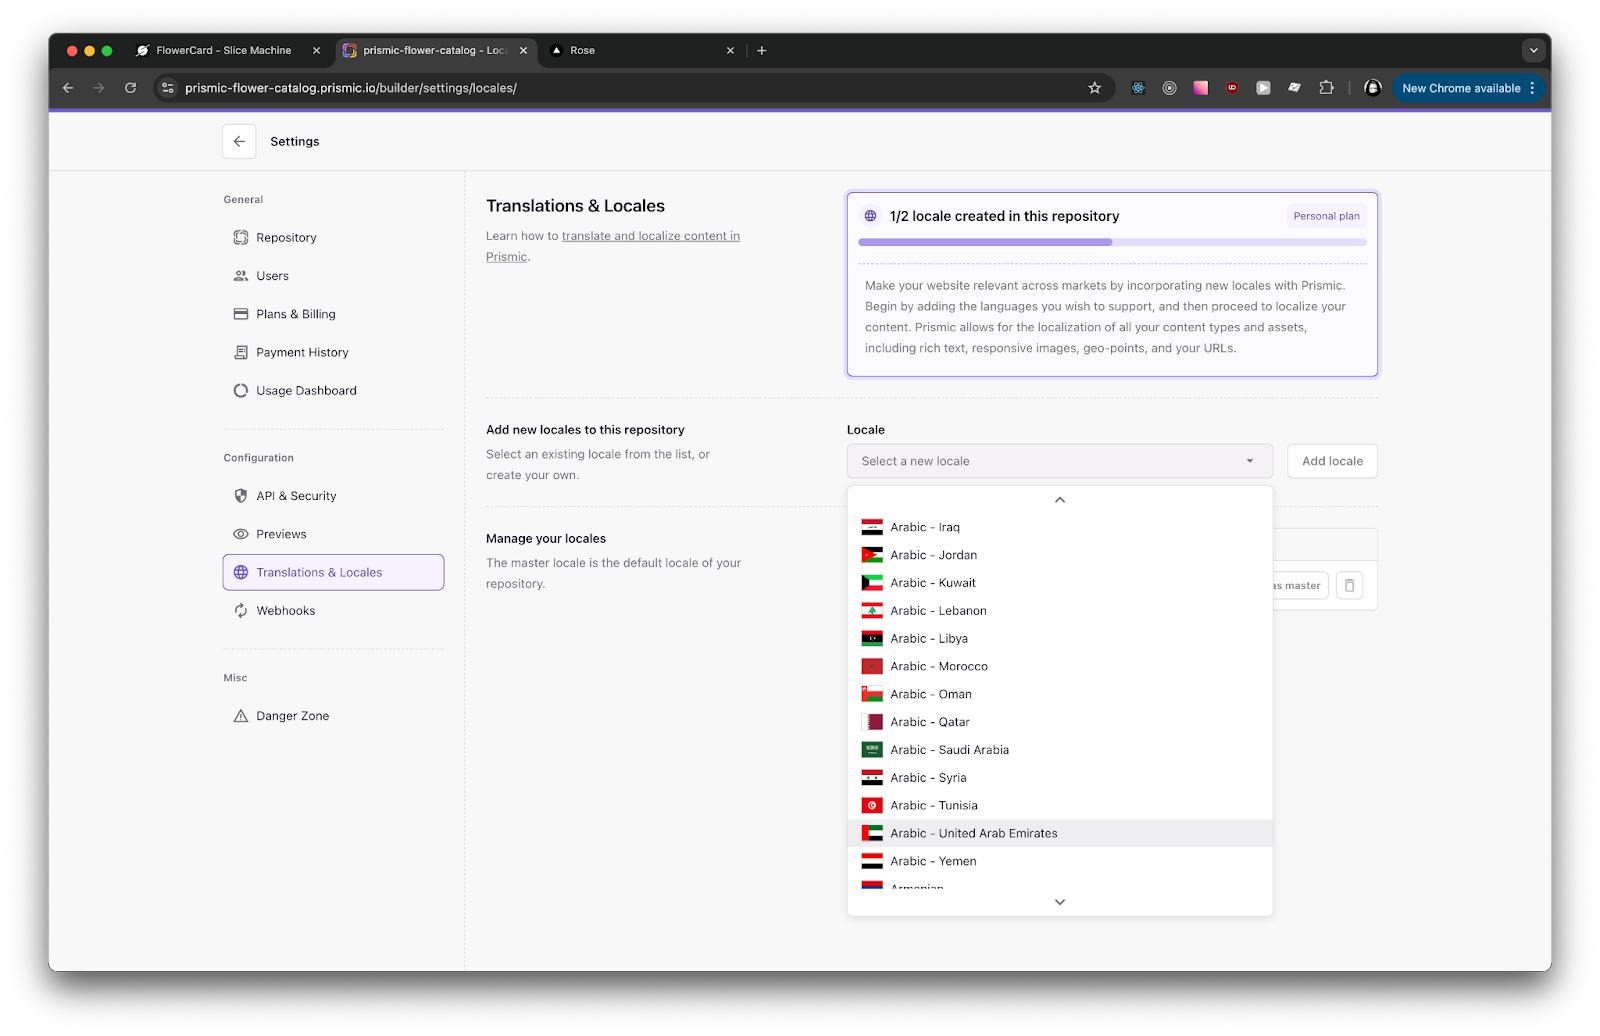
This could be the trickiest part of this section. Prismic supports multiple languages. In your Prismic Dashboard, go to Settings then Translations & Locales.

You will see all the locales supported here. You can add language of your preference here. In our case we will select Arabic (UAE):
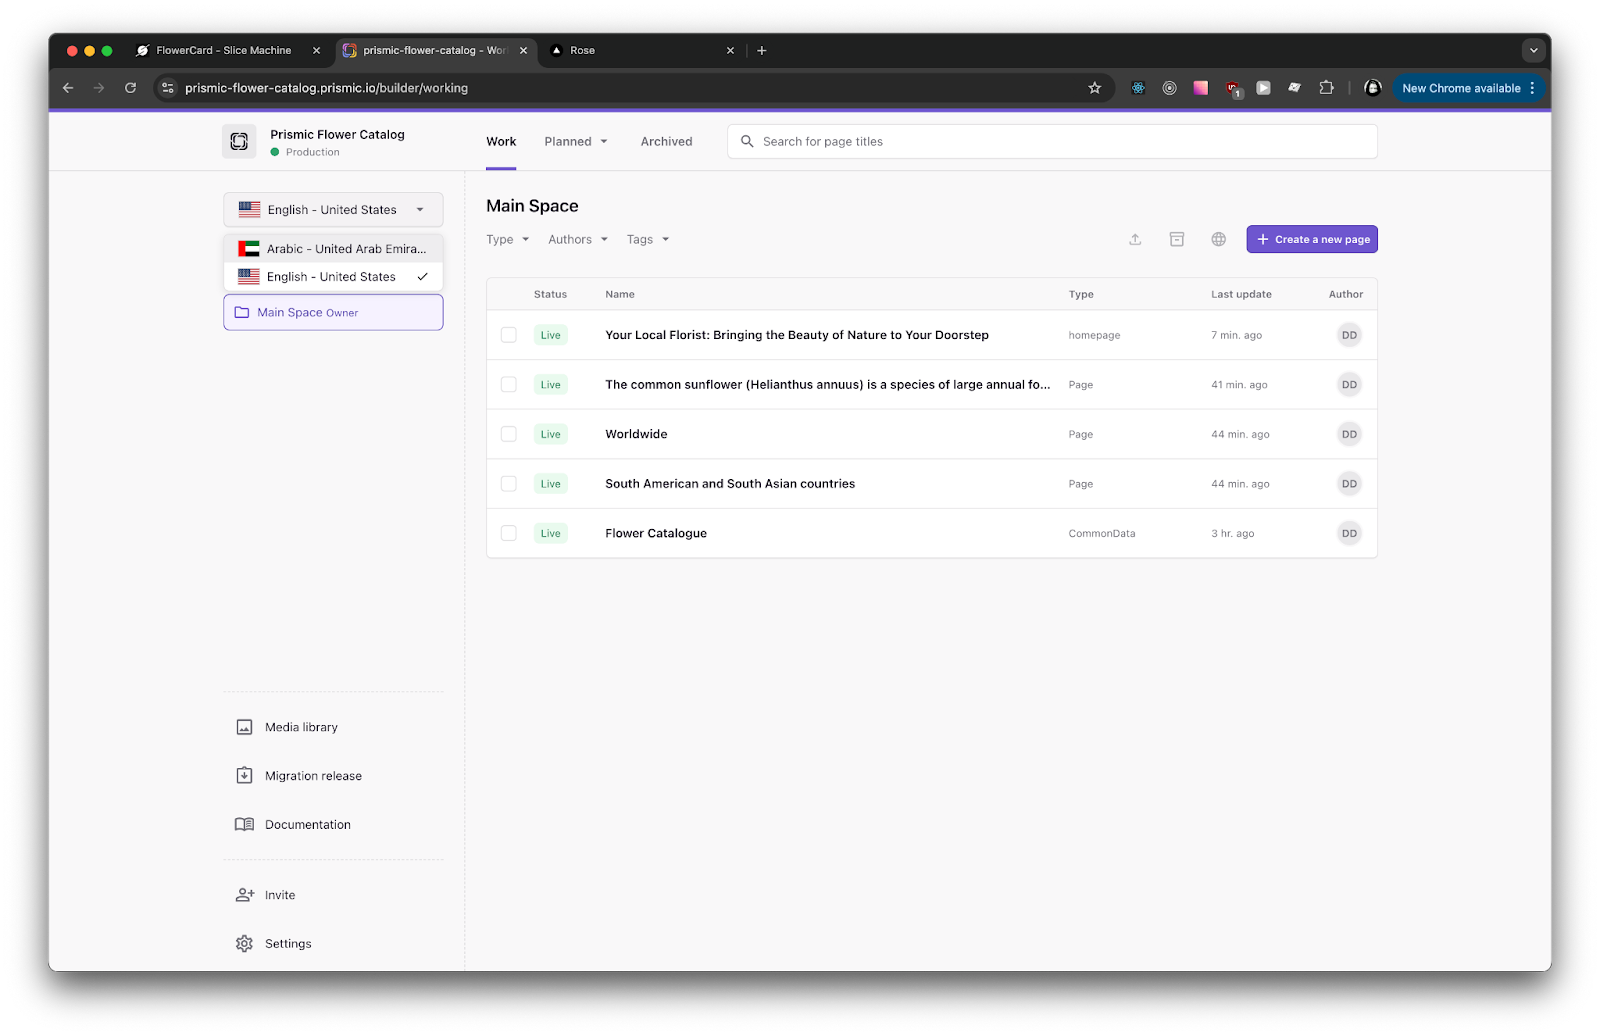
The content manager can switch between languages from the dropdown in the left:
Code Changes for i18n
Step 1: We need to add middleware that will detect the selected language and modify subsequent network requests based on the chosen locale:
File: src/middleware.ts
// ./src/middleware.ts
import { NextRequest, NextResponse } from 'next/server';
import { createClient } from '@/prismicio';
export async function middleware(request: NextRequest) {
 const client = createClient();
 const repository = await client.getRepository();
 const locales = repository.languages.map((lang) => lang.id);
 const defaultLocale = locales[0];
 // Check if there is any supported locale in the pathname
 const { pathname } = request.nextUrl;
 const pathnameIsMissingLocale = locales.every(
   (locale) => !pathname.startsWith(`/${locale}/`) && pathname !== `/${locale}`
 );
 // Redirect to default locale if there is no supported locale prefix
 if (pathnameIsMissingLocale) {
   return NextResponse.rewrite(
     new URL(`/${defaultLocale}${pathname}`, request.url)
   );
 }
}
export const config = {
 // Don’t change the URL of Next.js assets starting with _next
 matcher: ['/((?!_next).*)'],
};
Step 2: Next step, we need to update our routes in prismicio.ts to handle the language parameter in the URL:
const routes: prismic.ClientConfig['routes'] = [
 {
   type: 'page',
   uid: 'home',
   path: '/:lang?',
 },
 {
   type: 'page',
   path: '/:lang?/:uid',
 },
];
Step 3: Update folder structure of src/app to handle the dynamic lang. The new folder structure under src/app should look like this:

Step 4: Update src/app/[lang]/[uid]/page.tsx , add query of lang in request functions. Almost all the fetch functions provided by Prismic createClient provide a feature to pass language as a parameter. So the difference will look like this:
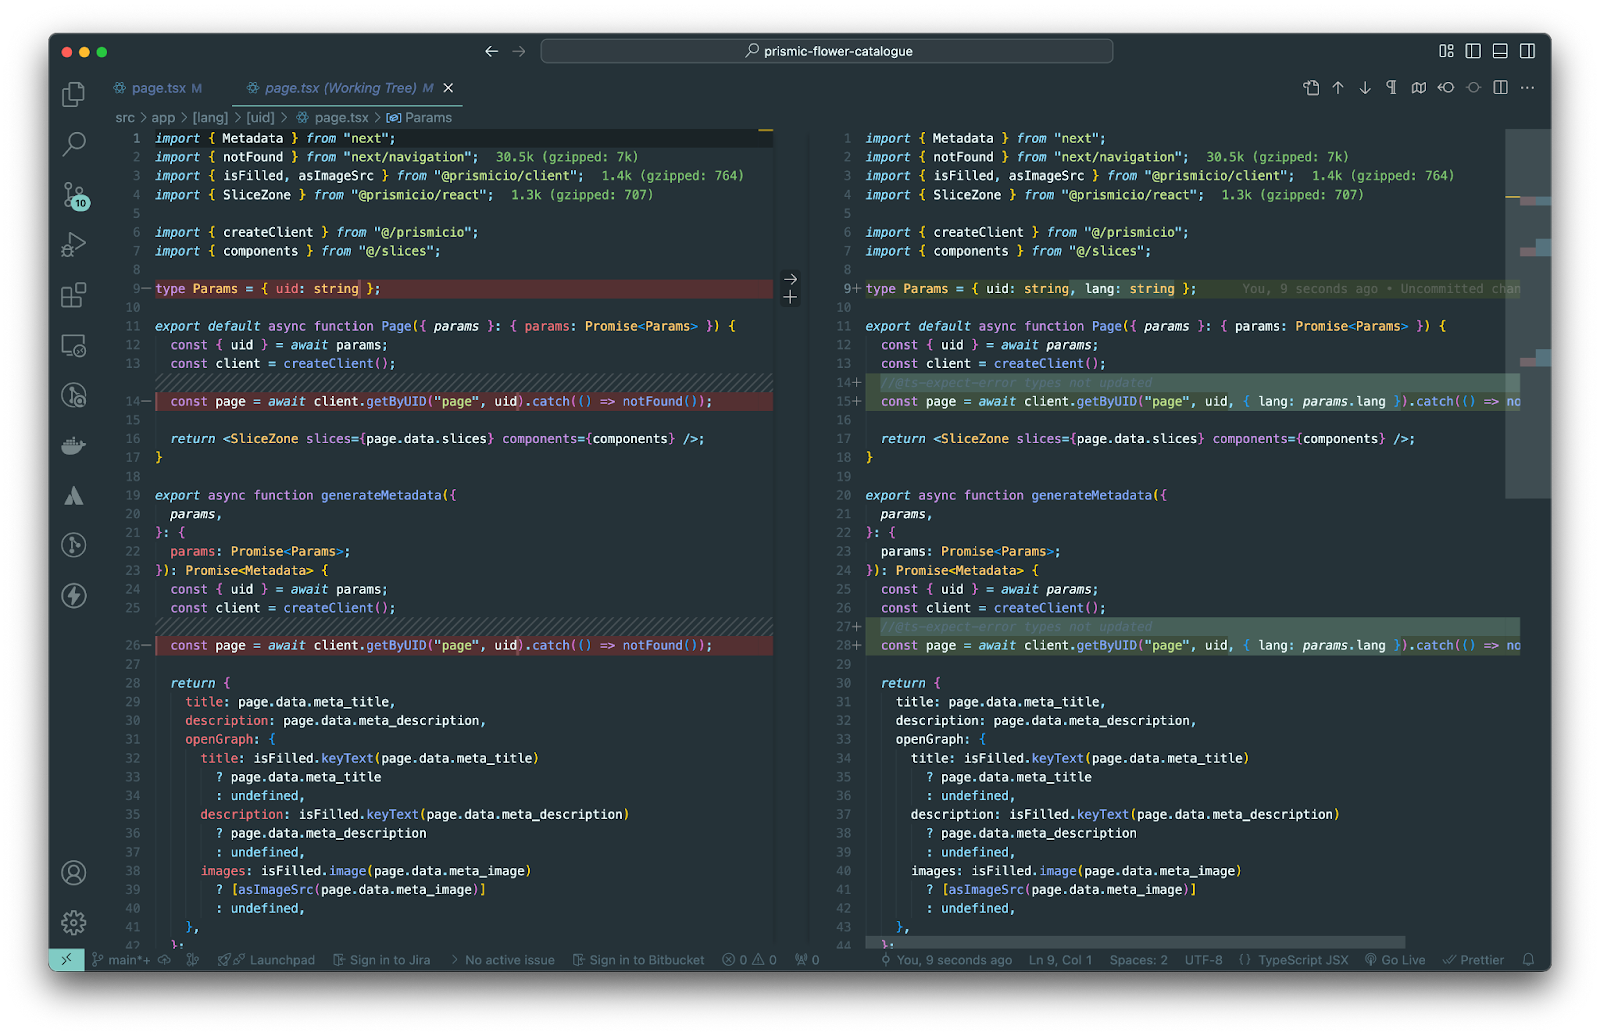
Final code:
import { Metadata } from "next";
import { notFound } from "next/navigation";
import { isFilled, asImageSrc } from "@prismicio/client";
import { SliceZone } from "@prismicio/react";
import { createClient } from "@/prismicio";
import { components } from "@/slices";
type Params = { uid: string, lang: string };
export default async function Page({ params }: { params: Promise<Params> }) {
 const { uid } = await params;
 const client = createClient();
 //@ts-expect-error types not updated
 const page = await client.getByUID("page", uid, { lang: params.lang }).catch(() => notFound());
 return <SliceZone slices={page.data.slices} components={components} />;
}
export async function generateMetadata({
 params,
}: {
 params: Promise<Params>;
}): Promise<Metadata> {
 const { uid } = await params;
 const client = createClient();
 //@ts-expect-error types not updated
 const page = await client.getByUID("page", uid, { lang: params.lang }).catch(() => notFound());
 return {
   title: page.data.meta_title,
   description: page.data.meta_description,
   openGraph: {
     title: isFilled.keyText(page.data.meta_title)
       ? page.data.meta_title
       : undefined,
     description: isFilled.keyText(page.data.meta_description)
       ? page.data.meta_description
       : undefined,
     images: isFilled.image(page.data.meta_image)
       ? [asImageSrc(page.data.meta_image)]
       : undefined,
   },
 };
}
export async function generateStaticParams() {
 const client = createClient();
 const pages = await client.getAllByType("page");
 return pages.map((page) => {
   return { uid: page.uid };
 });
}
Step 5: Same thing we need to do for src/app/[lang]/page.tsx to handle locale. Final code:
import { Metadata } from 'next';
import { isFilled, asImageSrc } from '@prismicio/client';
import { SliceZone } from '@prismicio/react';
import { createClient } from '@/prismicio';
import { components } from '@/slices';
type Params = { lang: string };
export default async function Page({ params }: { params: Promise<Params> }) {
 const client = createClient();
 const { lang } = await params;
 const page = await client.getSingle('homepage', { lang });
 return <SliceZone slices={page.data.slices} components={components} />;
}
export async function generateMetadata({
 params,
}: {
 params: Promise<Params>;
}): Promise<Metadata> {
 const client = createClient();
 const { lang } = await params;
 const page = await client.getSingle('homepage', { lang });
 return {
   title: page.data.meta_title,
   description: page.data.meta_description,
   openGraph: {
     title: isFilled.keyText(page.data.meta_title)
       ? page.data.meta_title
       : undefined,
     description: isFilled.keyText(page.data.meta_description)
       ? page.data.meta_description
       : undefined,
     images: isFilled.image(page.data.meta_image)
       ? [asImageSrc(page.data.meta_image)]
       : undefined,
   },
 };
}
Right to Left
Since we have added Arabic and English languages, we need to support both Left to Right and Right to Left. English is taken care of by default, but for Arabic we need to make some code changes. We need to take care of two attributes lang and dir in the html tag. How to do this?
We need to access [lang] dynamic parameters and decide on the above two values. At this point we can move our src/app/layout.tsx to src/app/[lang]/layout.tsx location. Reason - we need to access [lang] variable. Then paste following code in layout.tsx :
import type { Metadata } from 'next';
import { Geist, Geist_Mono } from 'next/font/google';
import '../globals.css';
import Header from '@/components/Header';
import Footer from '@/components/Footer';
const geistSans = Geist({
 variable: '--font-geist-sans',
 subsets: ['latin'],
});
const geistMono = Geist_Mono({
 variable: '--font-geist-mono',
 subsets: ['latin'],
});
export const metadata: Metadata = {
 title: 'Create Next App',
 description: 'Generated by create next app',
};
type Params = { lang: string };
export default async function RootLayout({
 children,
 params,
}: Readonly<{
 children: React.ReactNode;
 params: Promise<Params>;
}>) {
 const { lang } = await params;
 return (
   <html lang={lang} dir={lang.startsWith('ar-') ? 'rtl' : 'ltr'}>
     <body
       className={`${geistSans.variable} ${geistMono.variable} antialiased`}
     >
       <Header />
       {children}
       <Footer />
     </body>
   </html>
 );
}
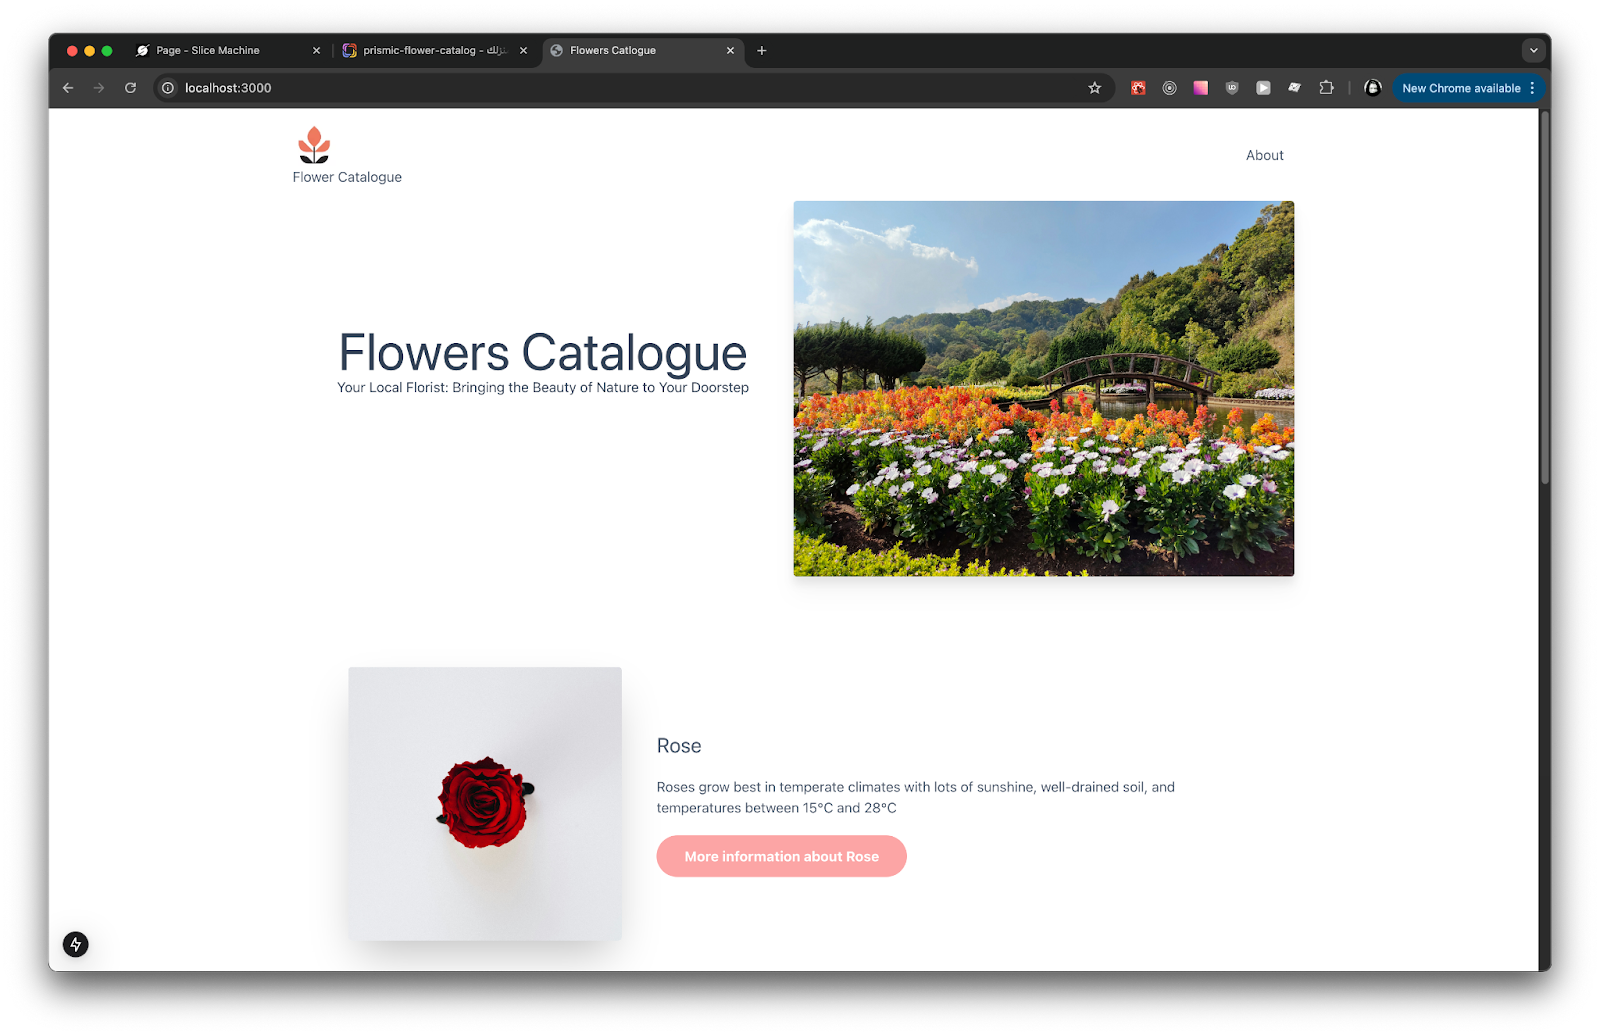
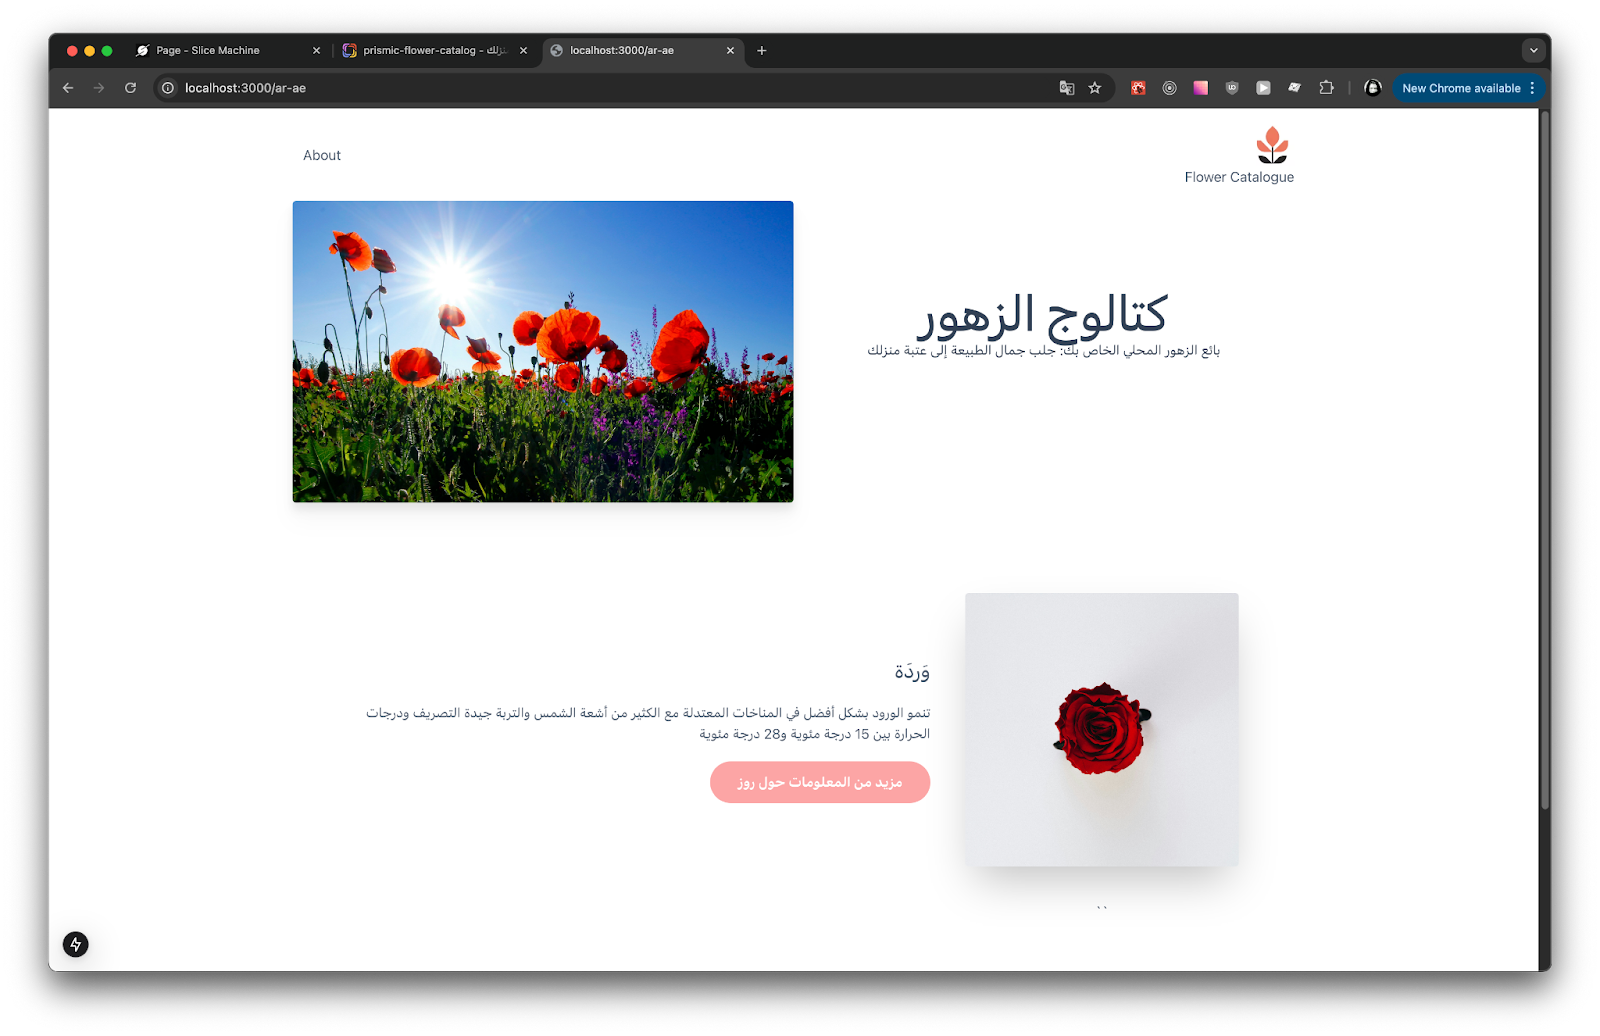
If everything has been done correctly, then you shall be able to see the website in both English and Arabic (after populating the content in both languages of course):
Add Language Switcher
Now that we have added two languages, we can give a simple language switcher. Create a file src/utils/getLocales.ts , this will get all the locales added in the Prismic CMS:
// ./src/utils/getLocales.ts
import { Client, Content } from '@prismicio/client';
export async function getLocales(client: Client<Content.AllDocumentTypes>) {
 const [repository] = await Promise.all([client.getRepository()]);
 return repository.languages;
}
And then add a new component src/components/LanguageSwitcher.tsx :
'use client';
import { PrismicNextLink } from '@prismicio/next';
interface LanguageSwitcherProps {
 locales: {
   id: string;
   name: string;
   is_master: boolean;
 }[];
}
const localeLabels = {
 'en-us': 'EN',
 'ar-ae': 'AR',
};
export const LanguageSwitcher = ({ locales }: LanguageSwitcherProps) => {
 return (
   <div className="flex flex-wrap gap-3">
     <span aria-hidden>🌐</span>
     <ul className="flex flex-wrap gap-3">
       {locales.map((locale) => (
         <li key={locale.id} className="first:font-semibold">
           <PrismicNextLink
             href={locale.is_master ? '/' : `/${locale.id}`}
             locale={locale.id}
             aria-label={`Change language to ${locale.name}`}
           >
             {localeLabels[locale.id as keyof typeof localeLabels] ||
               locale.id}
           </PrismicNextLink>
         </li>
       ))}
     </ul>
   </div>
 );
};
Add this new component in the Header.tsx :
       <nav>
         <ul className="flex">
           {data.navigation.map((item) => (
             <li key={item.name}>
               <PrismicNextLink field={item.link} className="p-3">
                 {item.name}
               </PrismicNextLink>
             </li>
           ))}
           <li>
             <LanguageSwitcher  locales={locales} />
           </li>
         </ul>
       </nav>
Now we have a functional language switcher.
Creating About Page
The last page remaining is the About page. We’ll keep it simple, with a title, an image, a paragraph, and a few team members. The AboutSlice looks like this: (Please refer to the first slice creation section if you have any questions or confusion regarding slicecreation).
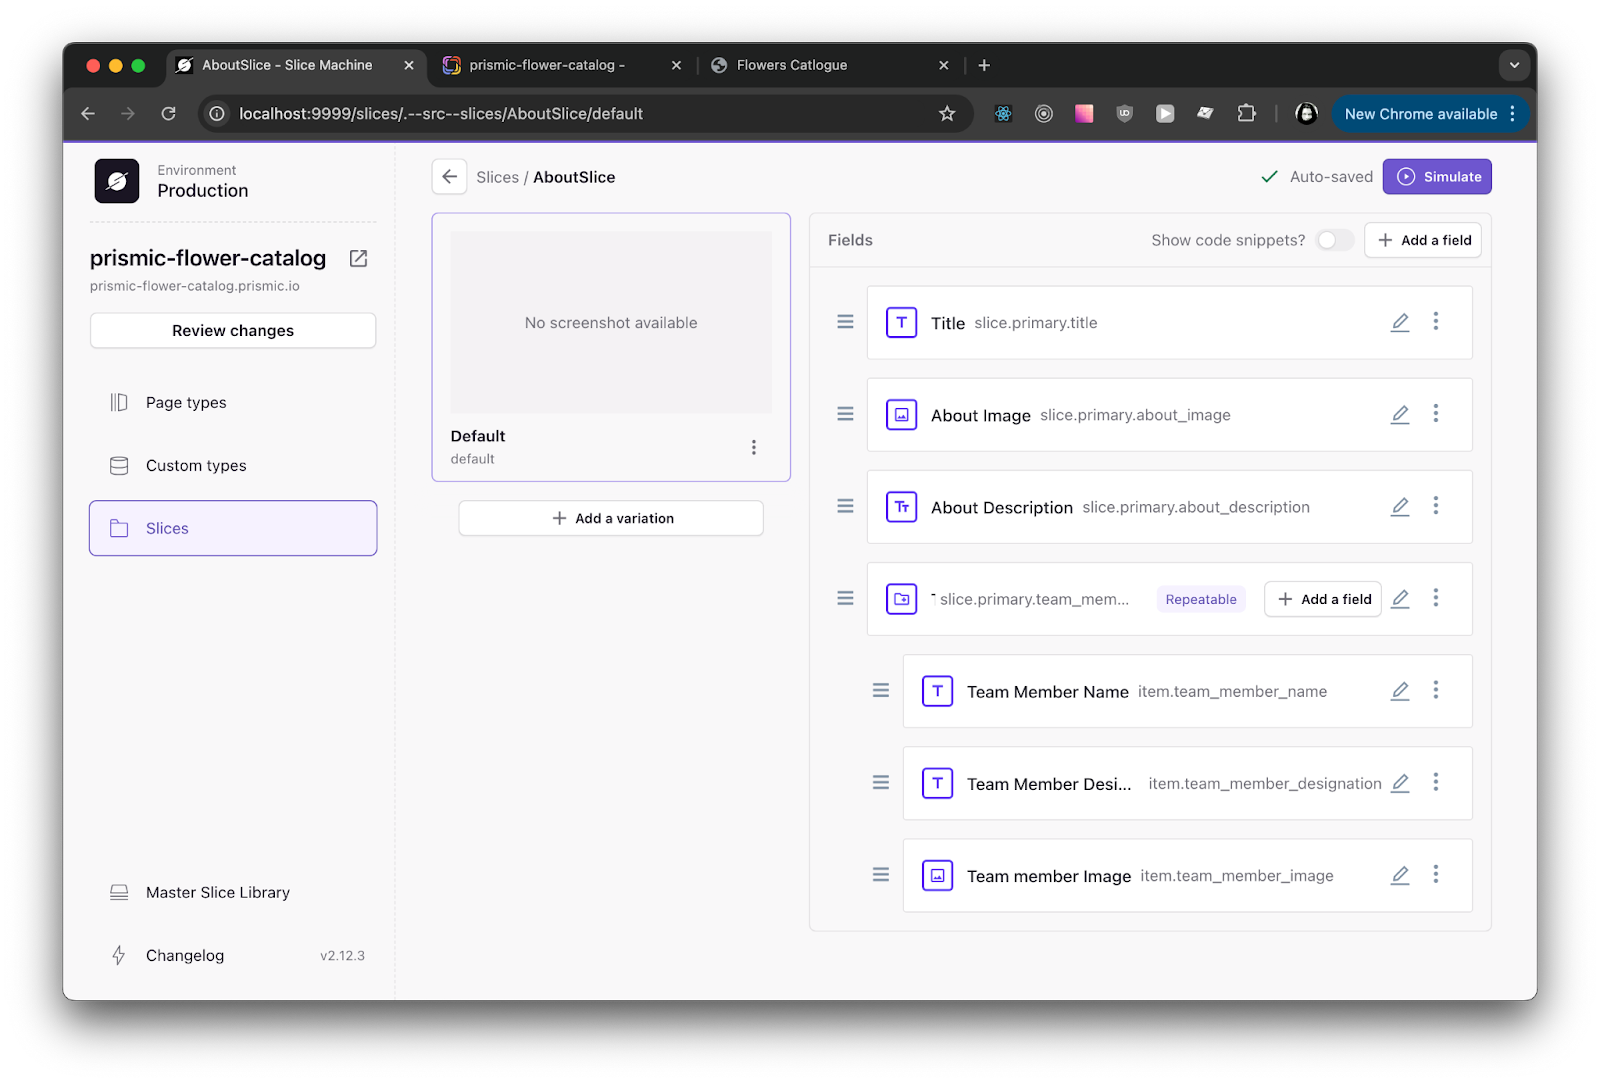
As usual, it will create a src/slices/AboutSlice/index.tsx file for Slice styling. Paste following code in this file:
import { FC } from 'react';
import { Content } from '@prismicio/client';
import { PrismicRichText, SliceComponentProps } from '@prismicio/react';
import Container from '@/components/Container';
import { PrismicNextImage } from '@prismicio/next';
/**
* Props for `AboutSlice`.
*/
export type AboutSliceProps = SliceComponentProps<Content.AboutSliceSlice>;
/**
* Component for "AboutSlice" Slices.
*/
const AboutSlice: FC<AboutSliceProps> = ({ slice }) => {
 return (
   <Container
     data-slice-type={slice.slice_type}
     data-slice-variation={slice.variation}
   >
     <div className="grid grid-cols-1 gap-4 max-w-screen-lg m-auto">
       <h2 className="text-3xl"> {slice.primary.title}</h2>
       <PrismicNextImage
         field={slice.primary.about_image}
         className="w-fit rounded shadow-2xl"
         width={400}
       />
       <div className="my-10">
         <PrismicRichText field={slice.primary.about_description} />
       </div>
       <div className="grid grid-cols-1 md:grid-cols-4">
         {slice.primary.team_members.map((item) => (
           <div key={item.team_member_name}>
             <PrismicNextImage
               field={item.team_member_image}
               className="w-fit rounded shadow-2xl"
               width={100}
             />
             <div>
               <b>{item.team_member_name}</b>
             </div>
             <div>{item.team_member_designation}</div>
           </div>
         ))}
       </div>
     </div>
   </Container>
 );
};
export default AboutSlice;
Now add this slice in the Page type and push via GUI.
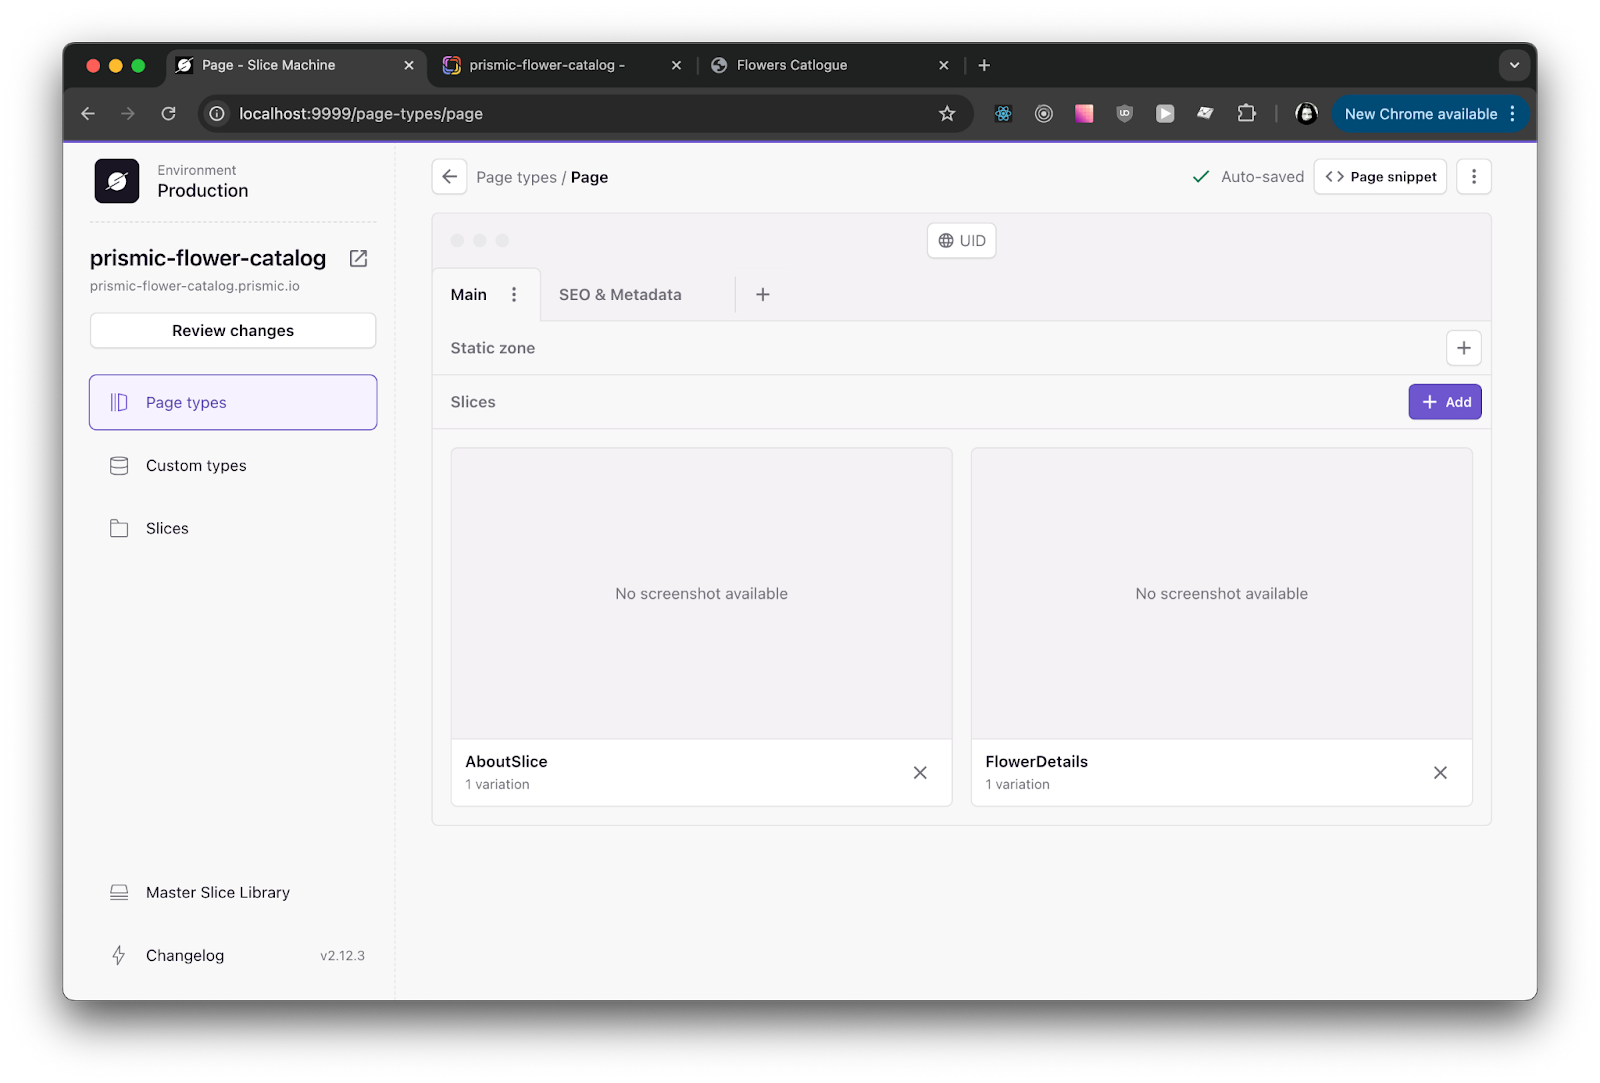
This is where the power of slices comes in. You don’t need to do anything extra. Simply create a new page for the About section and use the new AboutSlice. No additional coding is required. The page will be created automatically, and the slice will appear as expected.

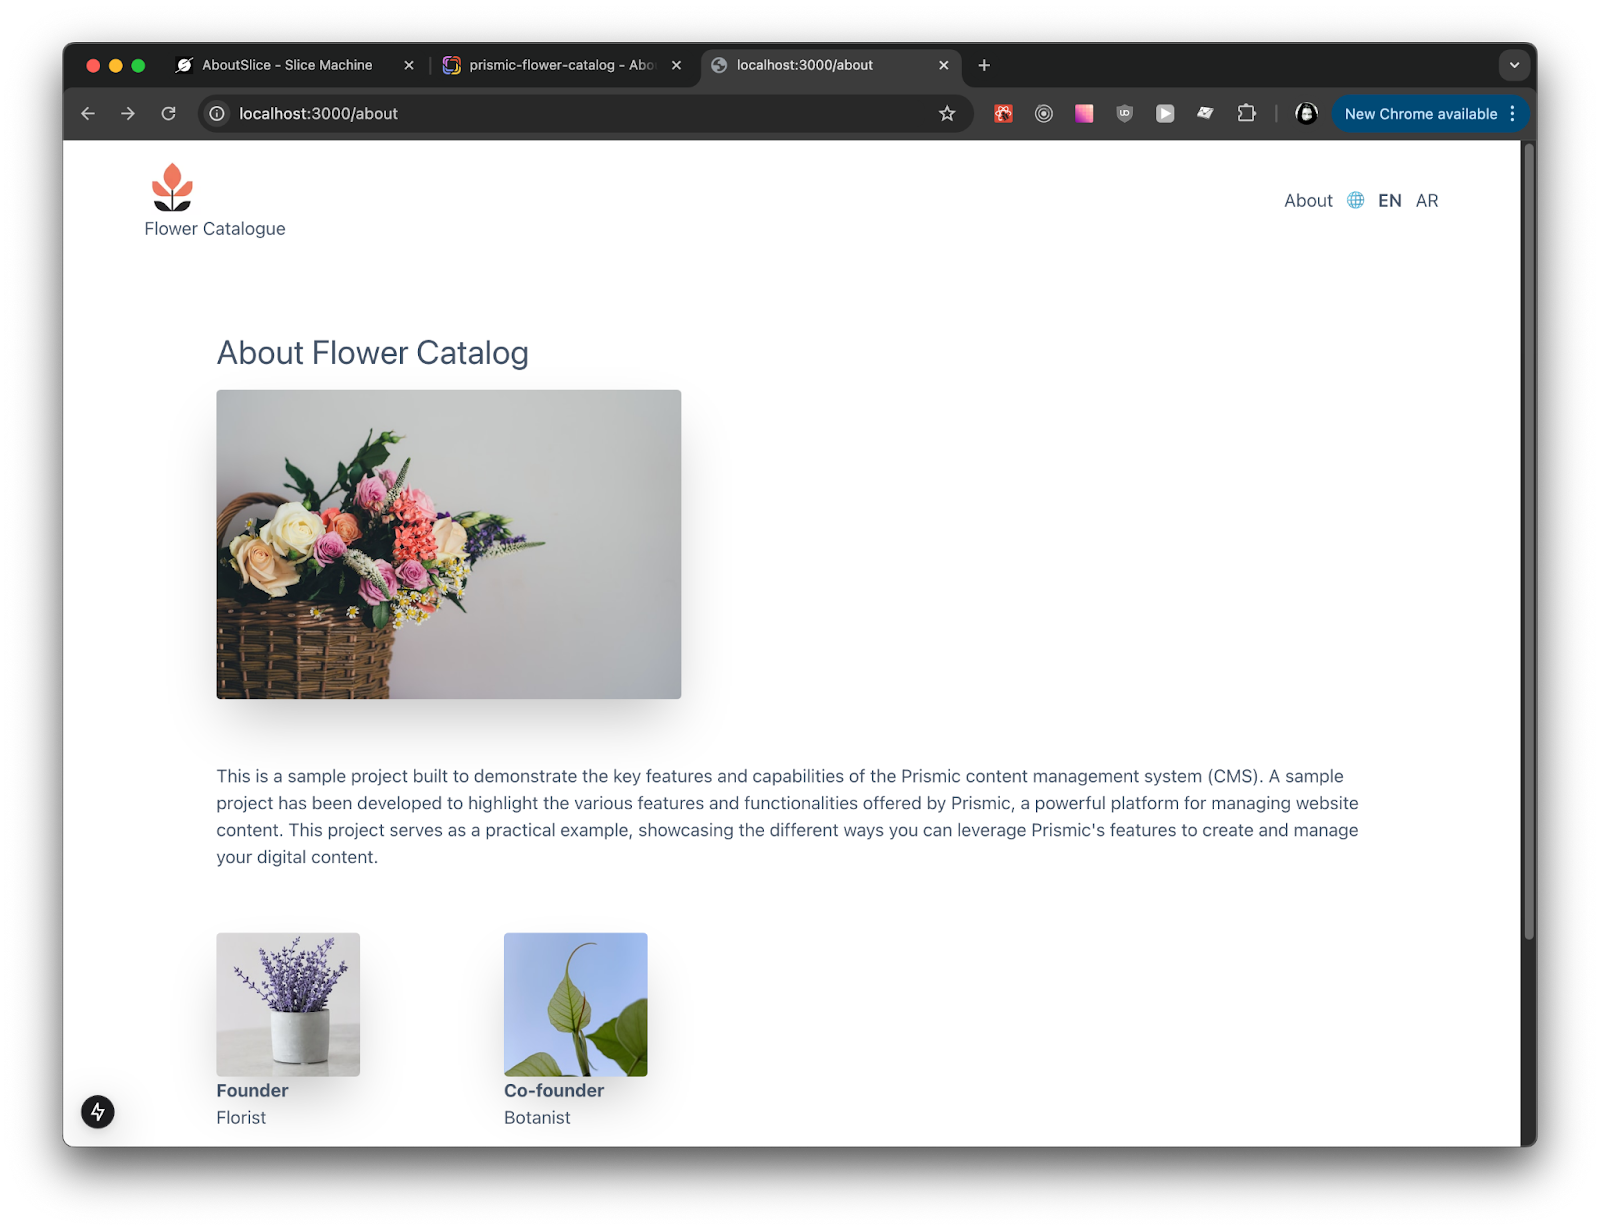
So this was a simple website we created using NextJS, Prismic, and Tailwind. The project has been deployed in Vercel, you can access it via https://prismic-flower-catalog.vercel.app/
If you get stuck at any point, you can refer to the source code of the completed project source code: https://github.com/Dhruw/prismic-flower-catalog
Give it a try and feel free to share your thoughts in the comments below!